
Adding a Global On/Off Button to a Local Keypad
Example: Adding an All On / All Off button to an entryway keypad
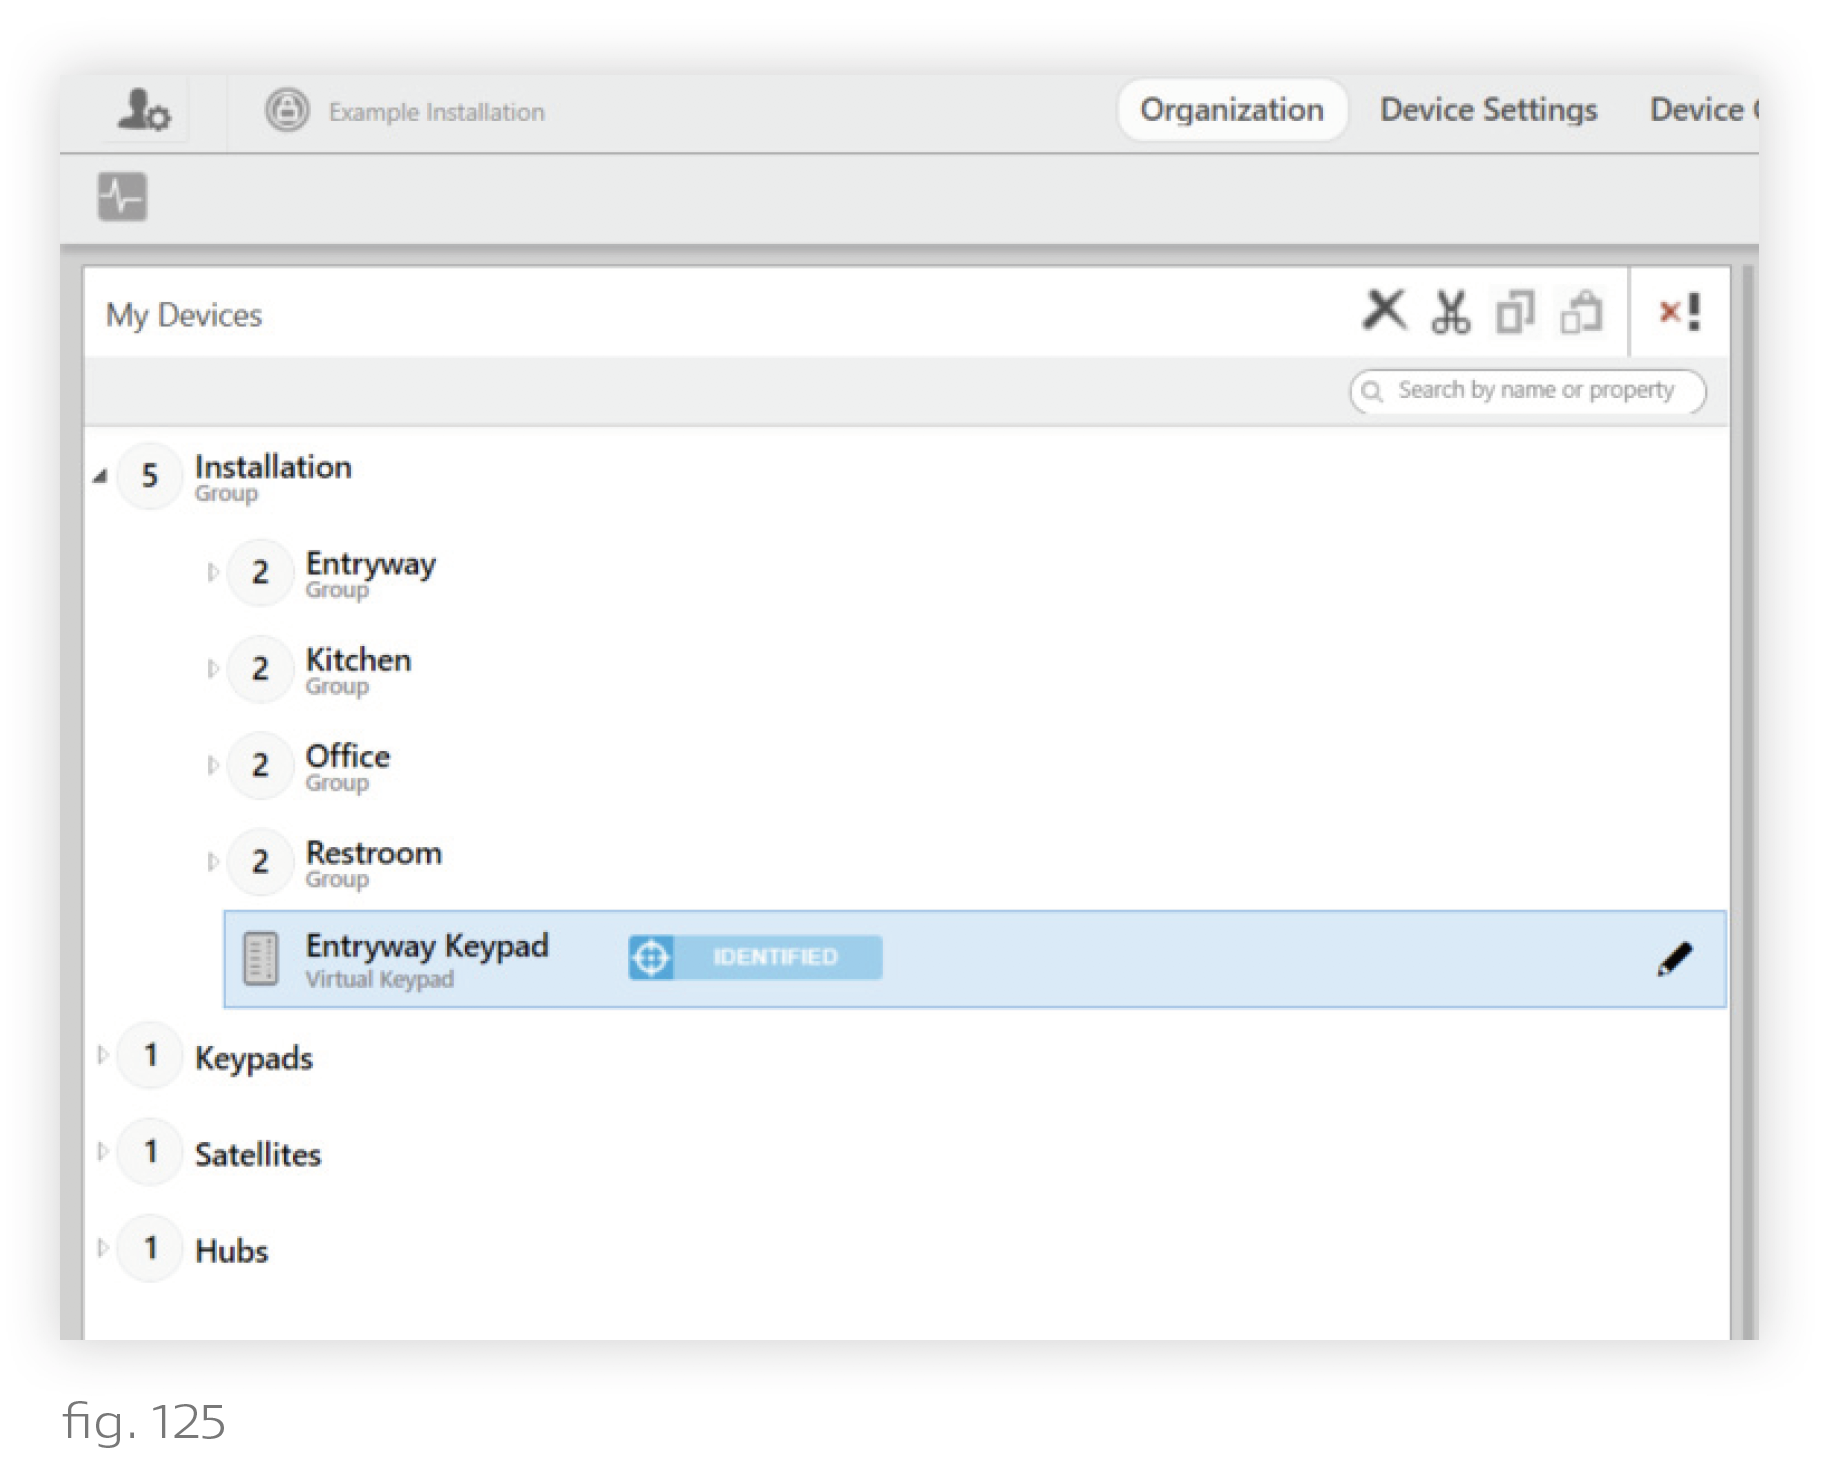
1. On the Organization tab, place the keypad in the highest-level group in the installation. The default name of this group will be either "Residence", "Office", or "Installation", depending on the type of installation.
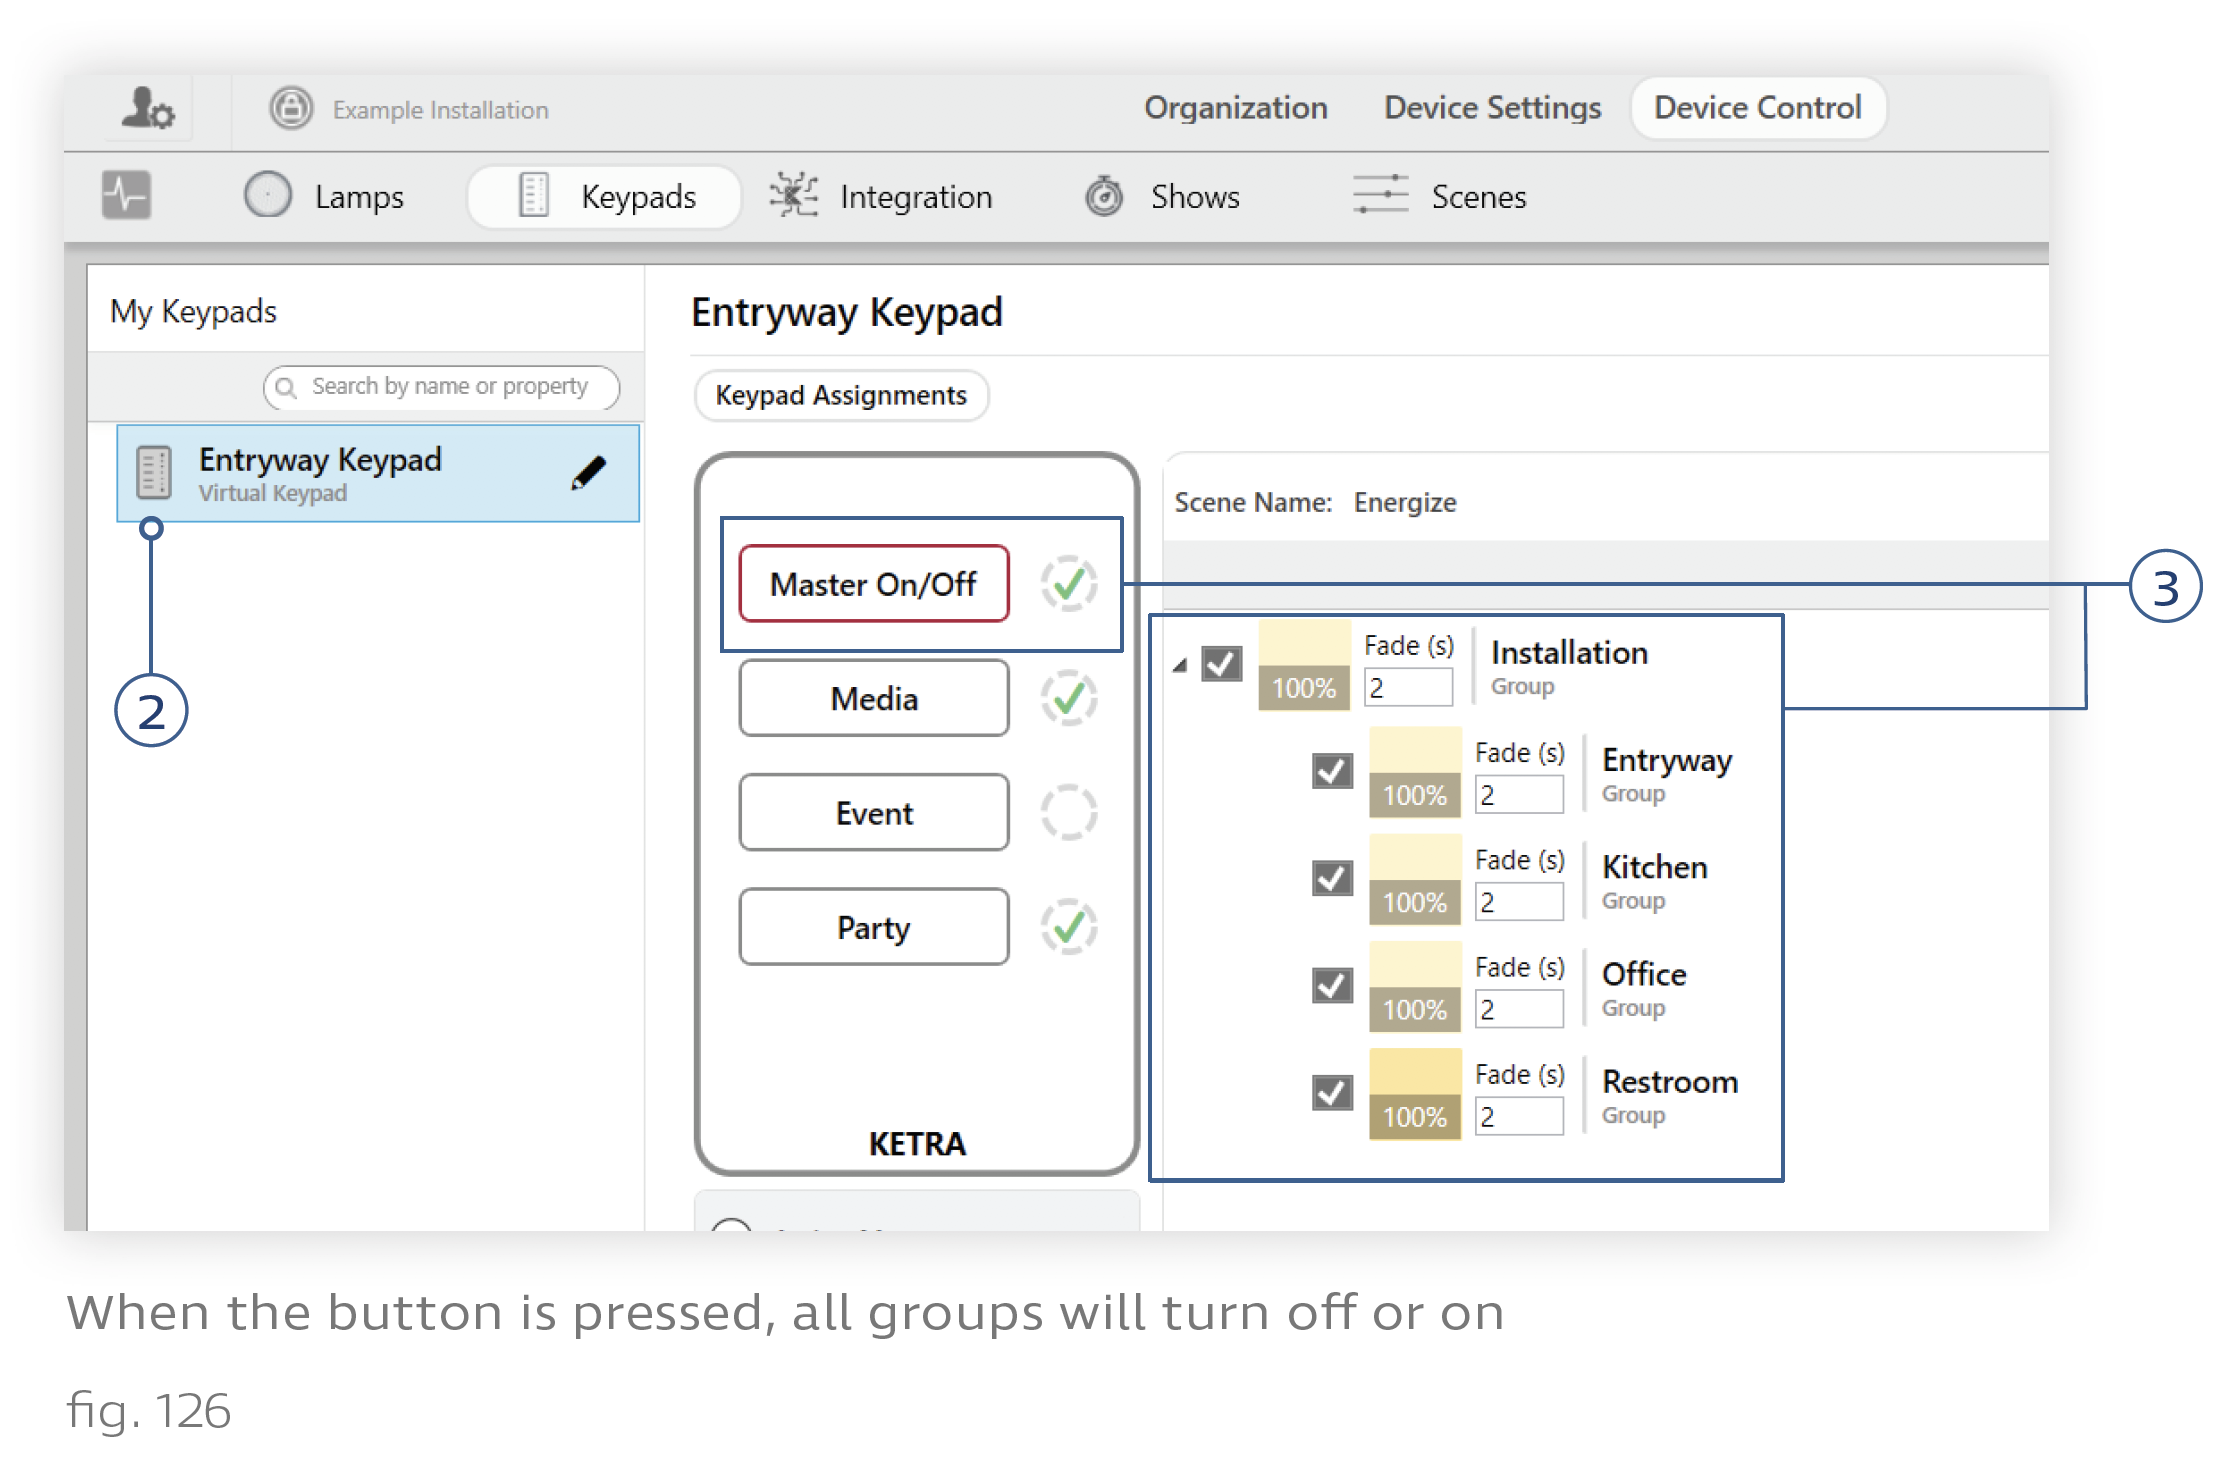
2. Go to Device Control > Keypads and select the keypad at left.
3. Make a Master On/Off button and program it as desired.
- If you want the button to turn on and off every group in the installation, make sure every group is checked. (Pictured)
- If you want the button to only turn on and off some groups, make sure those groups are checked and the others are unchecked.
- If you want the button to turn on a subset of groups but turn off all groups, use the NA feature. First, make sure all groups are checked. Then edit the scene such that the groups you do not want the button to turn on are marked NA, while those you do want it to turn on are set. When the user taps the Master button to turn it on, only the groups that are not marked NA will power on. When the user taps the Master button to turn it off, all checked groups will turn off.
Note: To exclude a group from a scene, select the scene button in the Keypads tab and uncheck the group. A common error is to try to exclude groups from scenes using the NA feature on the Scenes tab rather than unchecking the group on the Keypads tab. NA groups do not respond to the activation of a scene, but they do turn off when the scene is deactivated, and they are also affected by the keypad’s dimming controls.
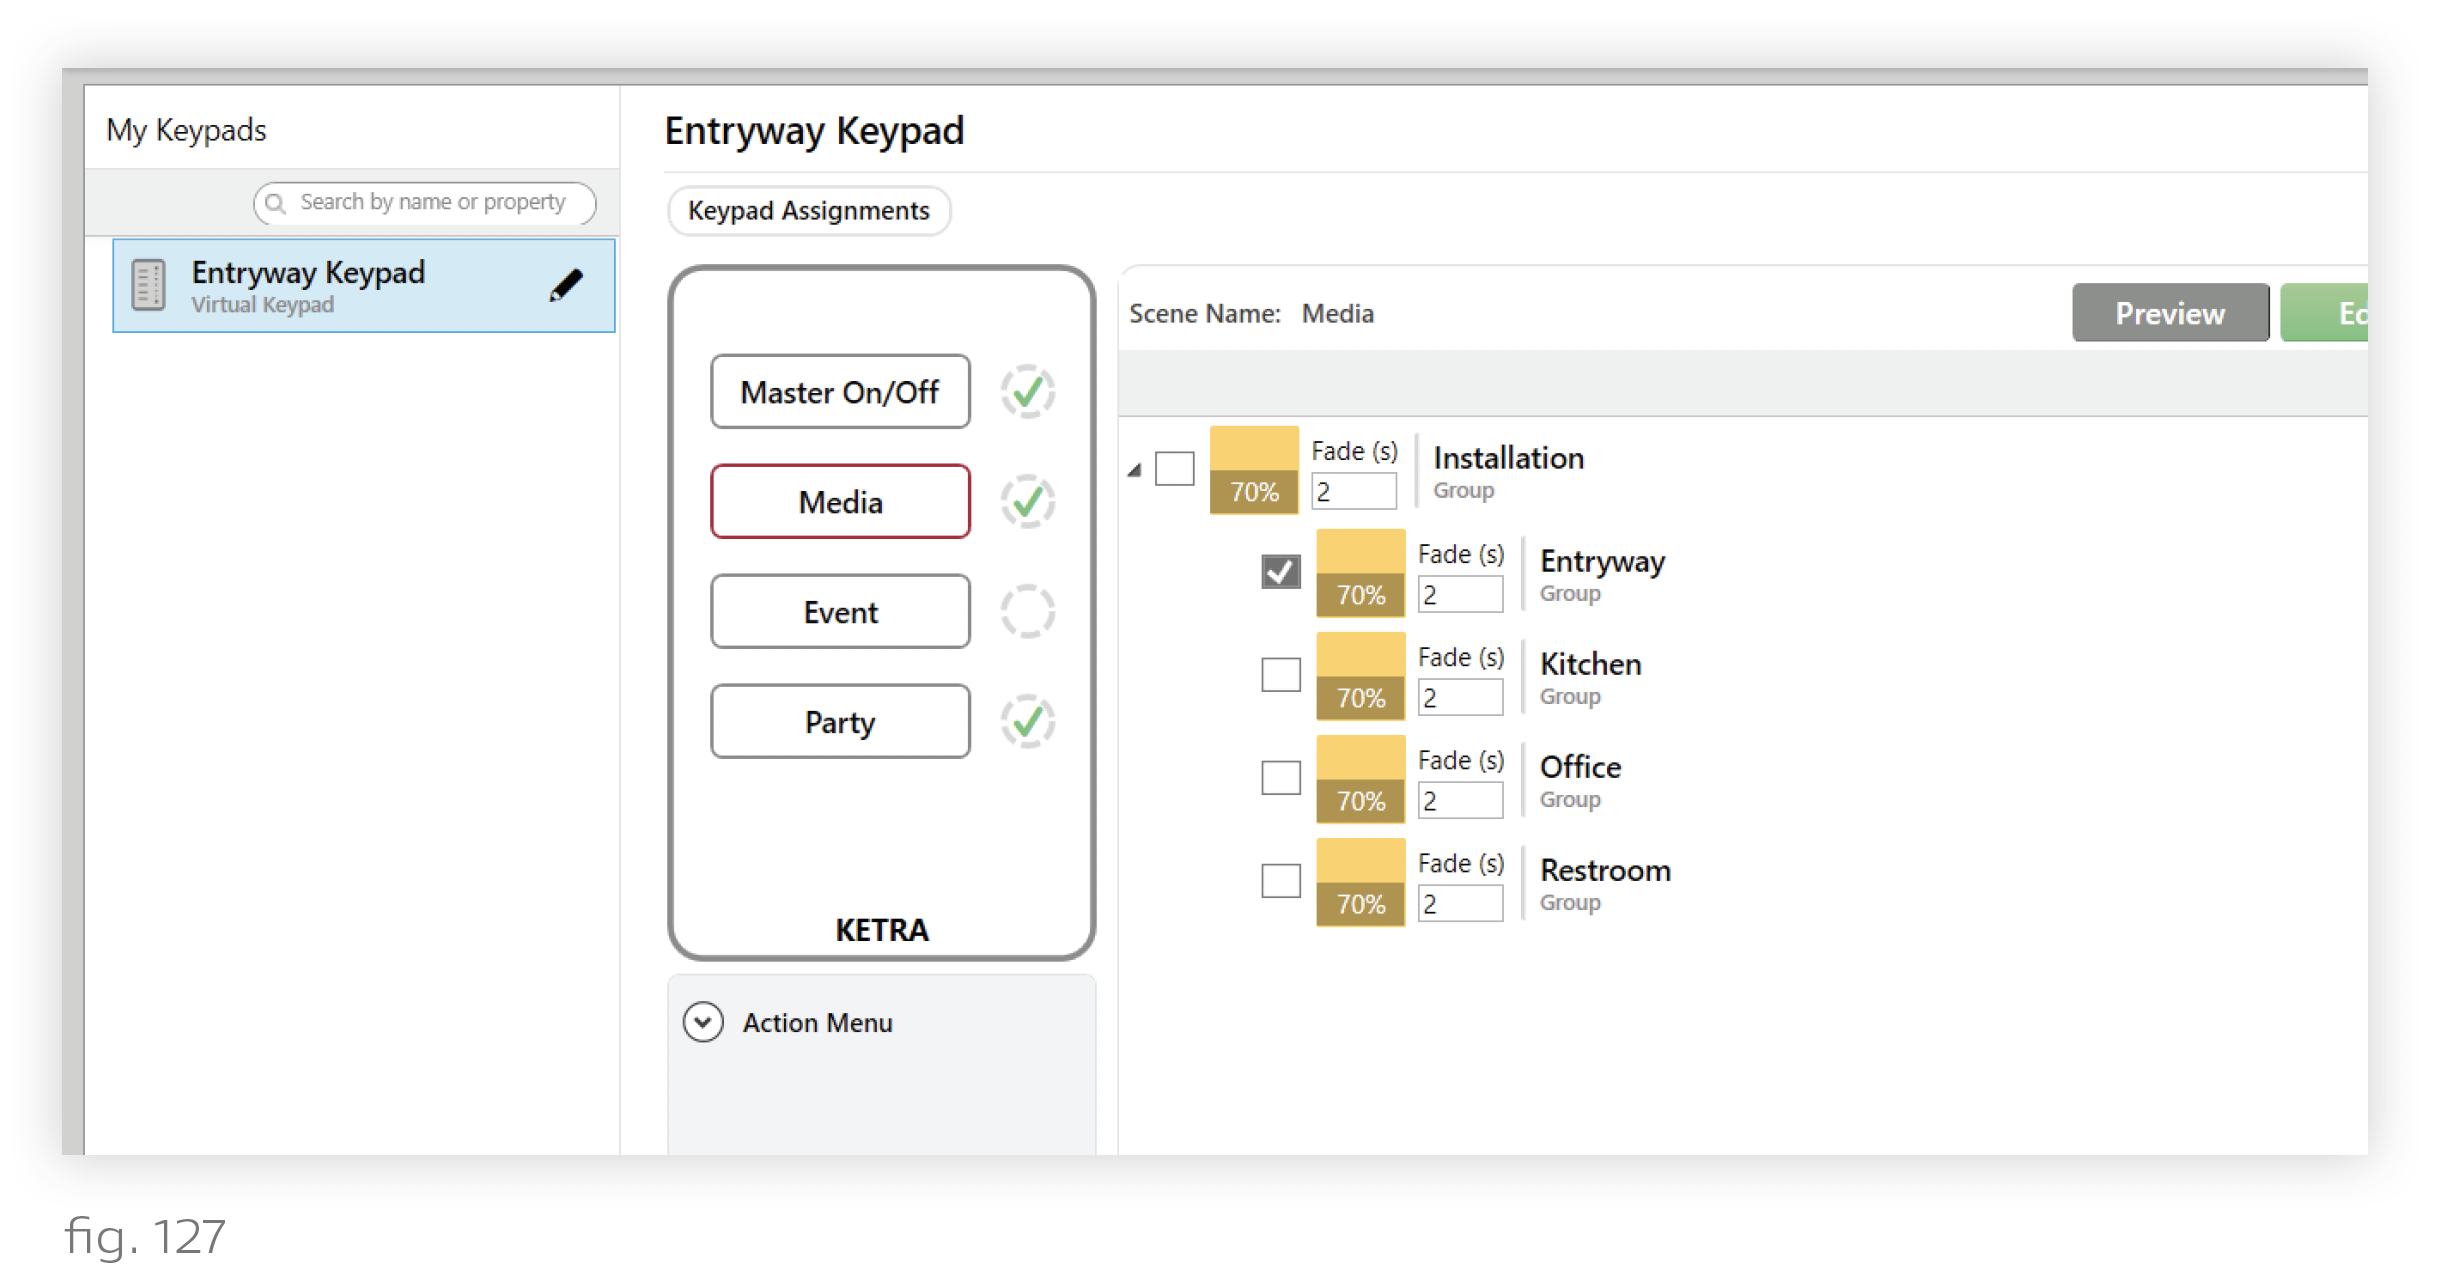
4. For the other keypad buttons, uncheck all groups except the "Entryway" group and/or subgroups. This ensures that those buttons only control the lighting in the entryway or entryway zones.
Configuring Discrete Zones on One Keypad
Example: Programming a Kitchen keypad with General, Task, and Accent zones
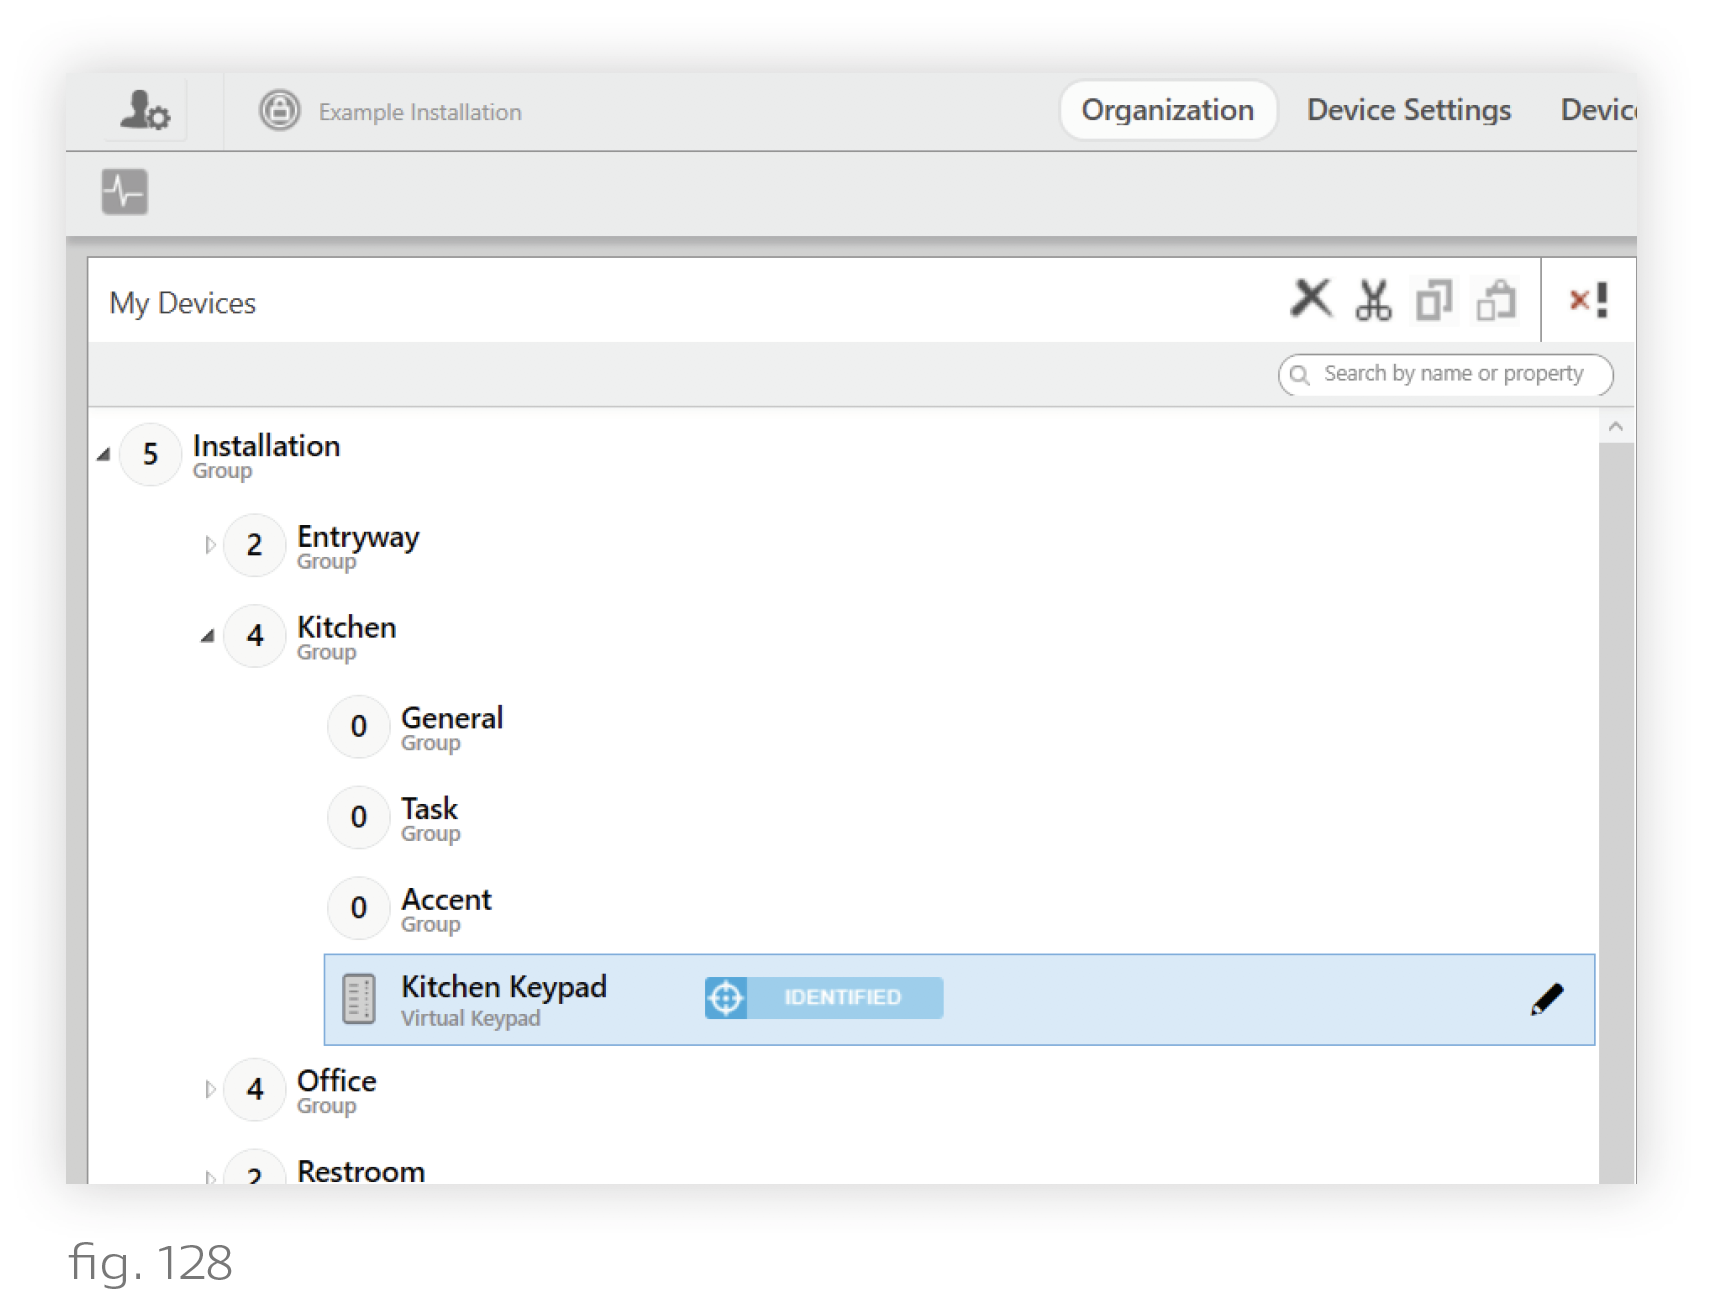
1. On the Organization tab, place the keypad in the room-level group. In our example, the keypad goes in the Kitchen group. It will then be able to control any devices in the "General", "Task", and "Accent" groups.
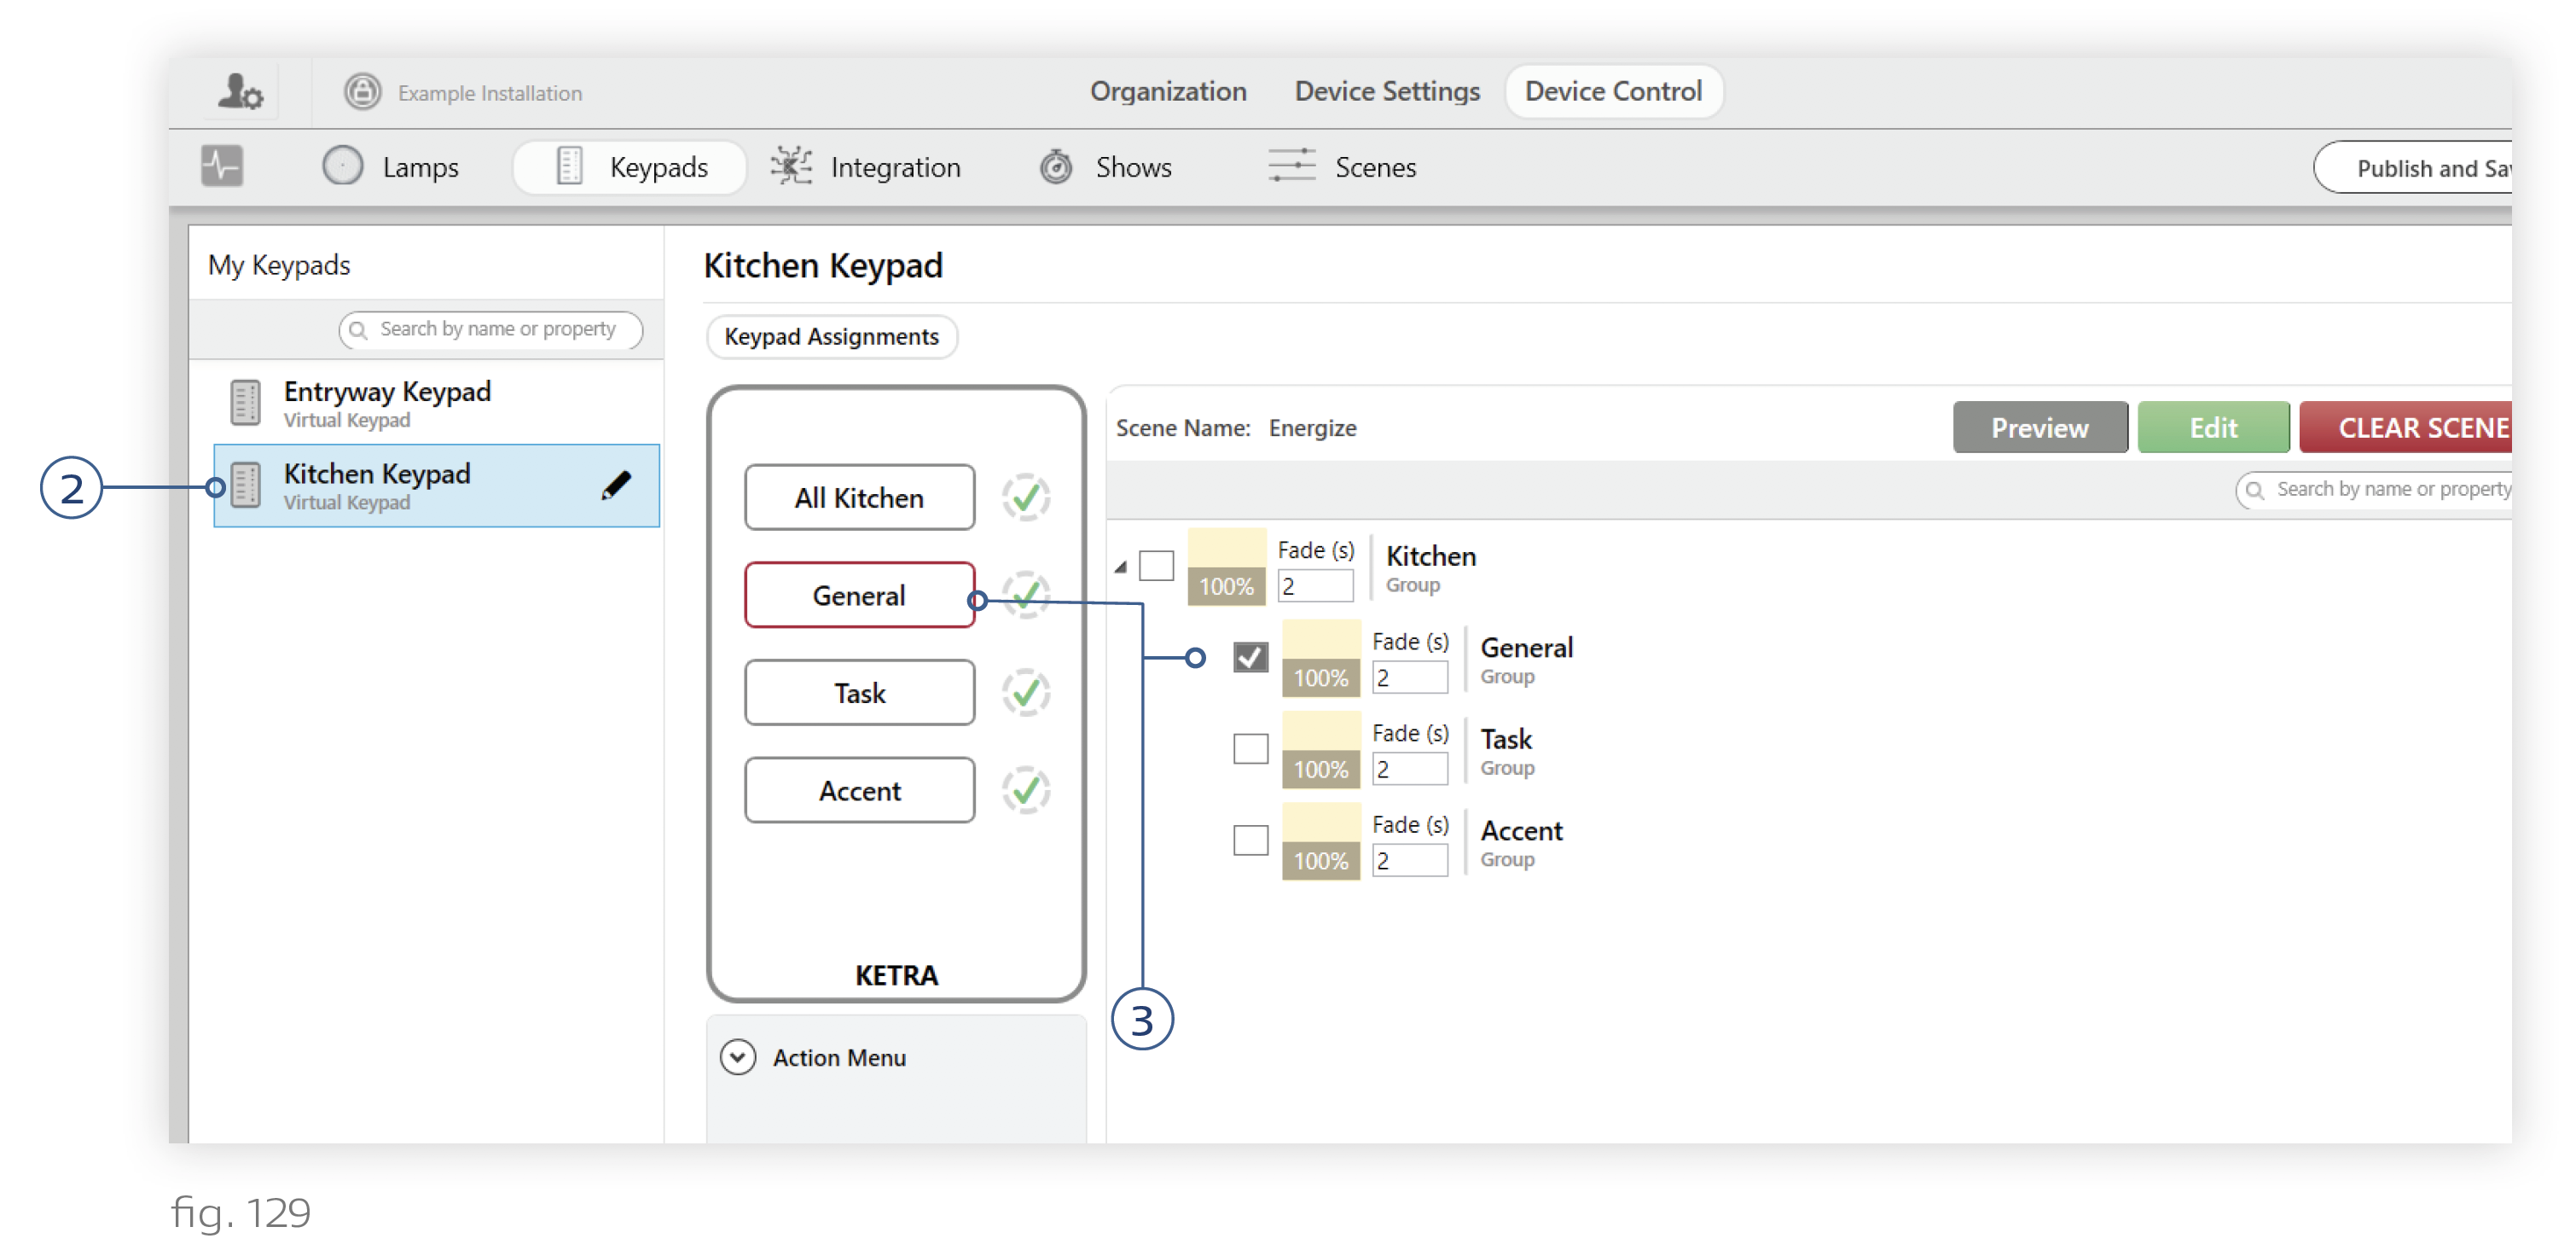
2. Go to Device Control > Keypads and select the keypad on the left.
3. For each button, ensure that only the corresponding zone (group) is checked. If assigning a different scene created on the Scenes tab, it is okay if the scene would normally control other groups as well. As long as only the desired zone is checked for this button, only that zone will be affected by the button.
Note: To exclude a group from a scene, select the scene button in the Keypads tab and uncheck the group. A common error is to try to exclude groups from scenes using the NA feature on the Scenes tab rather than unchecking the group on the Keypads tab. NA groups do not respond to the activation of a scene, but they do turn off when the scene is deactivated, and they are also be affected by the keypad’s dimming controls.
4. Optional: Customize the zone’s scene or show. To customize, click the green Edit button.
Note: Changing an existing scene affects other instances of the scene in the installation.