
To create an installation and perform the necessary setup, follow these steps:
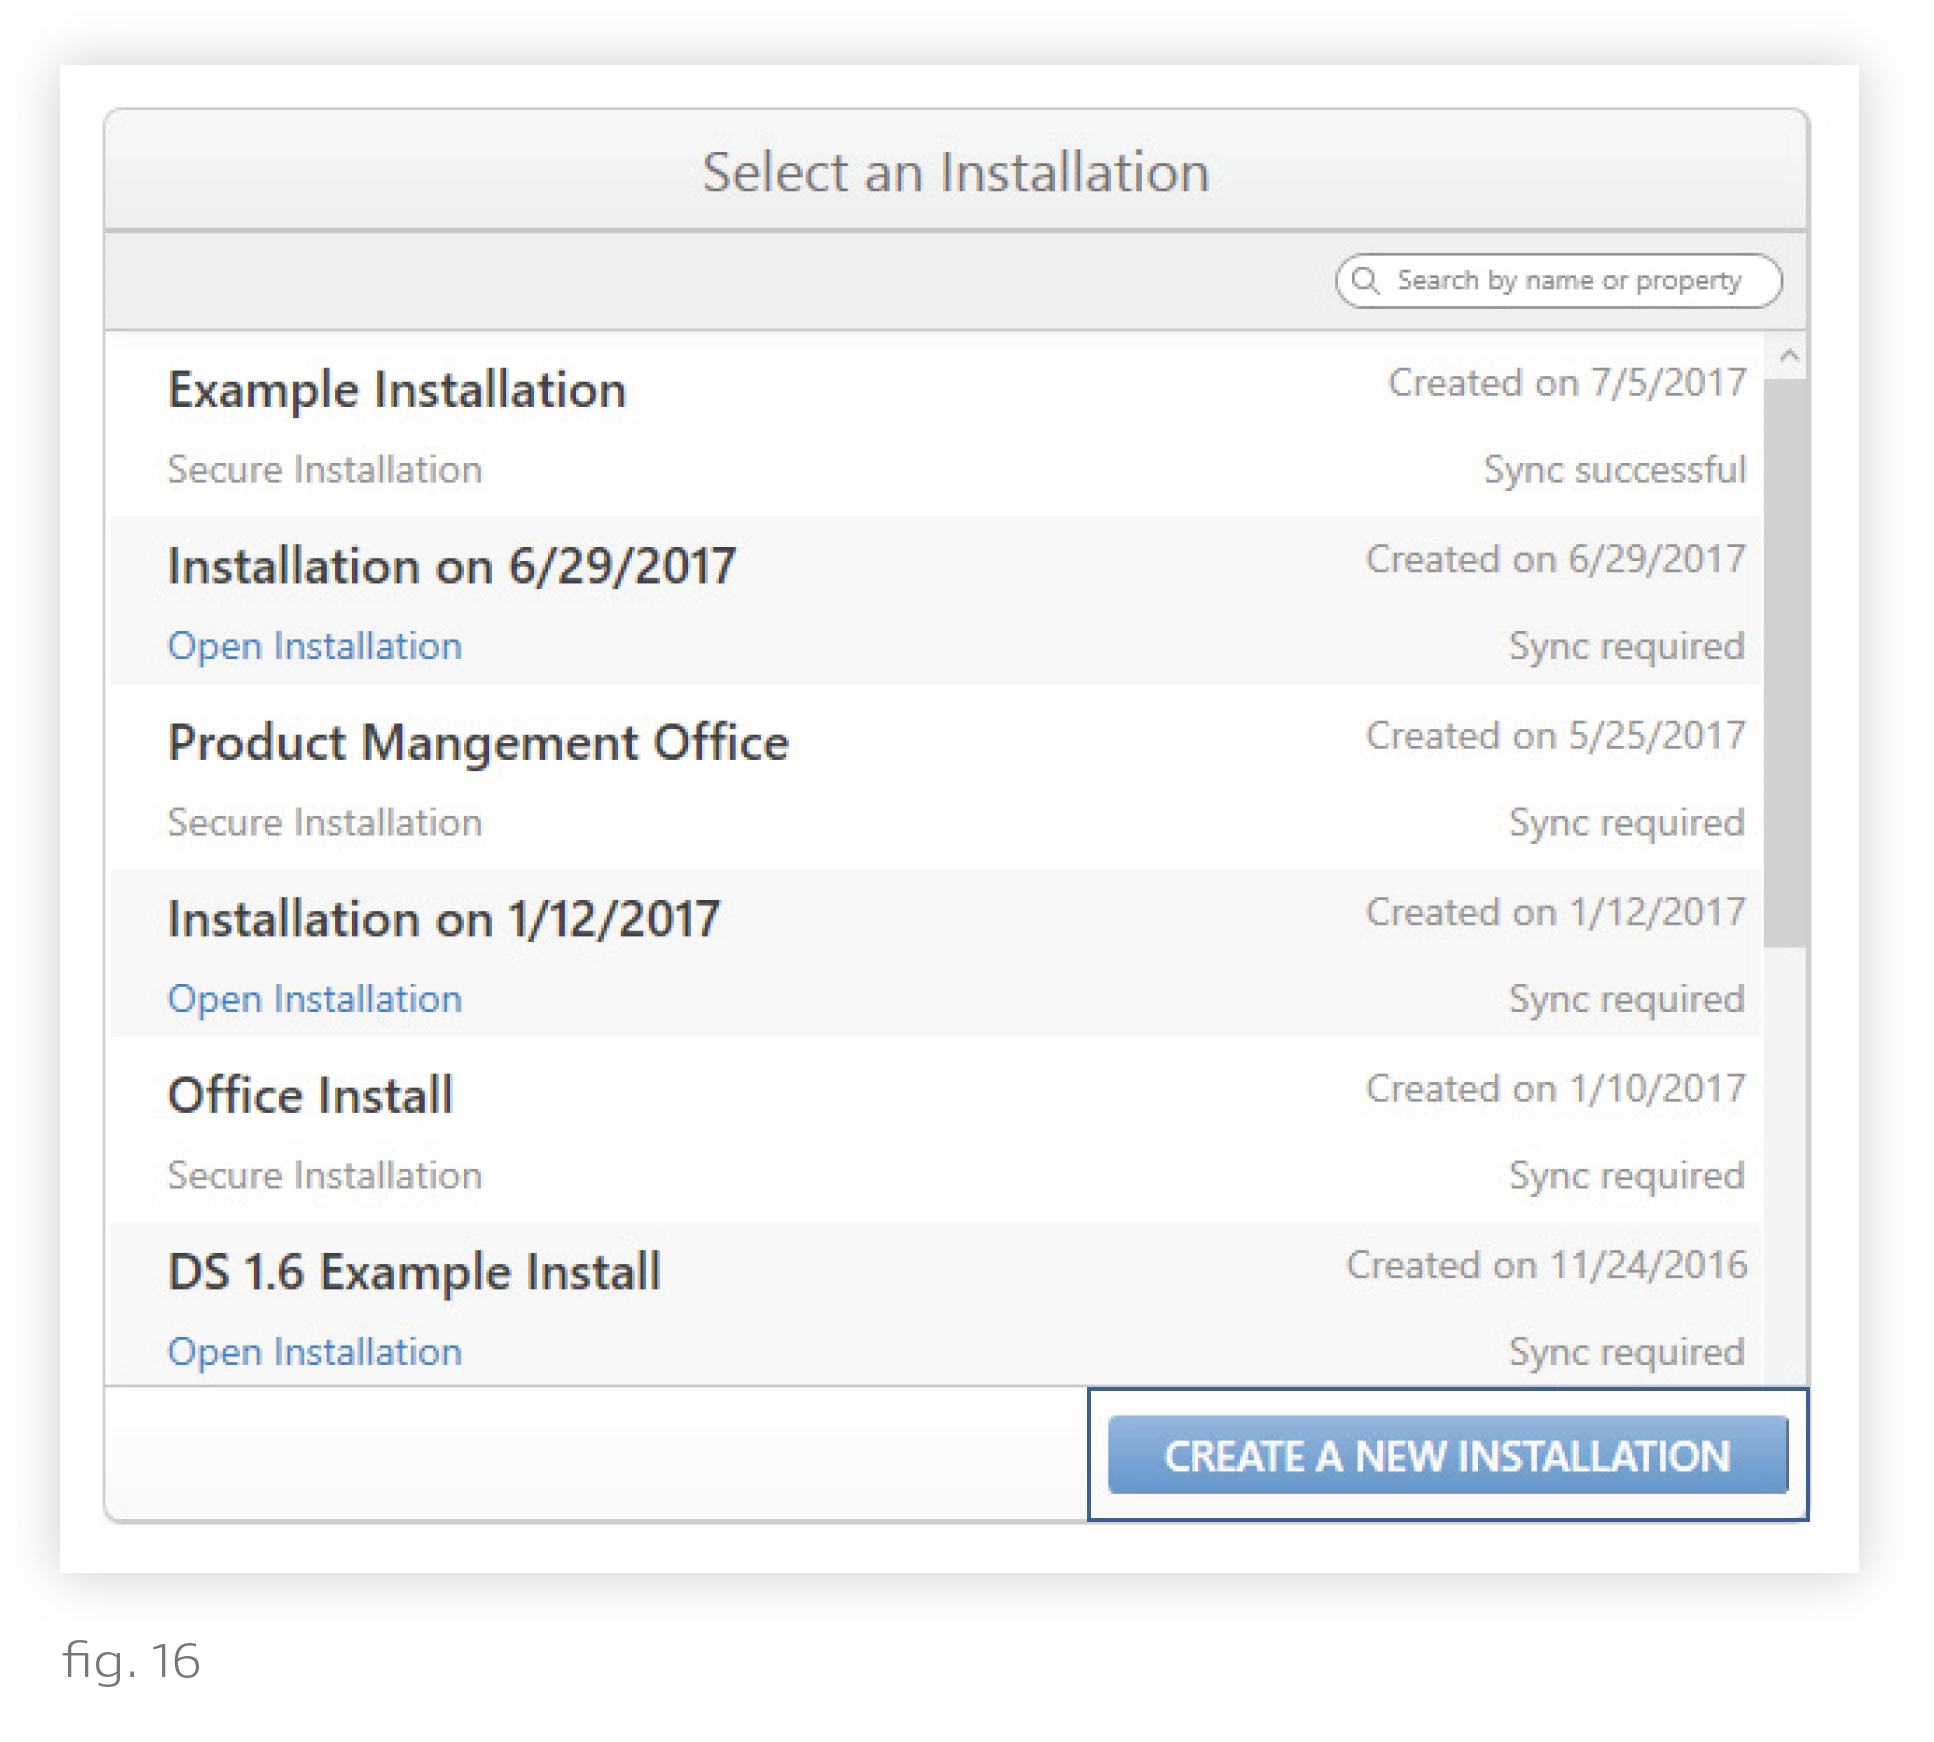
1. Click Create a New Installation on the Design Studio home screen.
2. Name the installation.
Naming Convention - We recommend naming the installation after the project title on the Ketra submittal (if available), and/or the address of the project. This level of specificity will be helpful if technical support is needed later on.
3. Choose Secure Installation. Open installations should be used only for temporary demonstrations of Ketra’s lighting system.
In secure installations, devices are provisioned (added) to a private network unique to the installation, meaning no other installation will be able to access them unless you deprovision them first.
Open installations, by contrast, leave devices on the public network, allowing use of the same products for multiple installations. Open installations can be converted to secure installations once the installation setup is complete. See Converting to a Secure Installation.
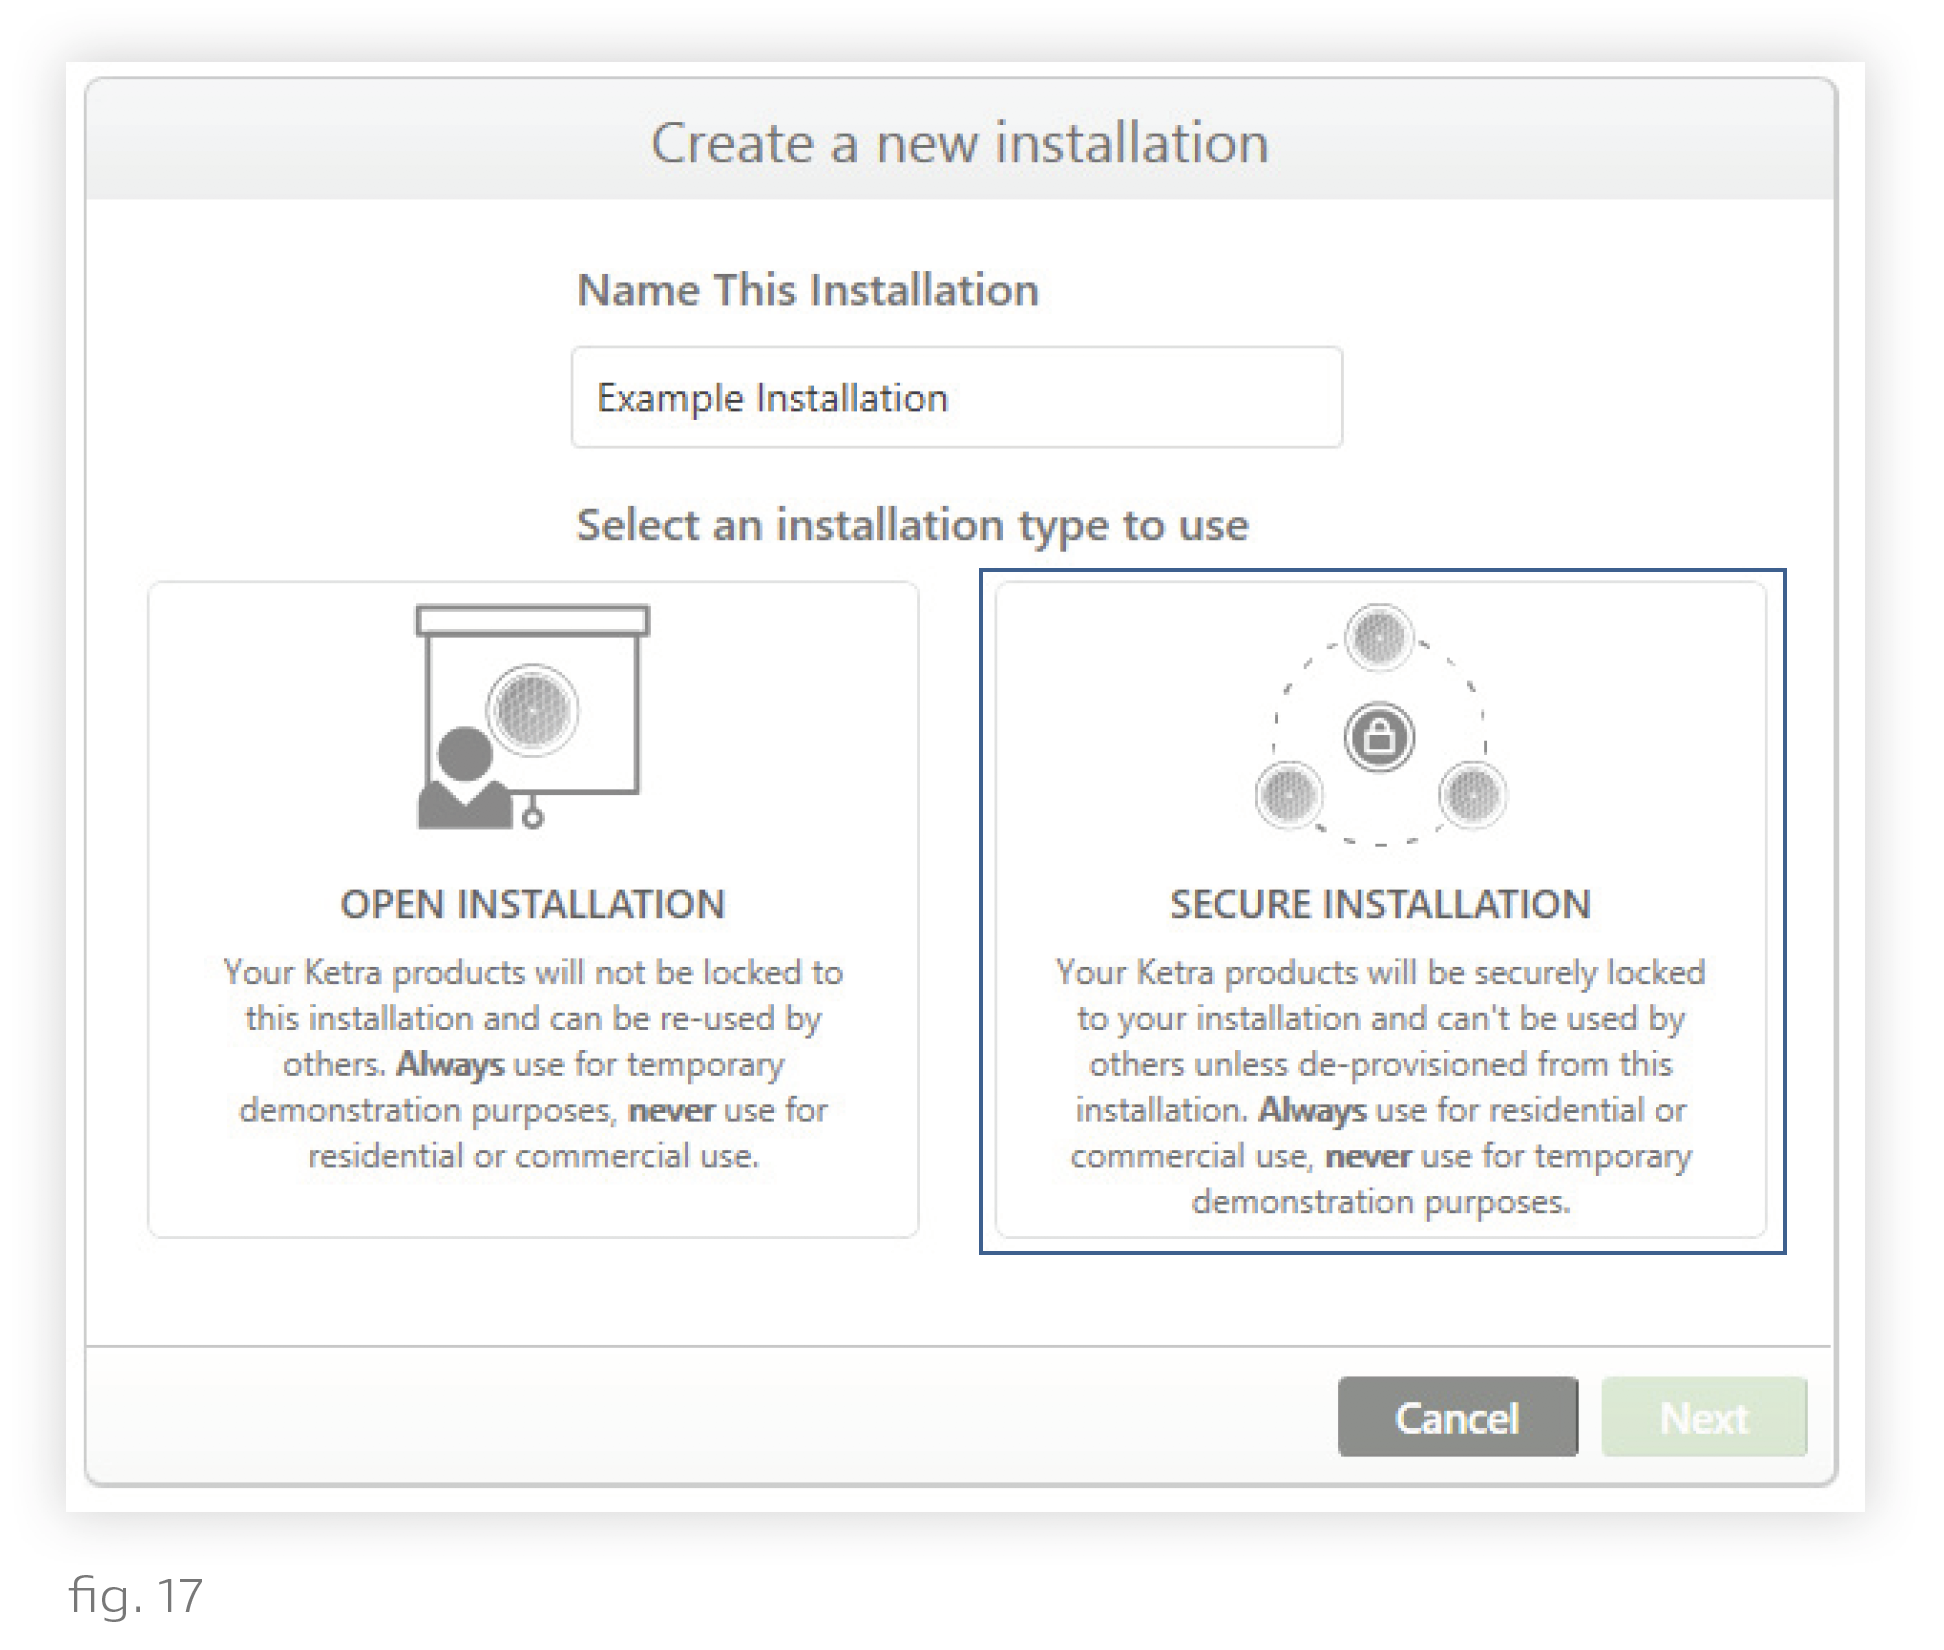
4. Click Next.
5. On the next screen, select N4 Hub(s).
6. Set whether you are building a Ketra Only or Ketra with HomeWorks QS installation (see fig. 18). If you select a Ketra with HomeWorks QS installation, you will have a smaller number of available Design Studio features for the installation, since the Ketra software will only be used to set up groups, scenes, and shows prior to configuration in Lutron HomeWorks QS.
Note: Only Ketra with HomeWorks QS installations can be imported into the Homeworks QS software.
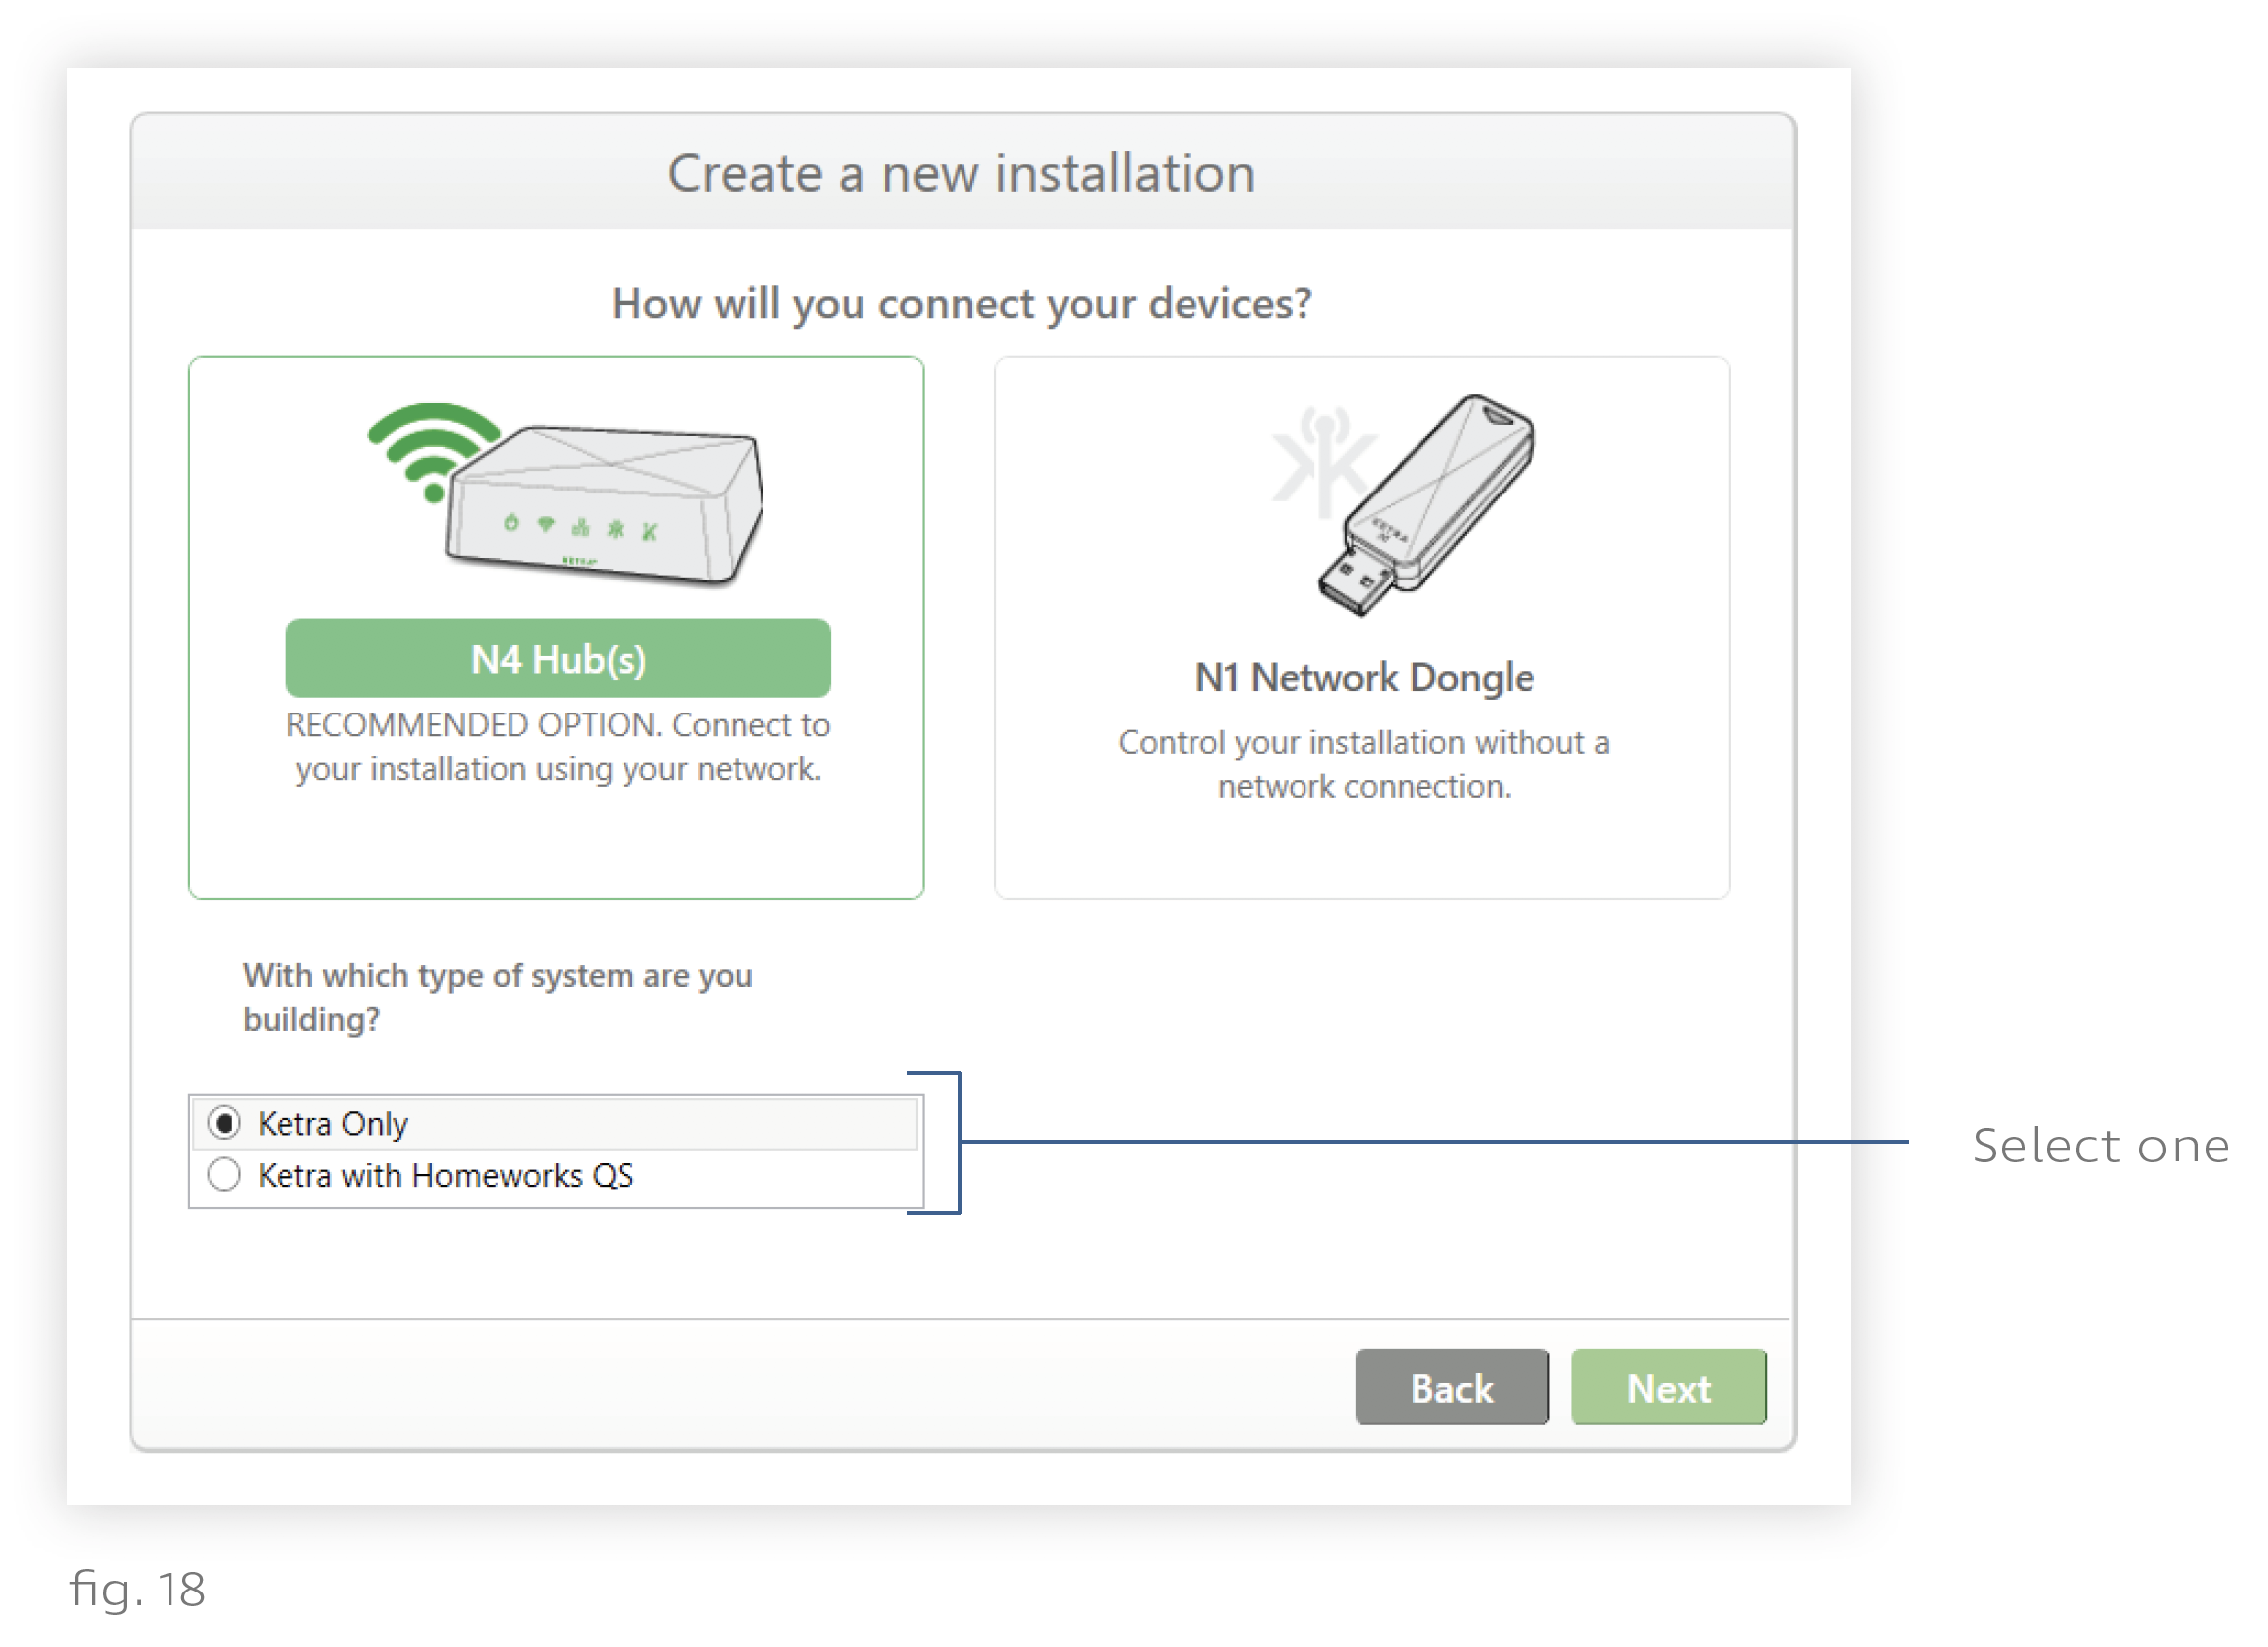
7. Click Next.
8. Set the installation location and pick an installation template. For a Ketra Only installation, we recommend using the Office template. For a Ketra with HomeWorks QS installation, we recommend using the Residential template.
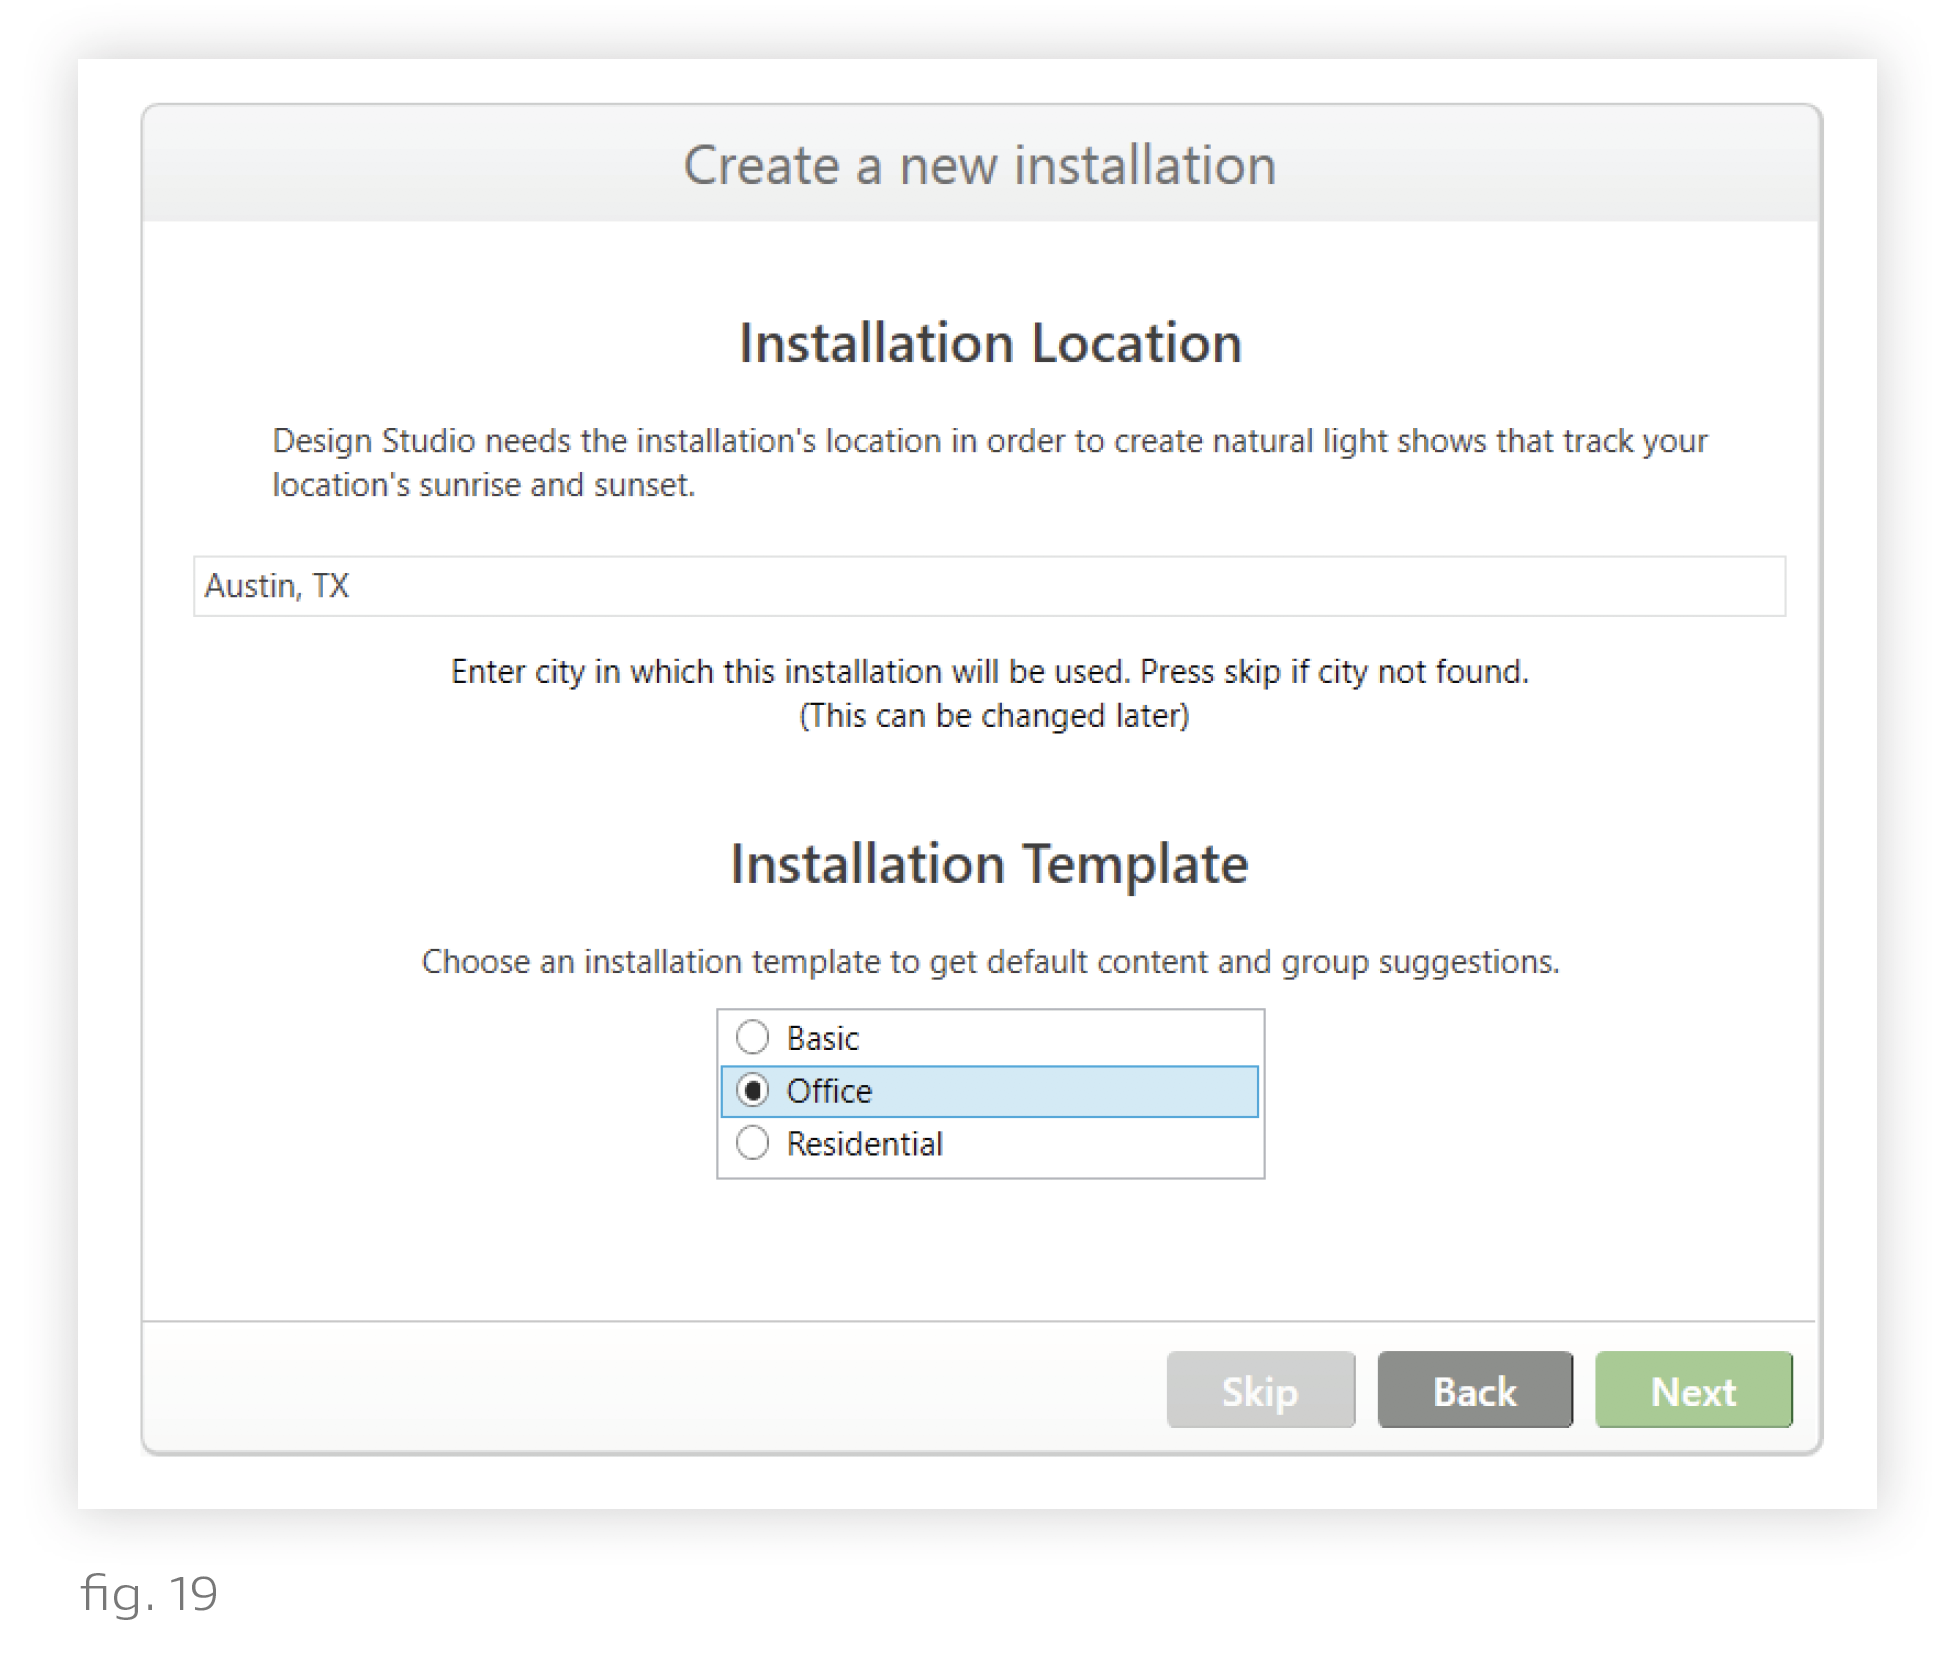
9. Click Next.