
For any trigger you select from the triggers list, you can use functionality native to the Shows tab to assign or modify a scene. To do so, follow these steps:
1. Select a trigger in the triggers list.
2. If assigning a scene, choose to create a new scene or copy from a previous scene.
If you are creating a new scene: Give your scene a name, and then click Next. Note that you cannot reuse names you have already used within one installation.
If you are copying a previous scene: Select the previous scene’s name from the dropdown. Note that the dropdown only includes scenes you have used in this installation. Once you select a scene, you will have the ability to edit it or use it as it is. Any edits made to the copy will not be reflected in the original.
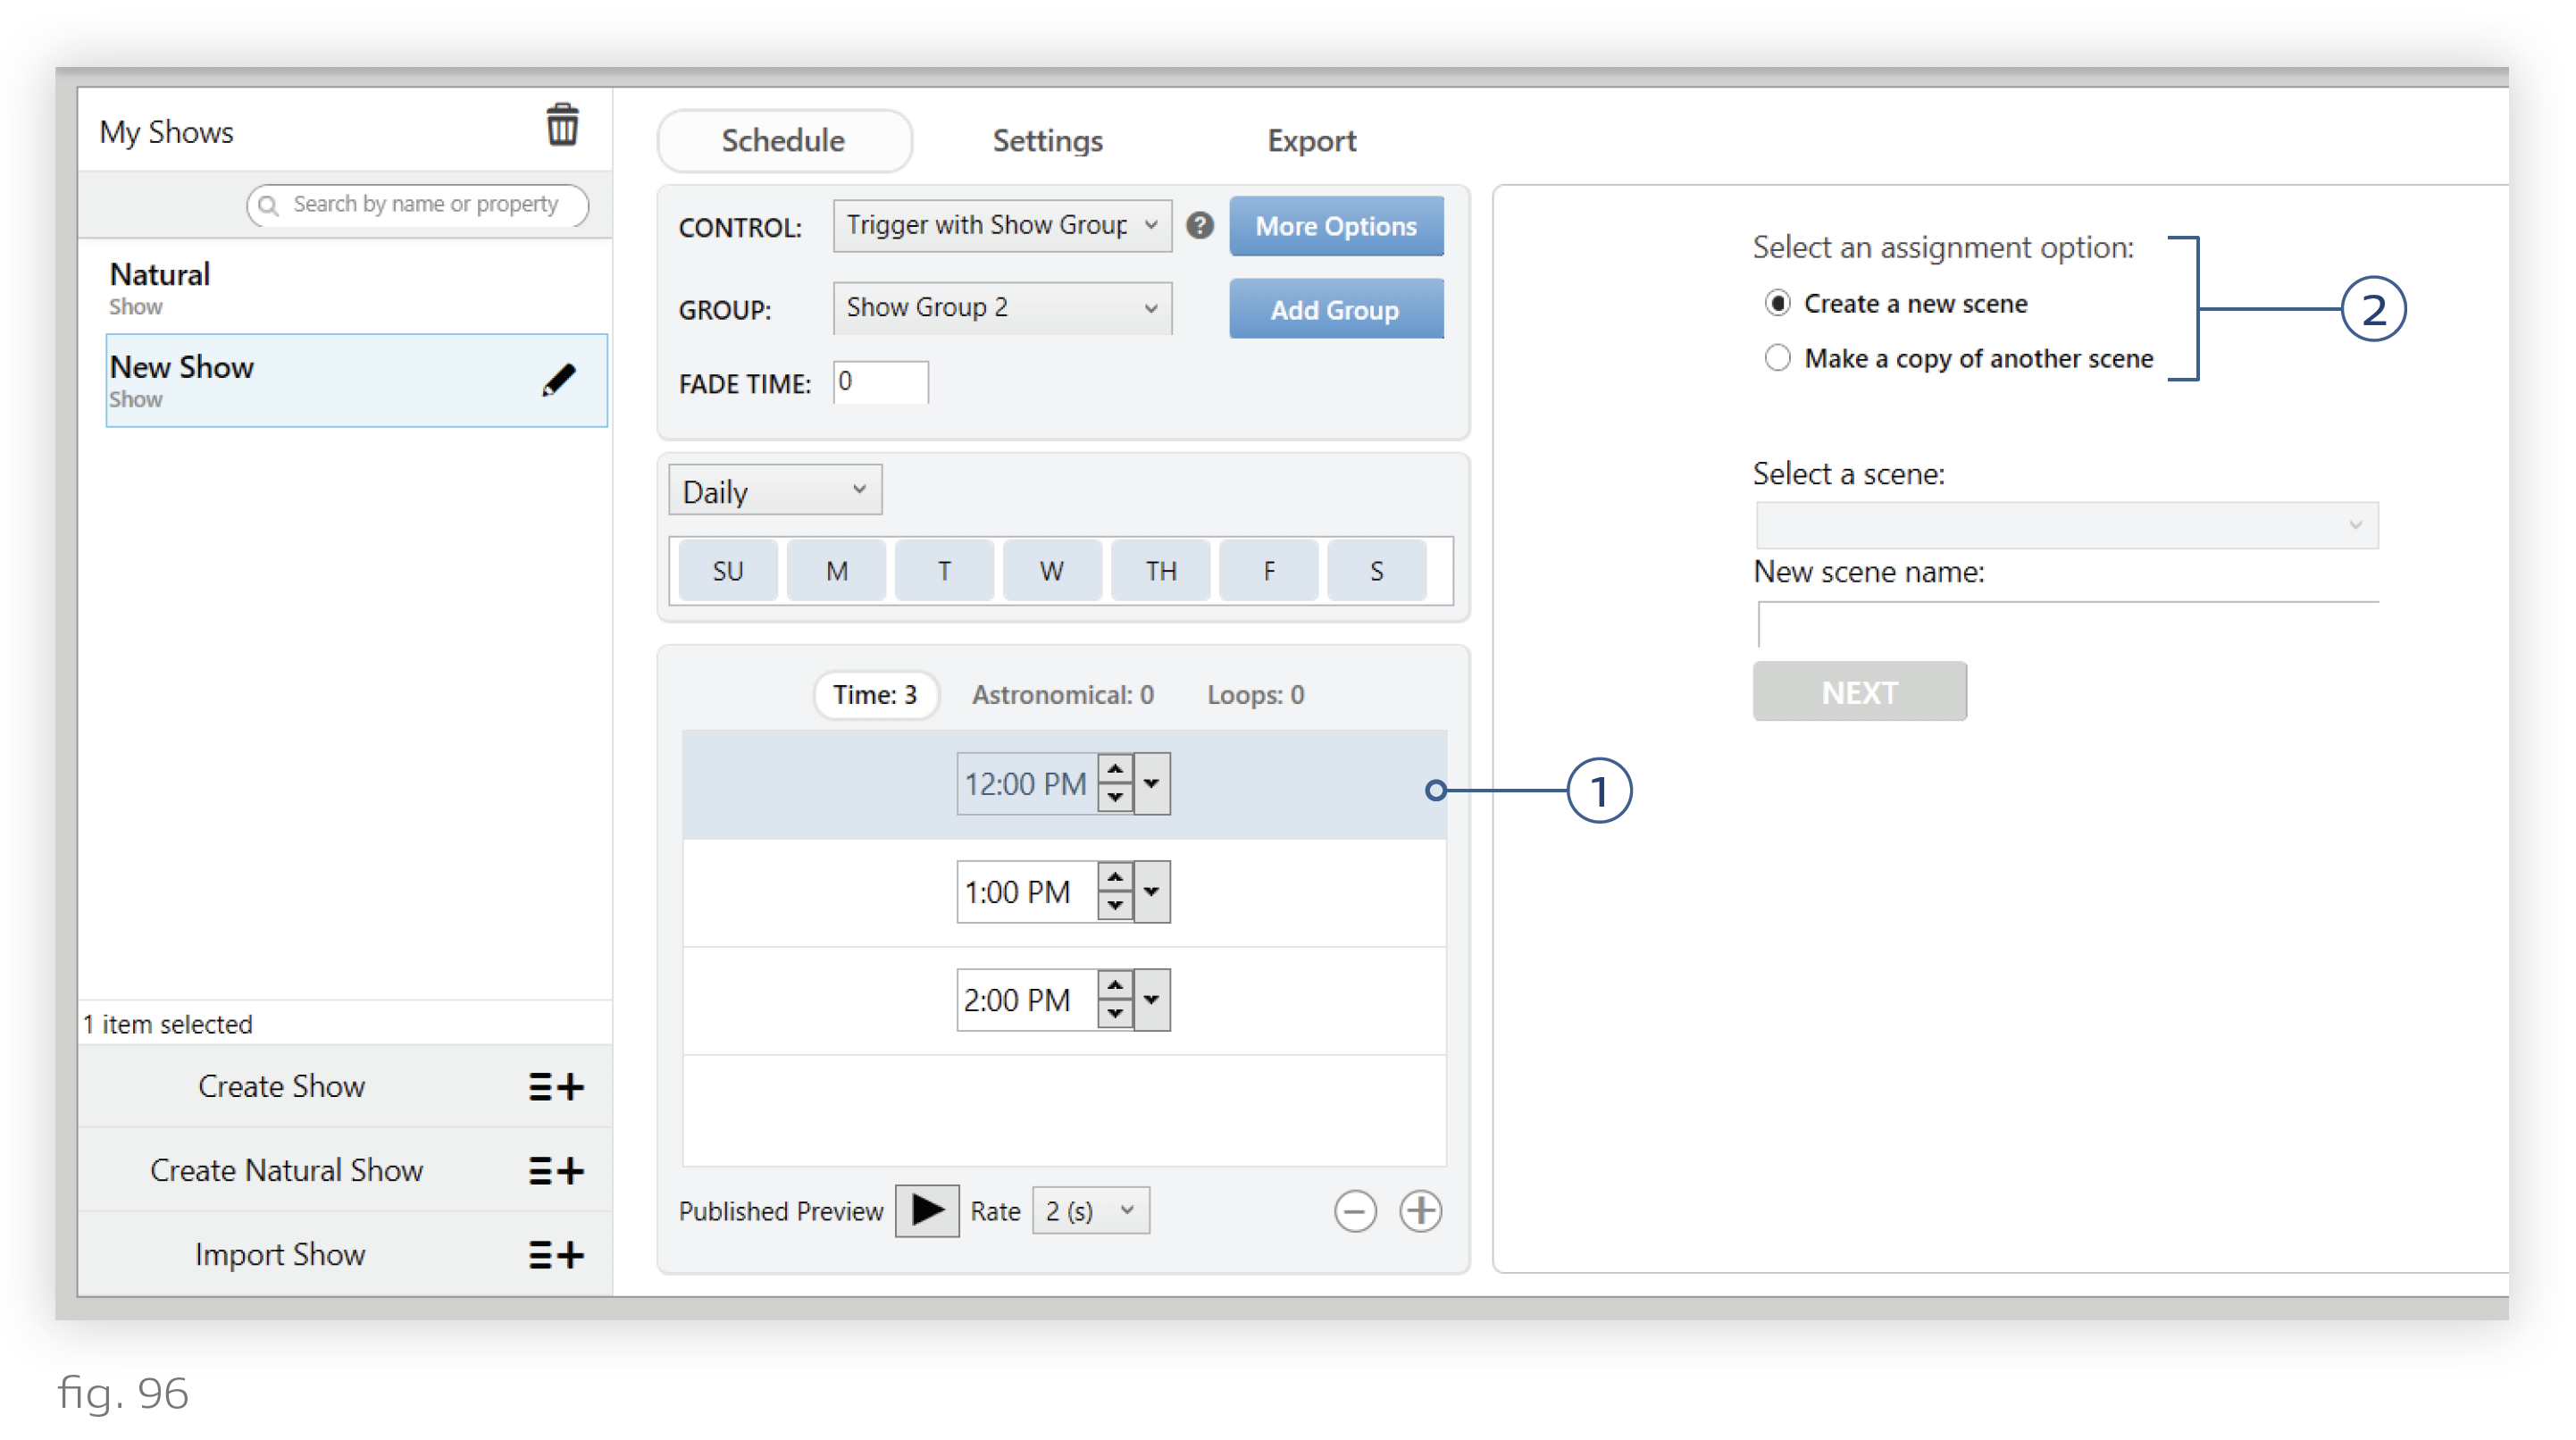
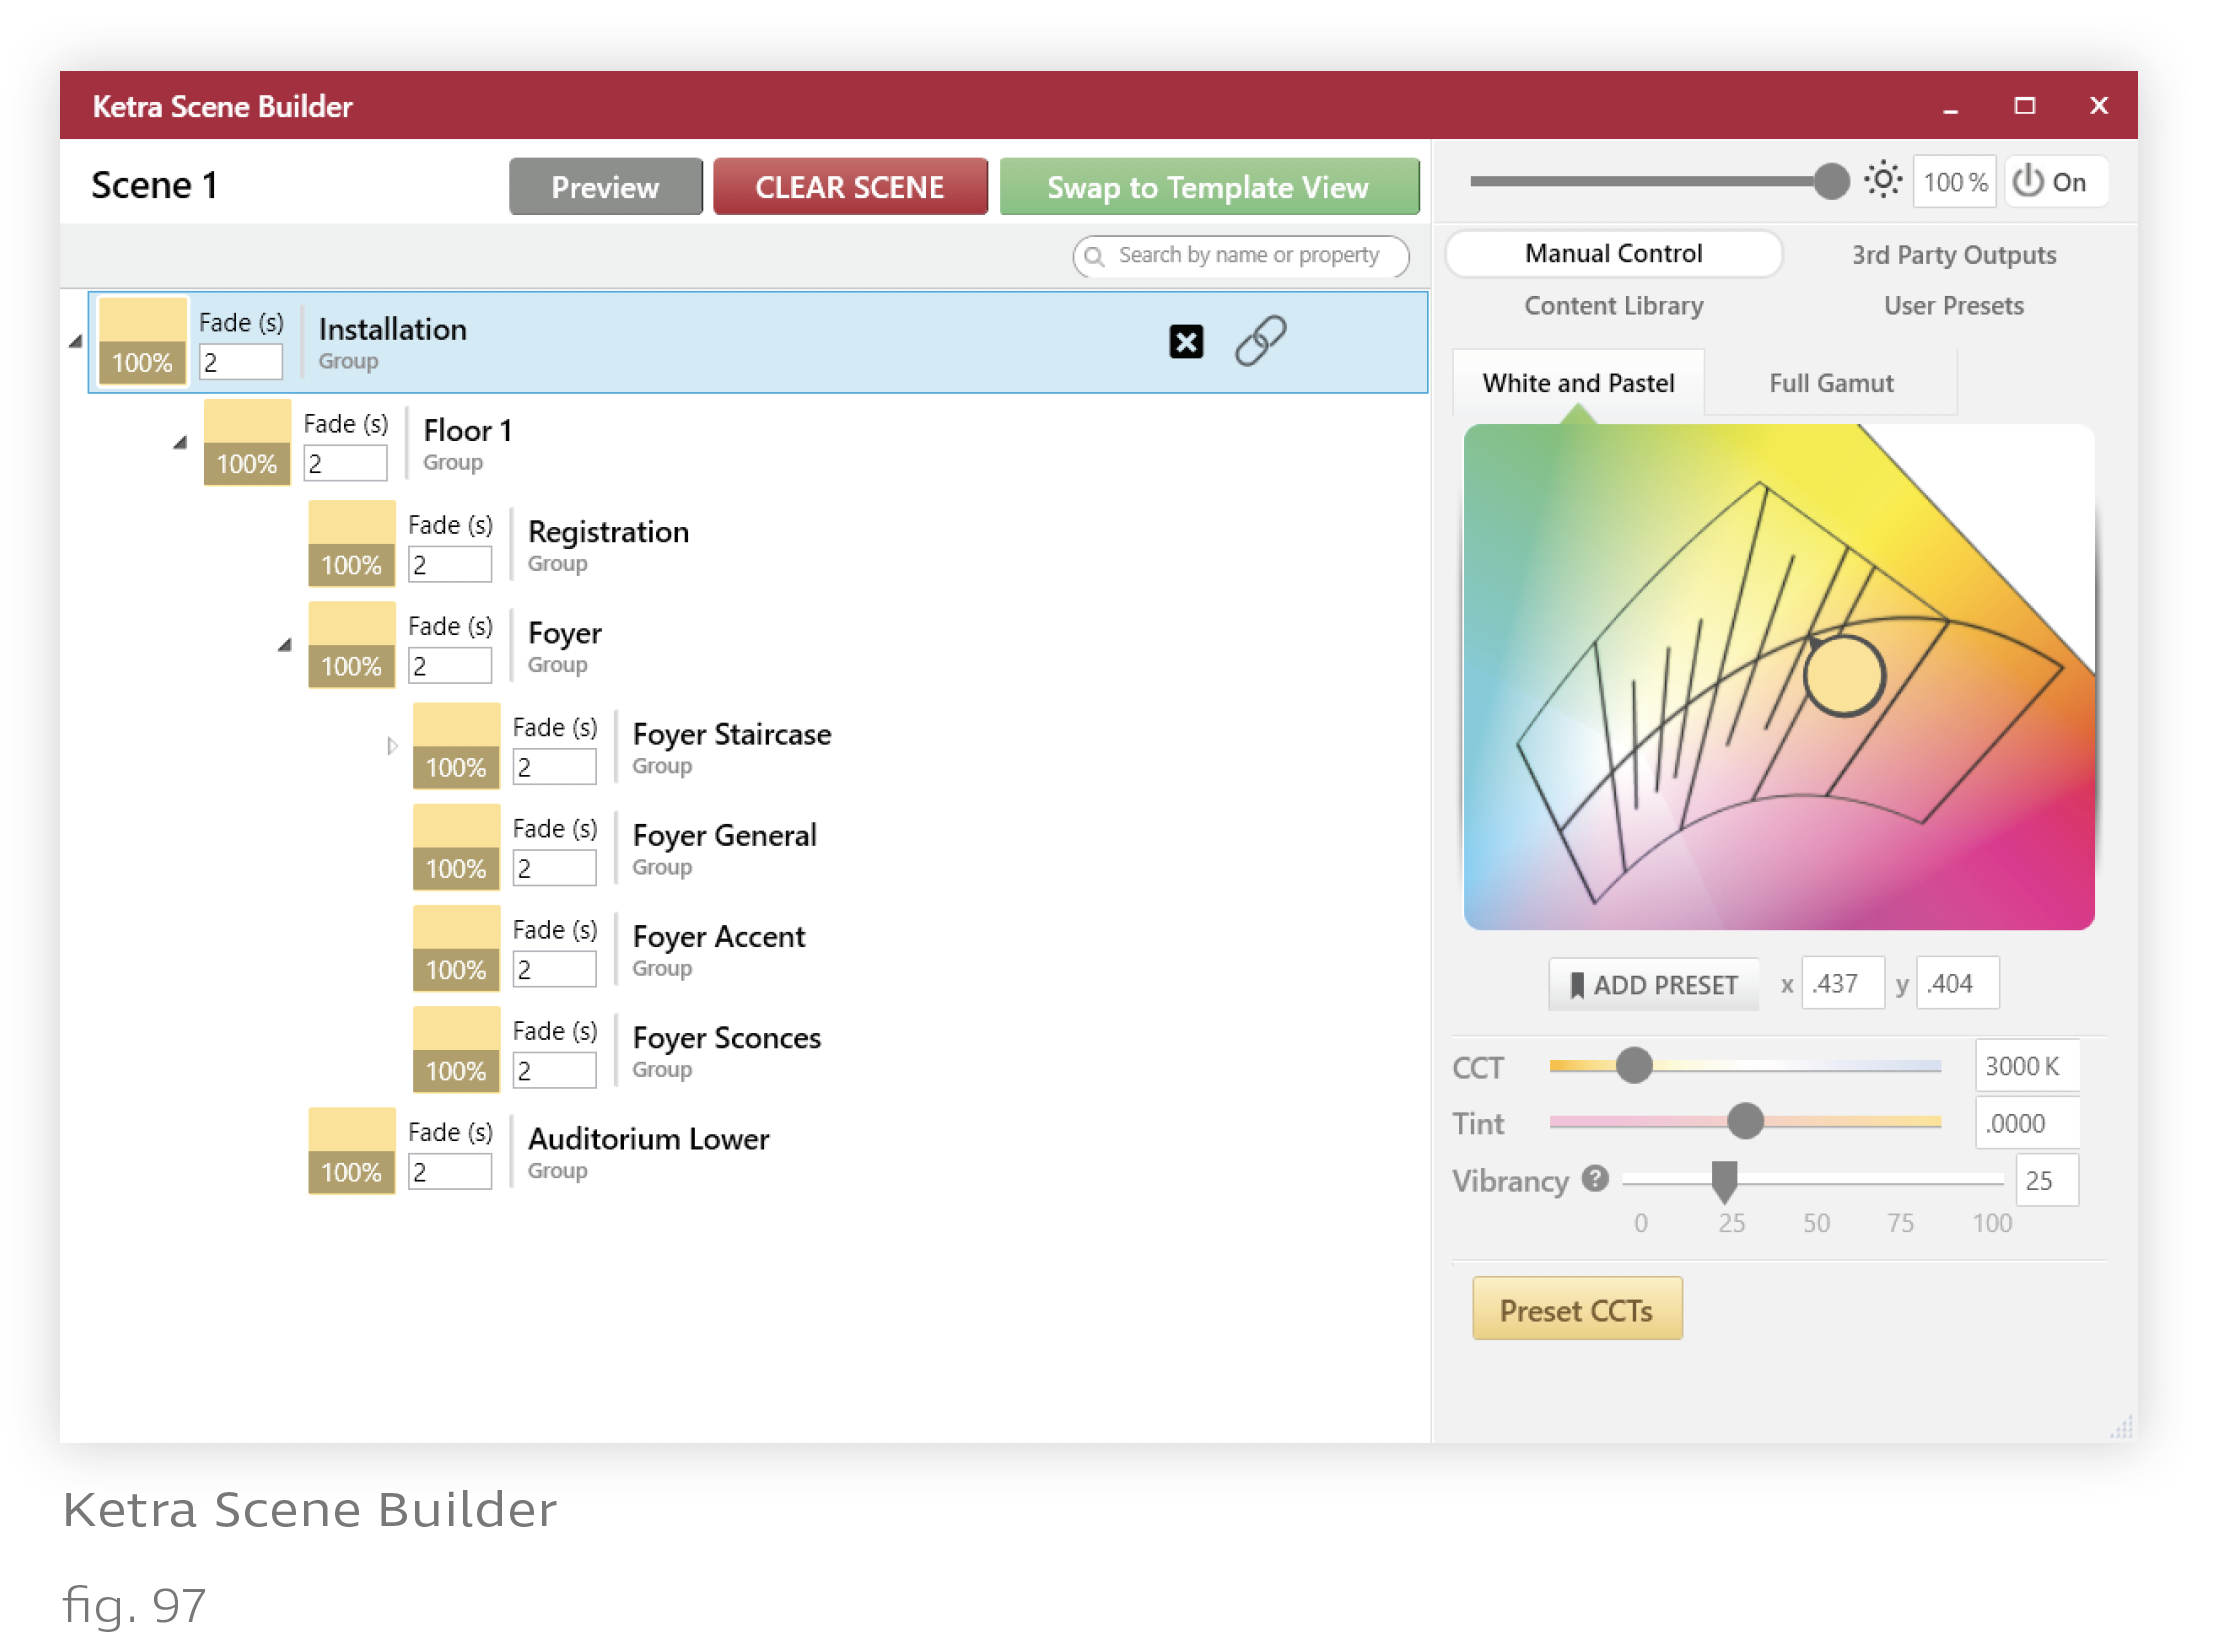
3. Edit the scene. Click the green Edit button to open the Ketra Scene Builder window. (Alternatively, if you created a new scene, the window will open automatically. See fig. 97.)
For instructions on using the Ketra Scene Builder window, refer to Building Scenes Using Scene Builder.
4. Assign scenes to or modify scenes for other triggers in the triggers lists.
Note: In a custom show, you have to create a scene for any trigger you add to the list.