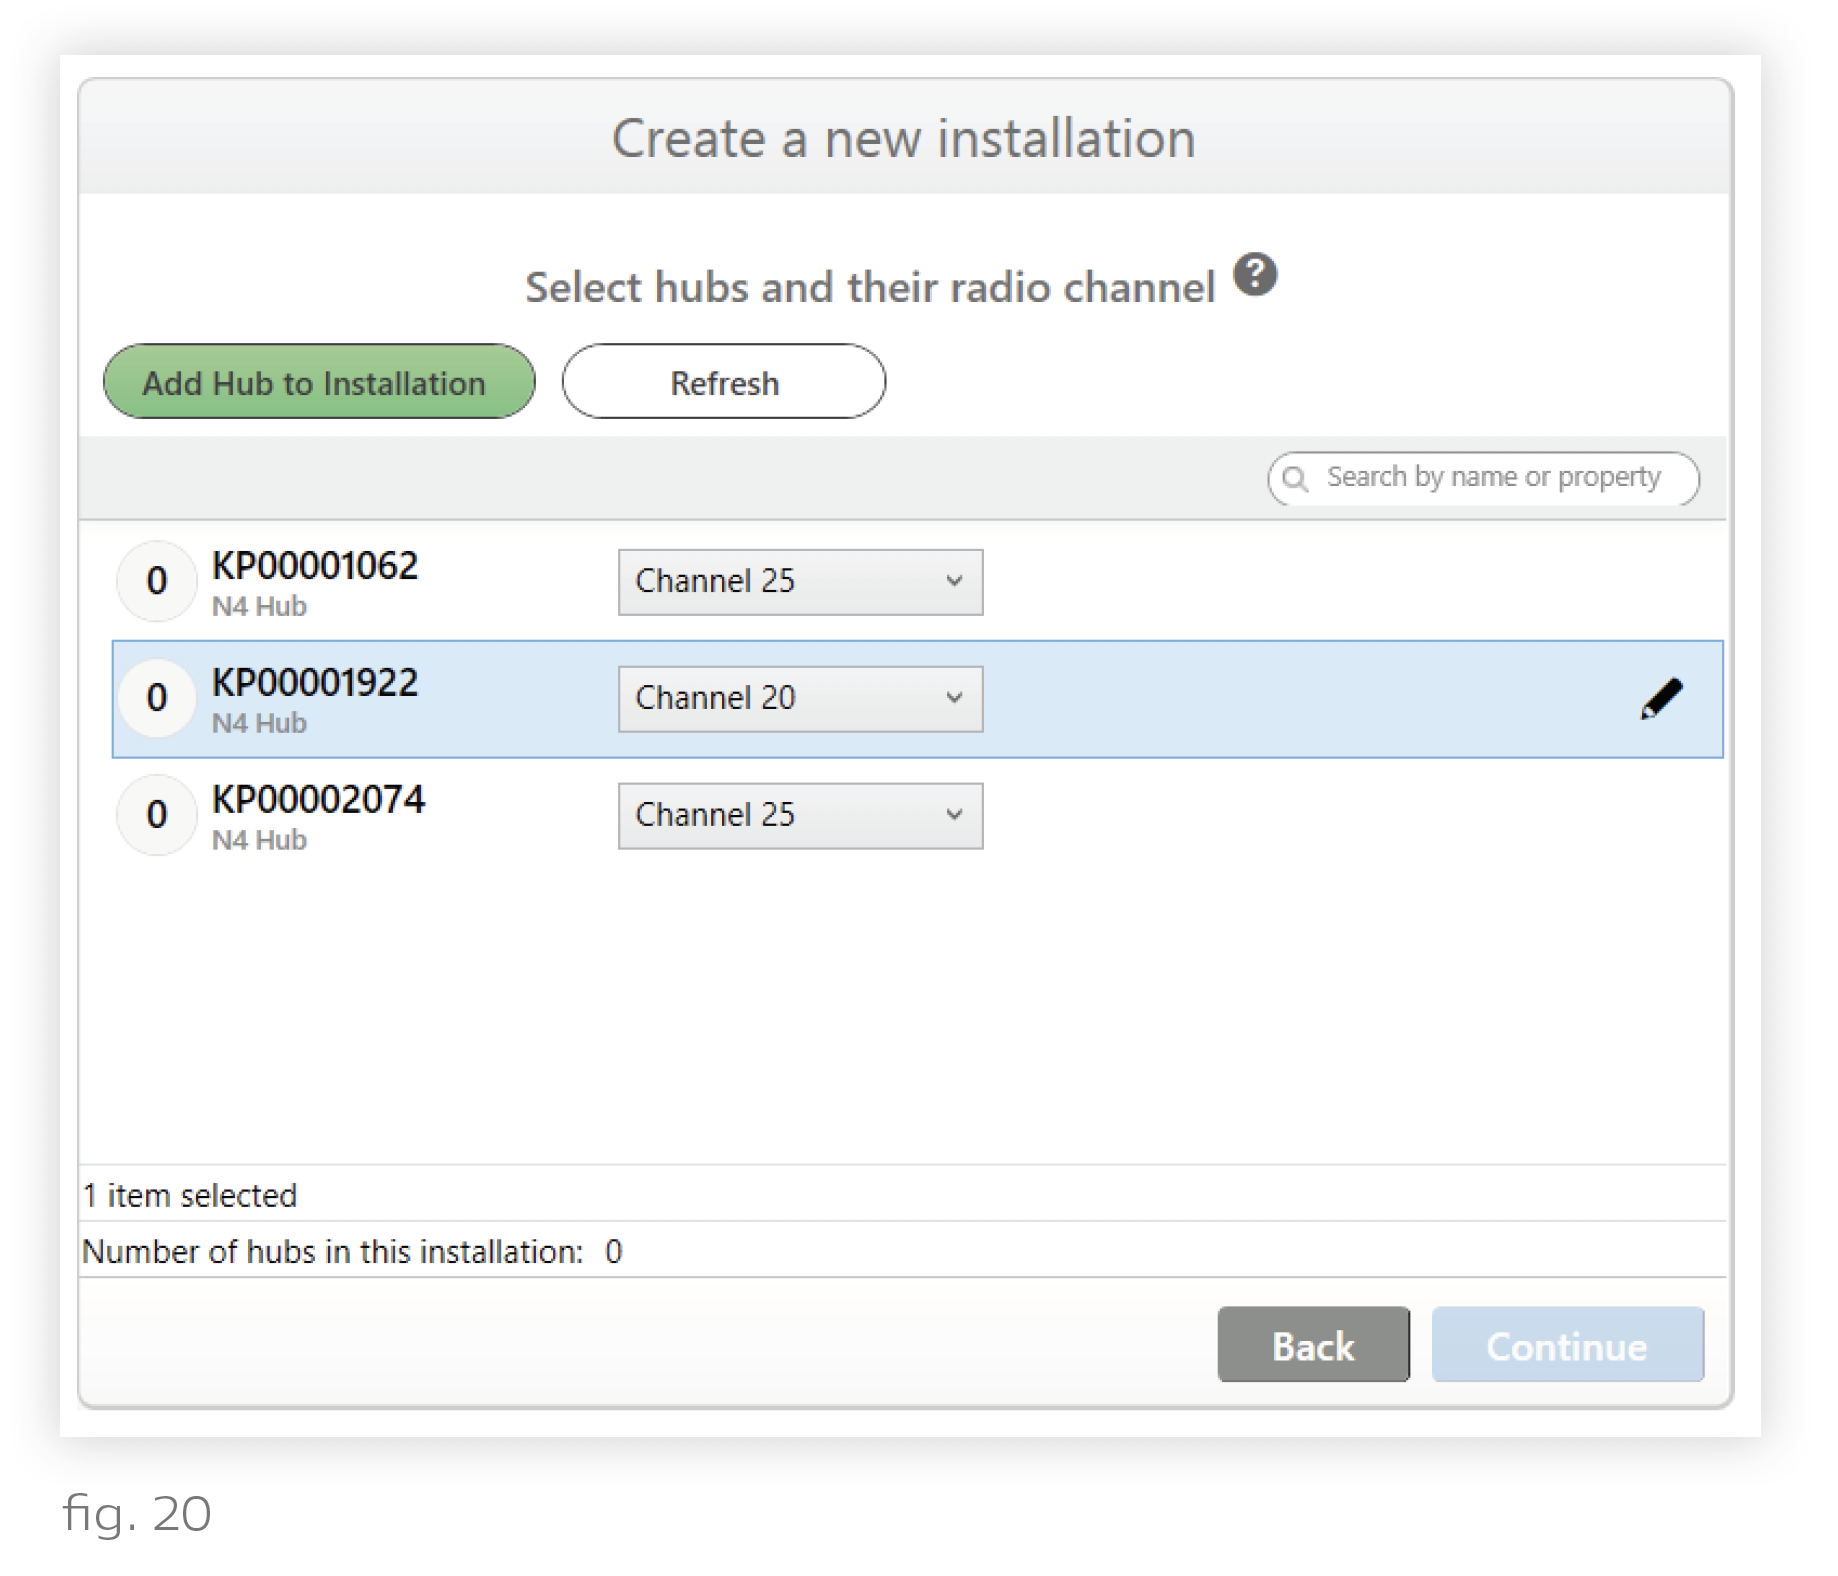
Design Studio will now display a list of N4 Hubs available on the computer’s LAN subnet. You can add the N4s in this list to your installation.
Note: If you are setting up an installation off-site and don’t have access to the N4 Hubs, you can click Continue to skip this step.
If an N4 is missing from the list, click Refresh. If no N4s appear, see Troubleshooting N4 Hubs.
To add N4s to your installation, follow these steps:
1. Highlight an N4 in the list. Highlighting the N4 causes the hub to identify itself by flashing its indicator lights. We recommend that for the first few N4s you provision, you use the identify feature to confirm that the N4 has been installed in its expected place.
2. Determine the KNet that the N4 should support. Reference the KNet Diagram (if available) for the KNet locations and names. Note that each N4 supports one KNet.
Rename the N4 by clicking the pencil icon. Naming Convention - We recommend renaming the N4 after the KNet it is supposed to support. For example, “1.01” might be a better name than “KP00002684.”
3. Change the N4’s channel as necessary. Adjacent KNets should be set at least 2 channels apart. This ensures that there will not be radio interference between them.
4. Repeat steps 1-4 for all of the other N4s you intend to add.
5. Highlight all of the N4s using Shift+Click and then click Add Hubs to Installation.
6. Click Continue.