Before adding any groups, we recommend thinking about what your grouping hierarchy will be, possibly even laying it out on paper. After you create your hierarchy, you will not be able to drag and drop groups to relocate them, so knowing the structure before you build might prevent laborious rework later.
Planning your hierarchy should be done with consideration to the space and stakeholder preferences.
Note: Groups can overlap KNets.
Not every installation needs to use nested groups, but they can be helpful in many applications.
- Use nested groups to represent zones within rooms. This includes any group that you want to be discreetly controllable at any time. Examples:
- General, task, and accent lighting in an office or study
- Lights above a media station: Putting these into a nested group enables you to control them separately from the room’s other lighting when a video or movie is playing, and to control them together with the room’s other lighting when no video or movie is playing.
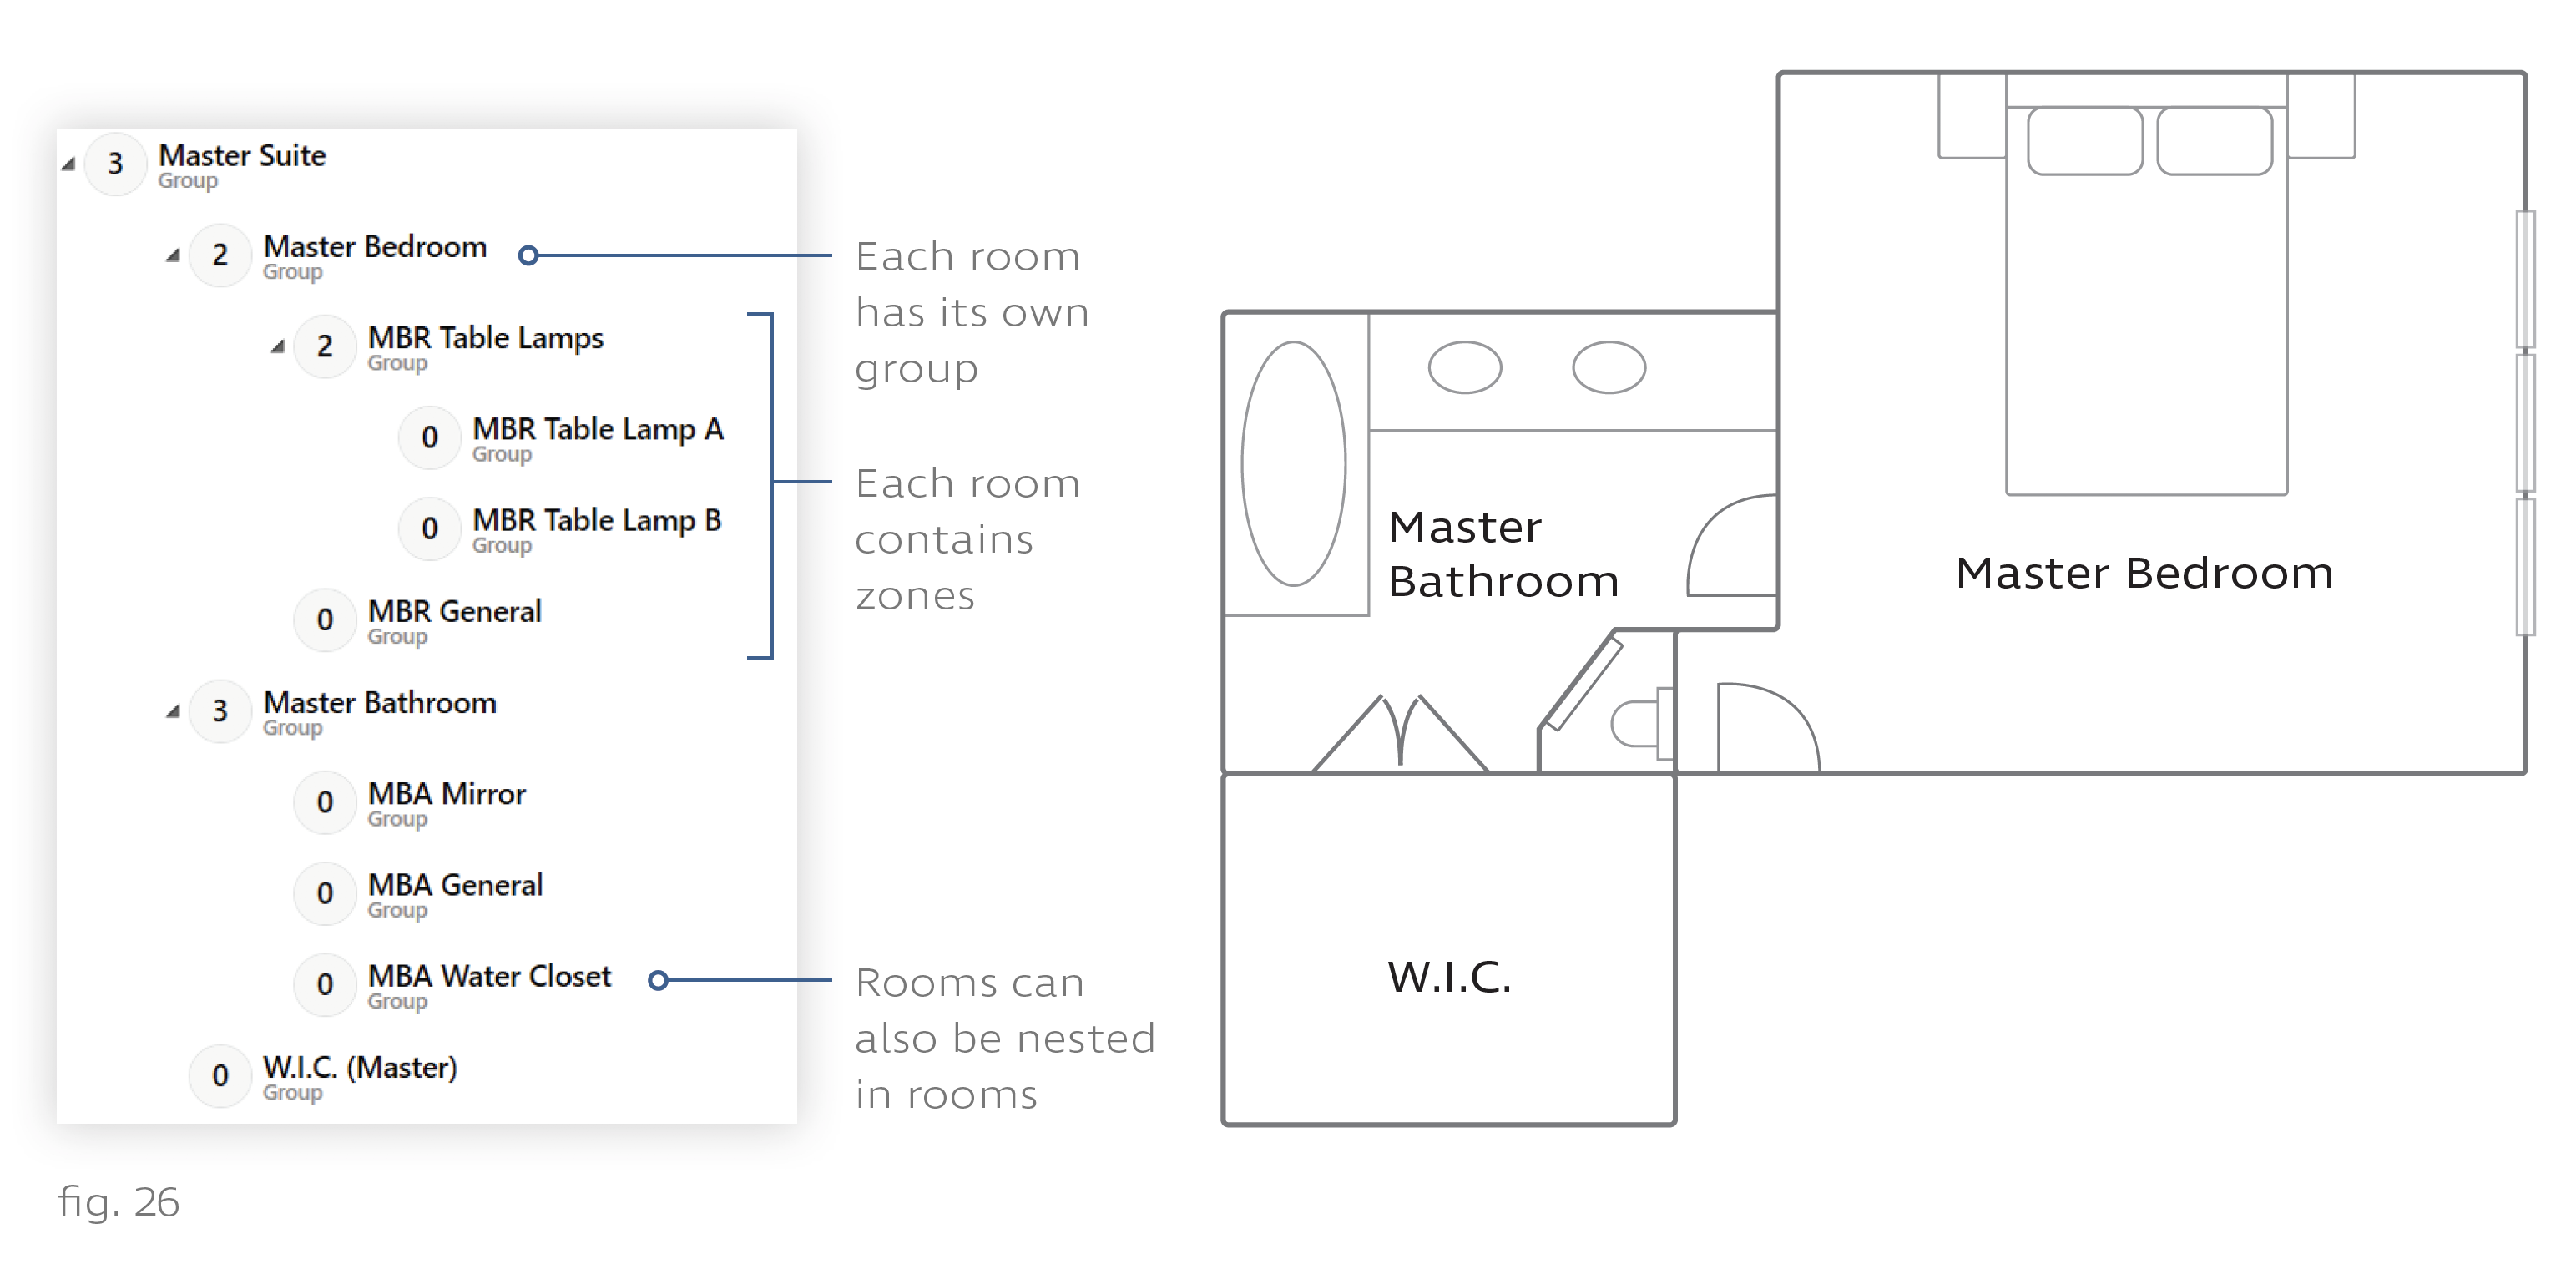
- Use nested groups to represent rooms within suites. These nested “room” groups might in turn have their own nested “zone” groups. Example:
- A Master Suite group might contain subgroups "Master BR", "Master Bath", and "WIC". In turn, "Master BR" might contain several groups for zones, as in the previous example. Since these are all nested within "Master Suite", a "Master Suite" keypad could turn the entire suite off as needed. See fig. 26.