1. In Lutron Designer, create a new project or choose an existing project.
2. Create the Area hierarchy in Lutron Designer.
i. The area tree in Lutron Designer should be similar to the grouping hierarchy in Ketra Design Studio.
ii. Create a separate area in Lutron Designer named “Whole Home” or “Residence” that does not contain children areas. Ketra groups cannot be mapped to Lutron Designer areas containing children.
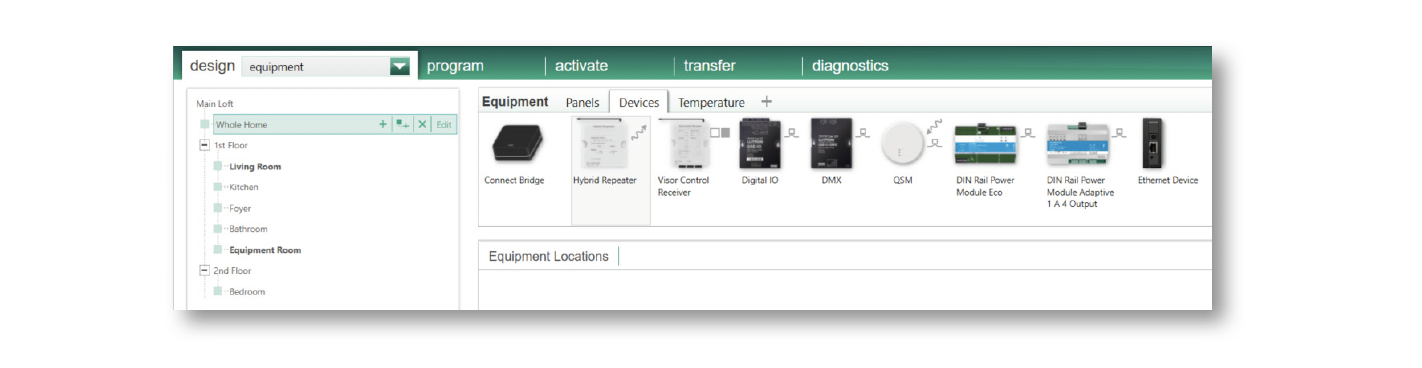
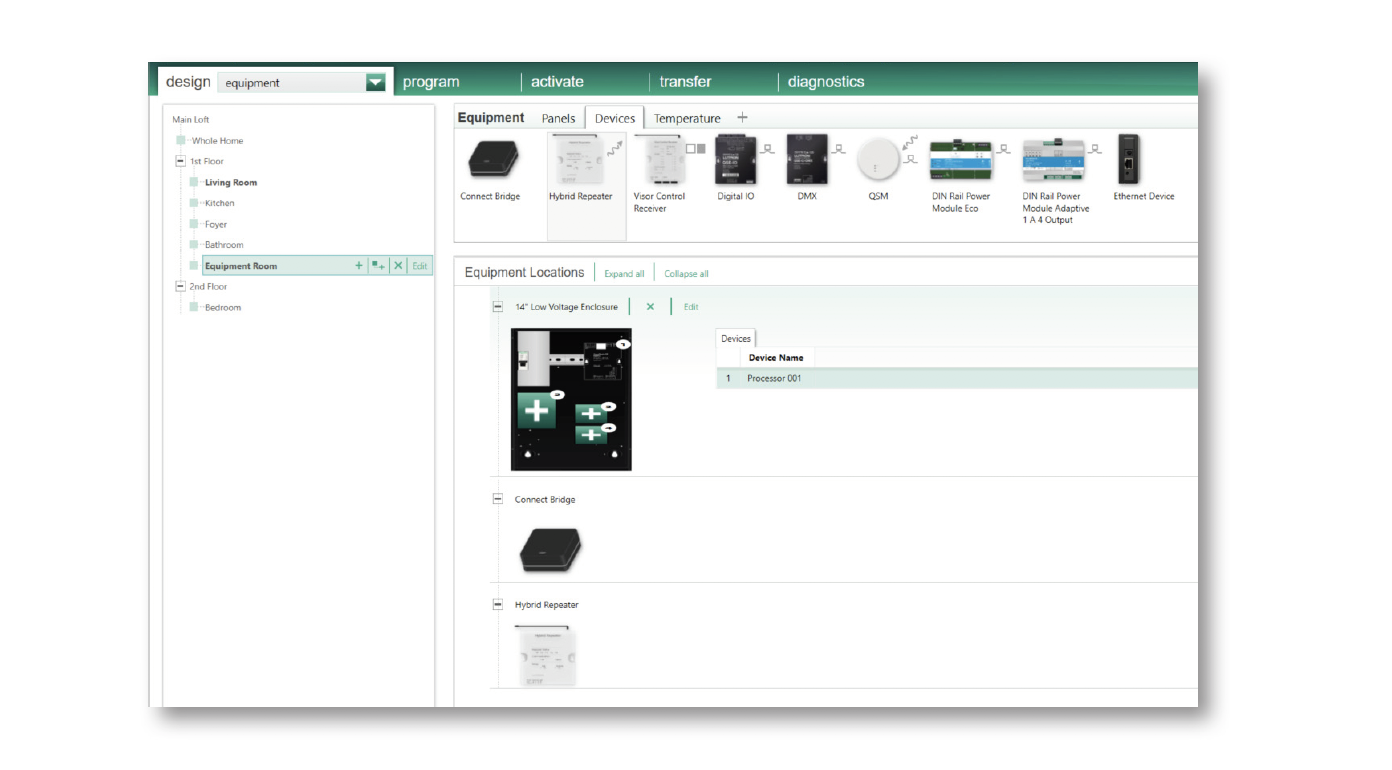
3. To add equipment, click the design tab and select equipment from the drop down menu. Examples of equipment that can be added are: panels, processors, Lutron Connect bridges, hybrid repeaters.
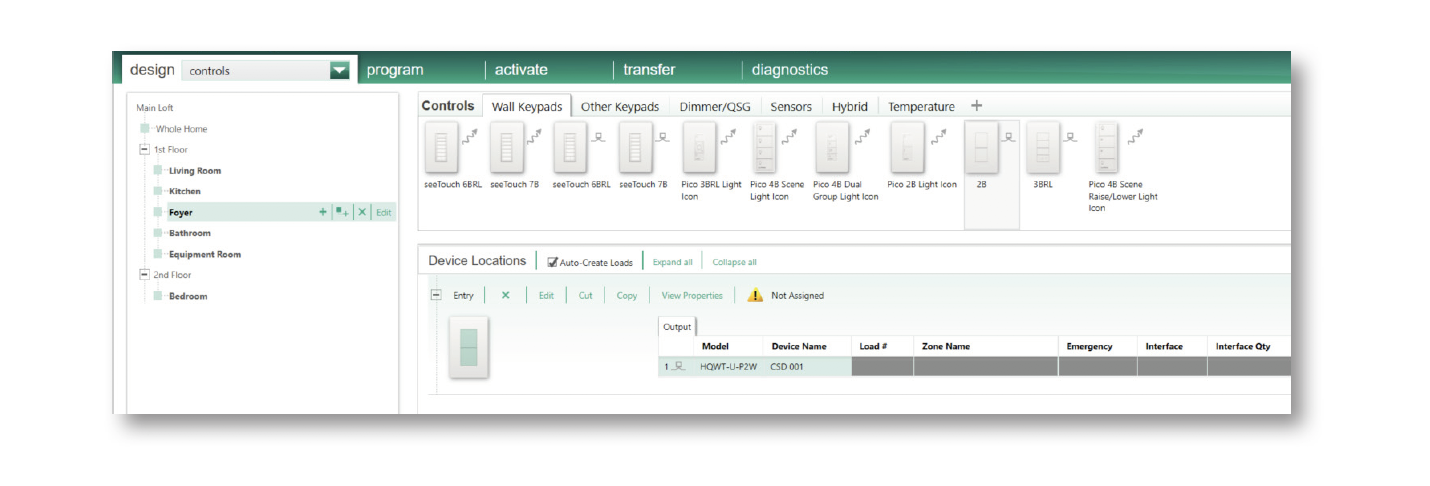
4. To add controls, click the design tab and select controls from the drop down menu. Examples of controls that can be added are: keypads, Pico wireless controls, sensors, thermostats.
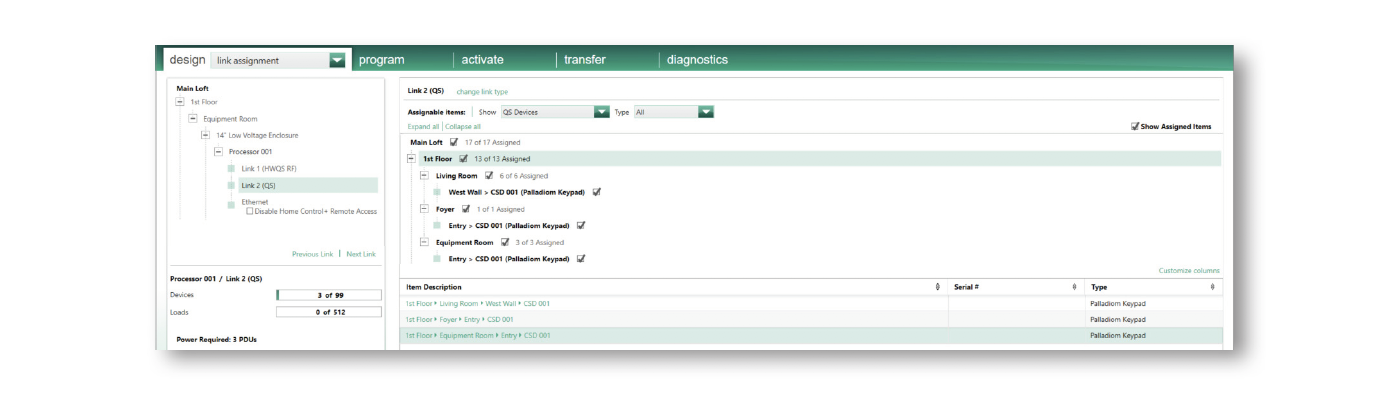
5. Click the design tab and select link assignment from the drop down menu to configure the processor links and link-assign Lutron devices.
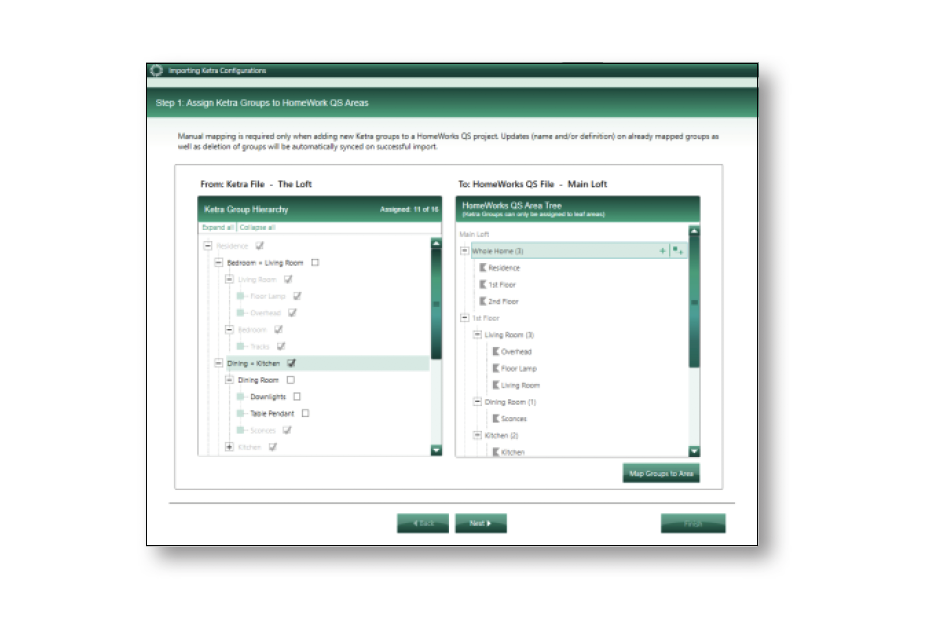
6. Import a Ketra project.
i. Click Tools and then Import Ketra Project. Select the desired Ketra installation.
ii. Map Ketra groups to Lutron Designer areas. Assign residence and floor level Ketra groups to a Lutron Designer area. In the example below, a Lutron Designer area (without children) was previously created and named "Whole Home". Control Groups that include multiple rooms (example: Dining Room + Kitchen) can also be mapped to this Whole Home area.
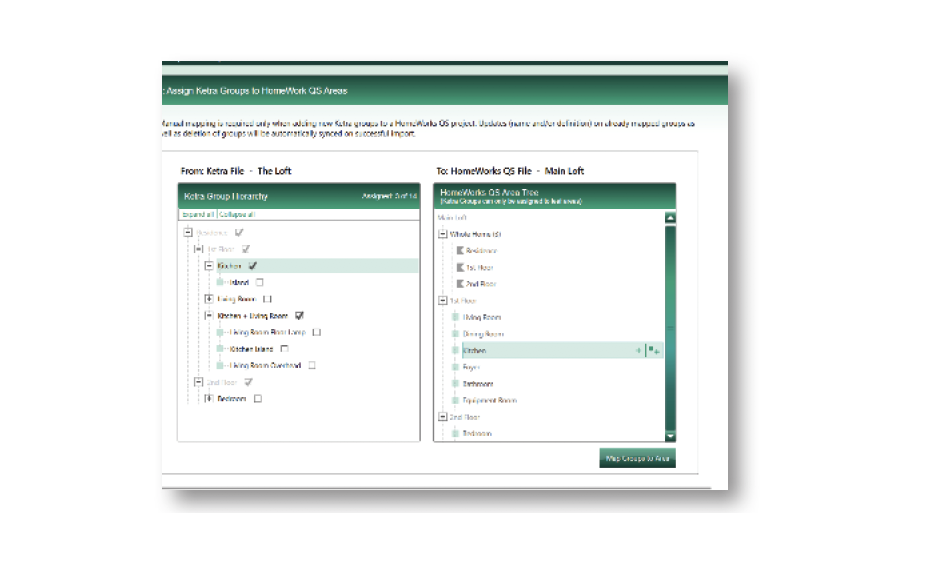
iii. Map parent level Ketra groups to Lutron Designer areas. This allows a HomeWorks QS system to trigger a scene or show at the room level. This group will show under Assignable Items in Lutron designer but it will not show in the Lutron Connect app.
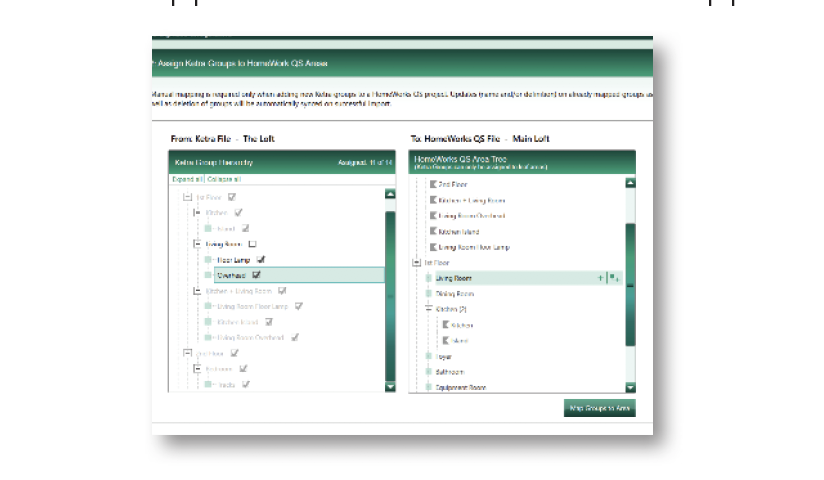
iv. Map child level (lowest level) Ketra groups to Lutron Designer areas. These groups will appear in the Lutron Connect app as zones.
v. Review report.
7. Program a Ketra Project.
Now that a Ketra project has been imported, the Ketra groups, scenes, and shows will be available for selection during programming.
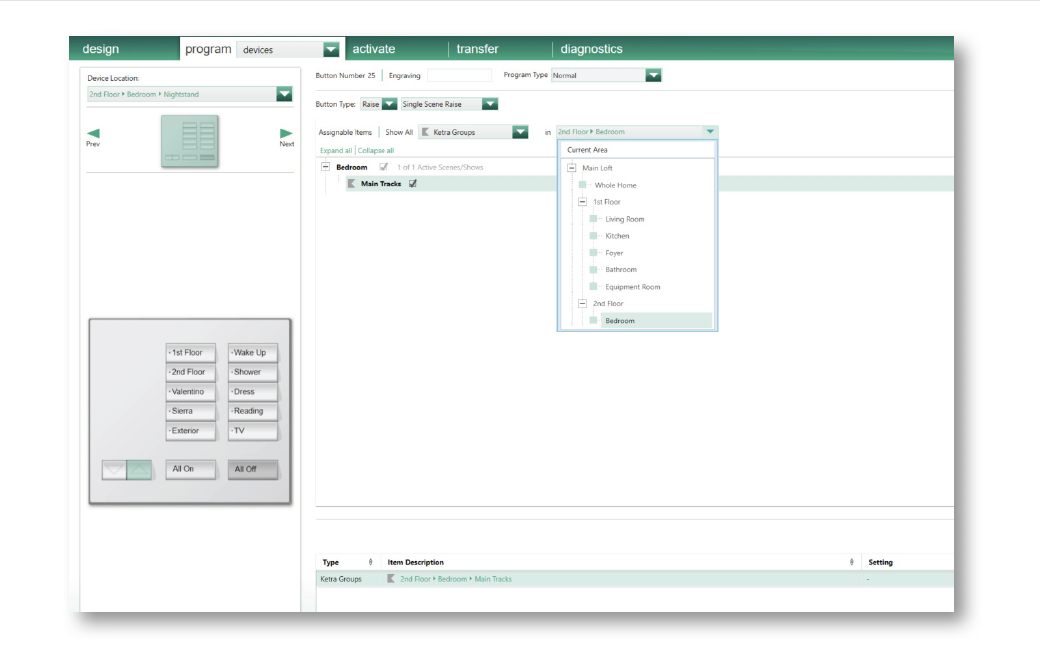
i. Single action buttons
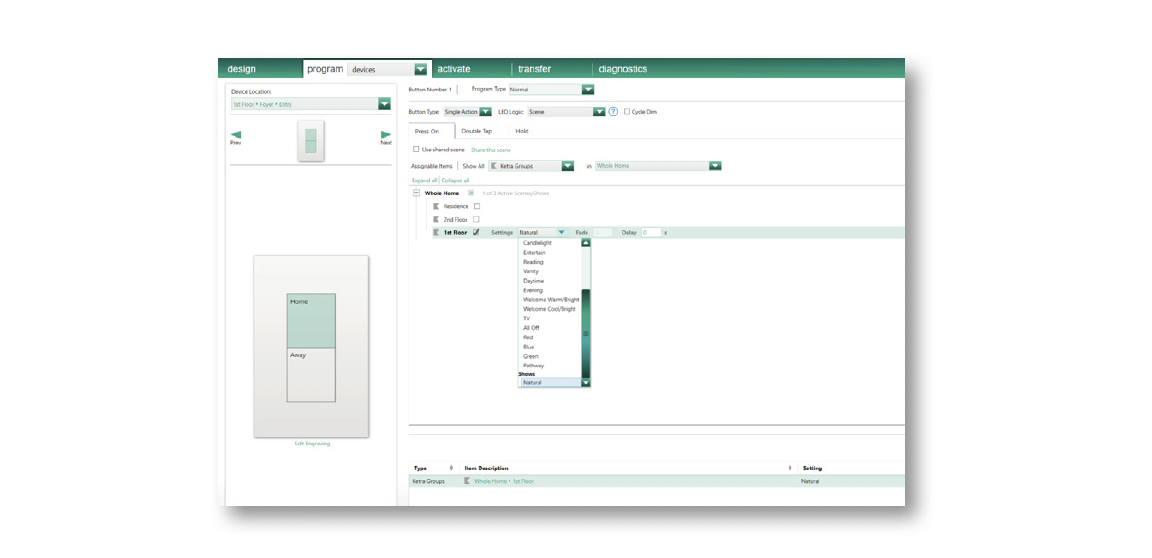
a. Clock the program tab and select devices from the drop down menu. In the Assignable Items drop down menu, select Ketra Groups.
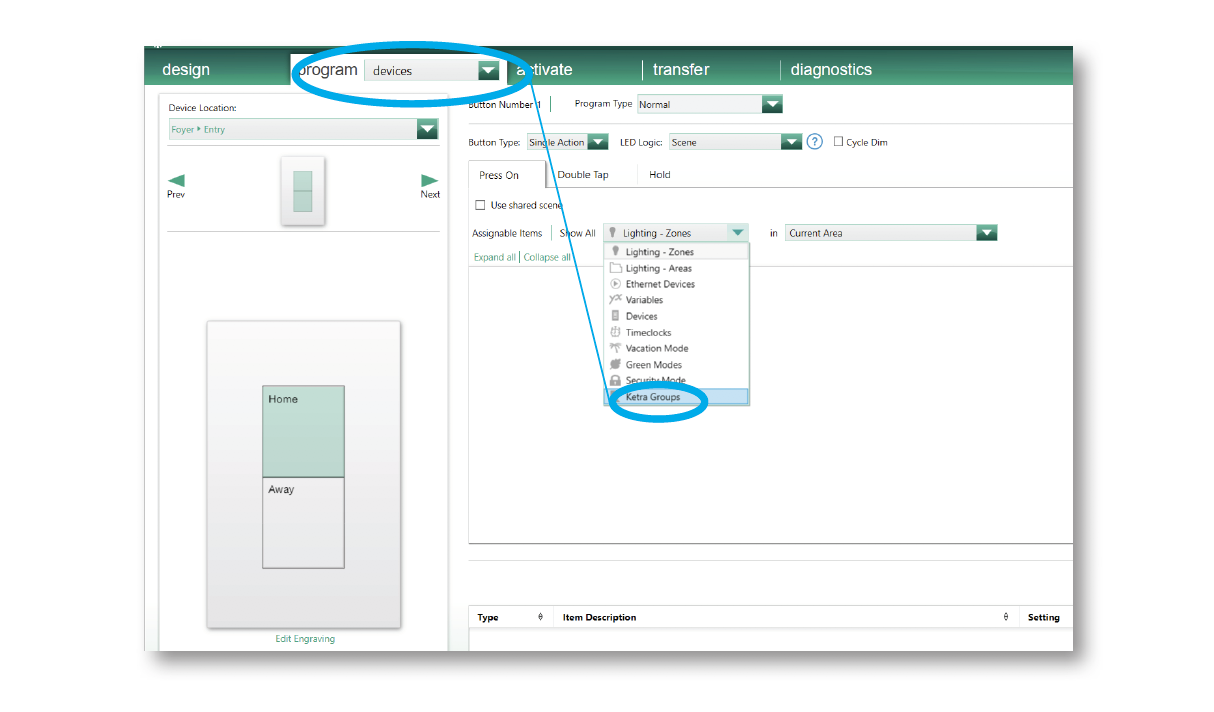
b. Select a Ketra scene or show at the desired group level. In the example below, the Natural Show will only affect Ketra groups included in the 1st Floor group.
Note: Only one Ketra scene or show can be recalled at a time from a single HomeWorks QS button press or input action.
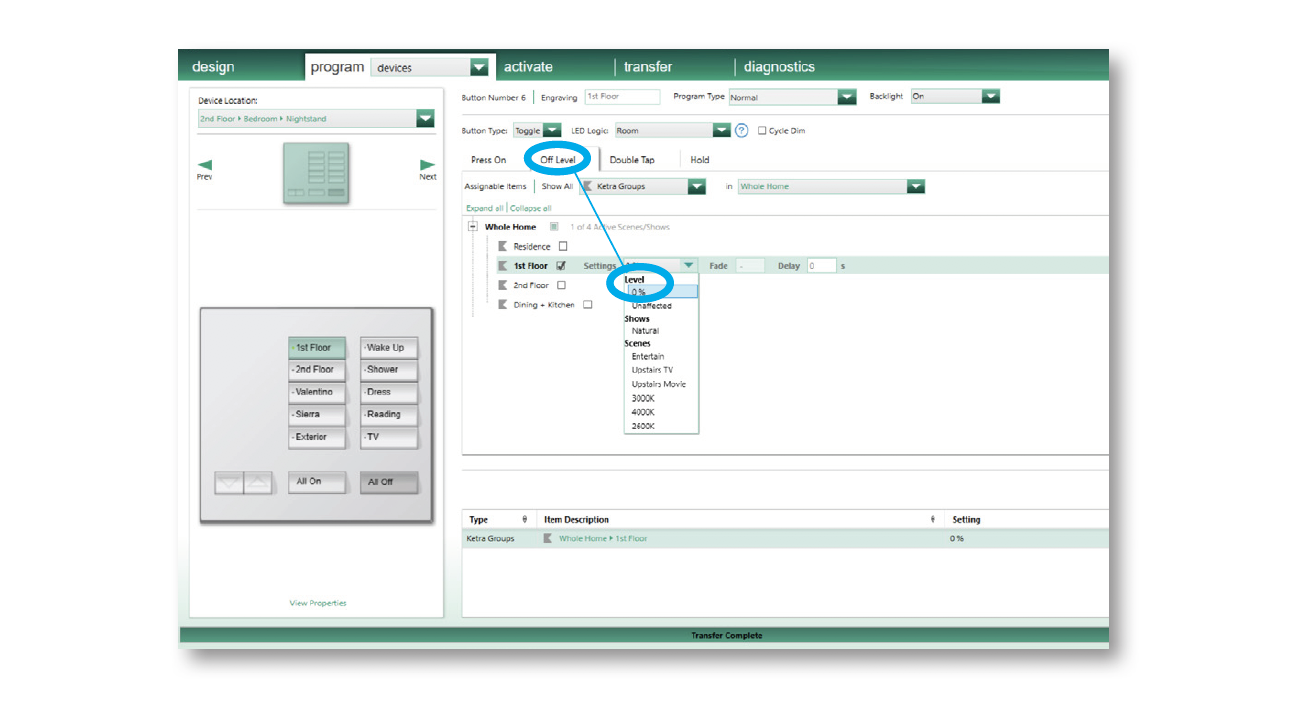
i. Toggle buttons
a. Click the program tab and select devices from the drop down menu. In the Assignable Items drop down menu, select Ketra Groups.
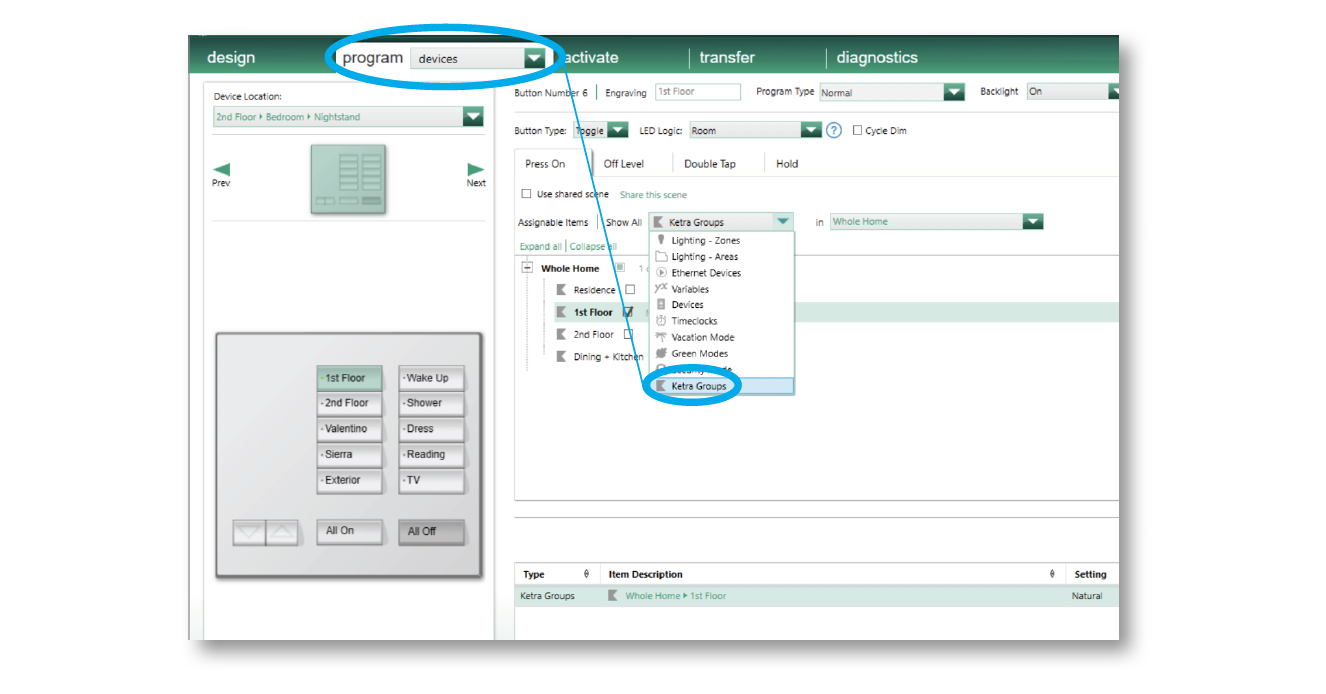
b. On the Press On tab, select a Ketra scene or show.
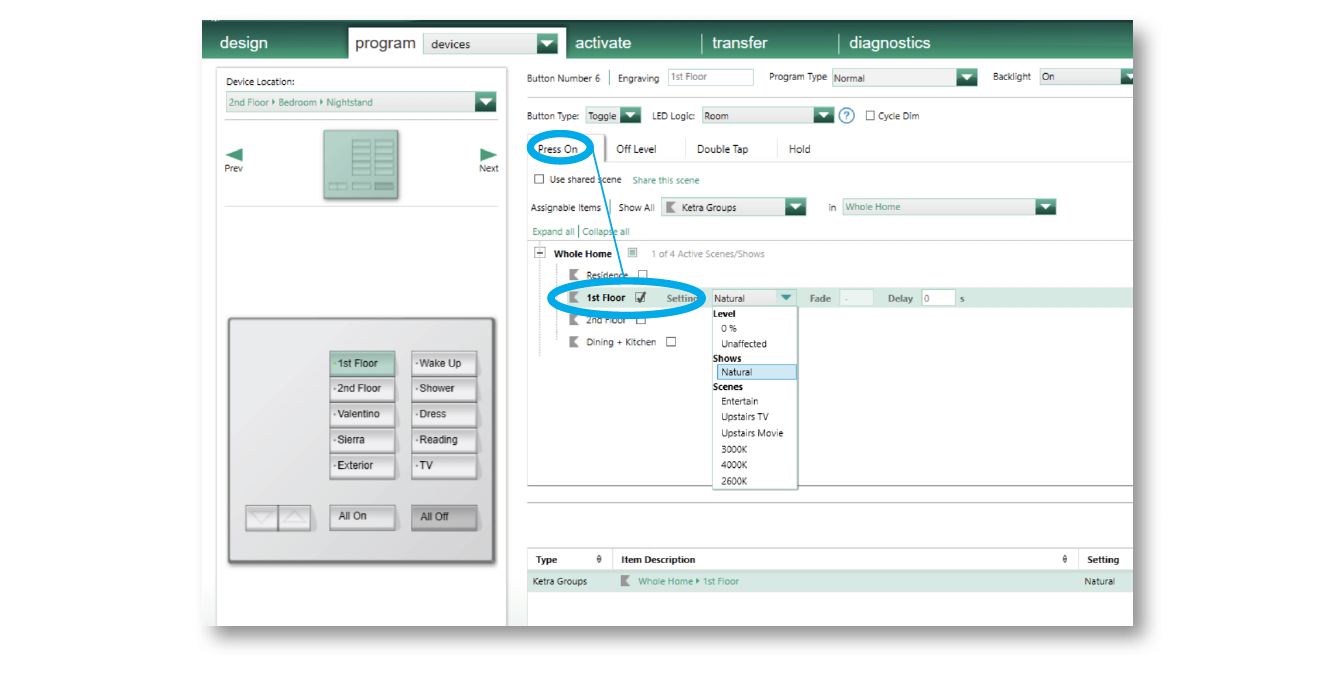
c. On the Off Level tab, select 0% level for the Ketra group.
Note: A scene or show can also be selected for the Off Level if a level other than 0% is desired.
iii. Raise or lower buttons
a. Master raise or lower buttons will affect all lights assigned to the last button pressed on the keypad. This includes Lutron lighting zones and Ketra groups.
b. Single Scene Raise/Lower buttons allows a single Ketra group (and multiple Lutron lighting zones) to be affected by the raise or lower button, regardless of the last button pressed on the keypad.
Note: Only one Ketra group can be affected from a Single Scene Raise/Lower button. To raise or lower more than one group at a time, raise/lower a higher group in the hierarchy or use Master Raise/Lower buttons.