Users can build scenes using two methods: Tree View and Template View. Different use cases call for one method or the other.
Note: Tree View is the default method; users can access Template View by clicking Swap to Template View.
Tree View
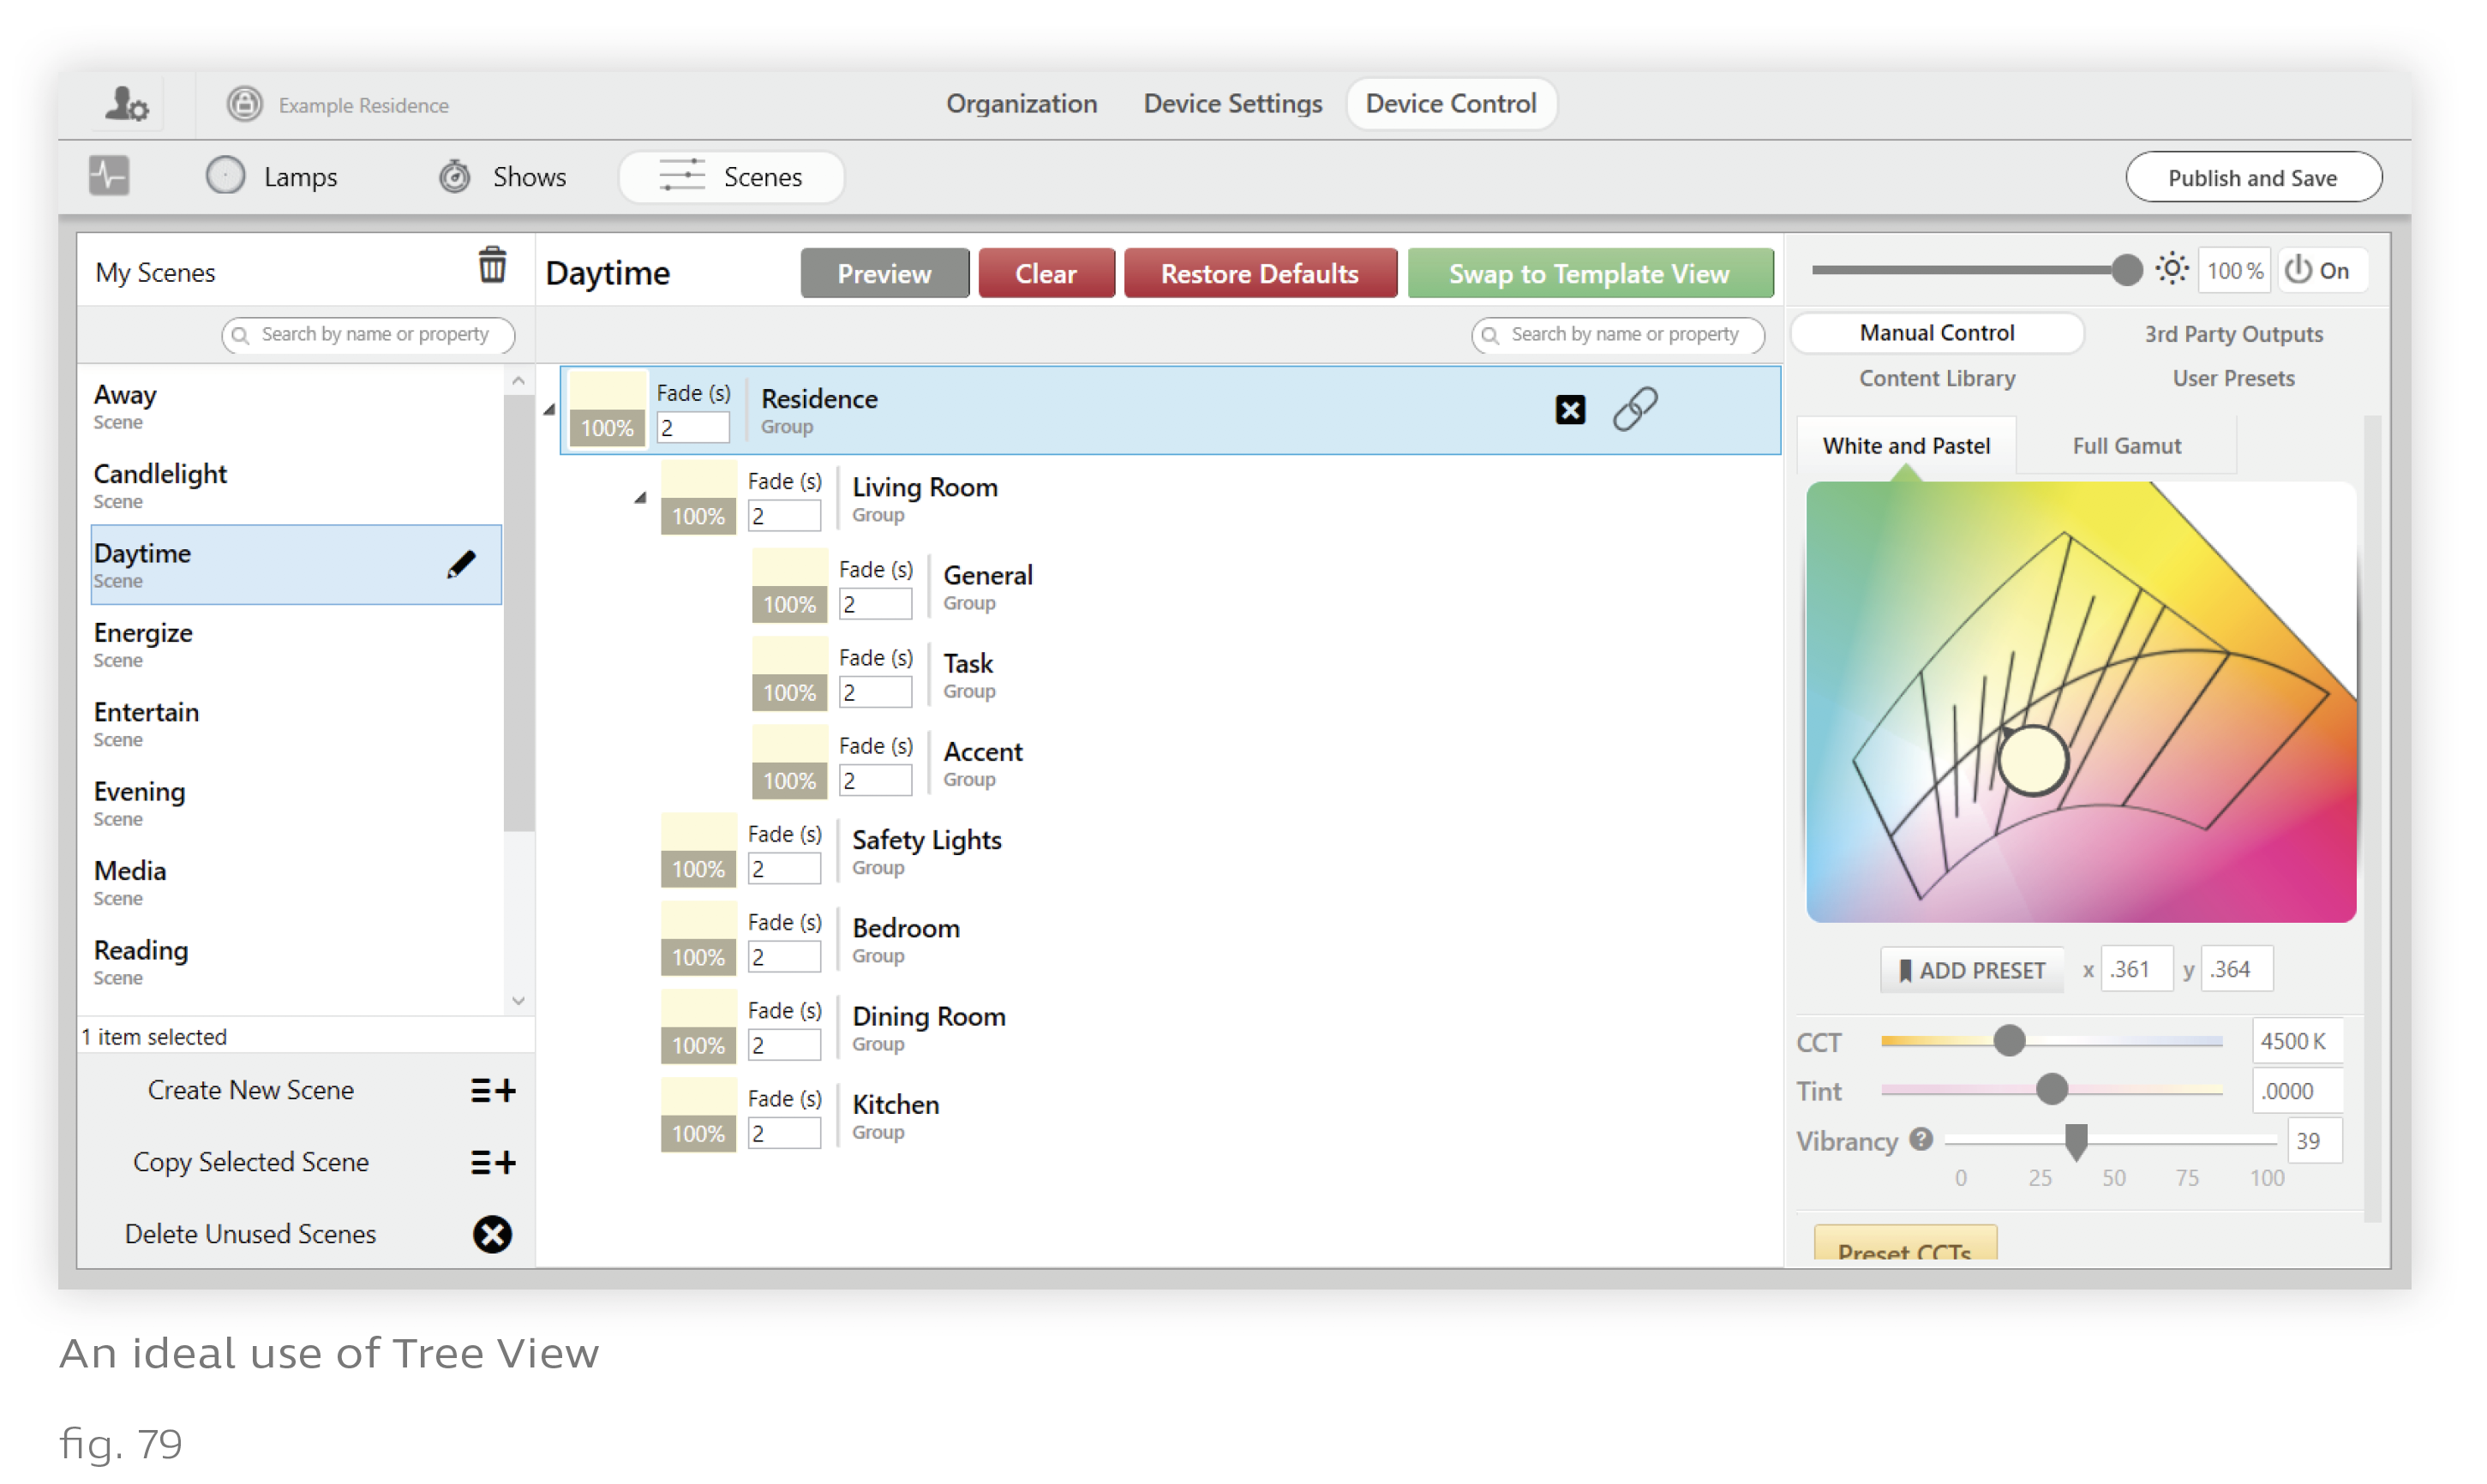
Tree View replicates the grouping hierarchy, or tree, from the Organization tab. It is ideal for building scenes that apply the same content to entire branches of the tree—i.e., to groups and subgroups.
An effective use of Tree View might look like the curated Daytime scene. This scene has one color setting that applies to all groups. Since its content applies globally, whichever keypad it is assigned to will play that setting on its groups and subgroups.
To create and configure a scene using tree view, follow these steps:
1. Navigate to Device Control > Scenes.
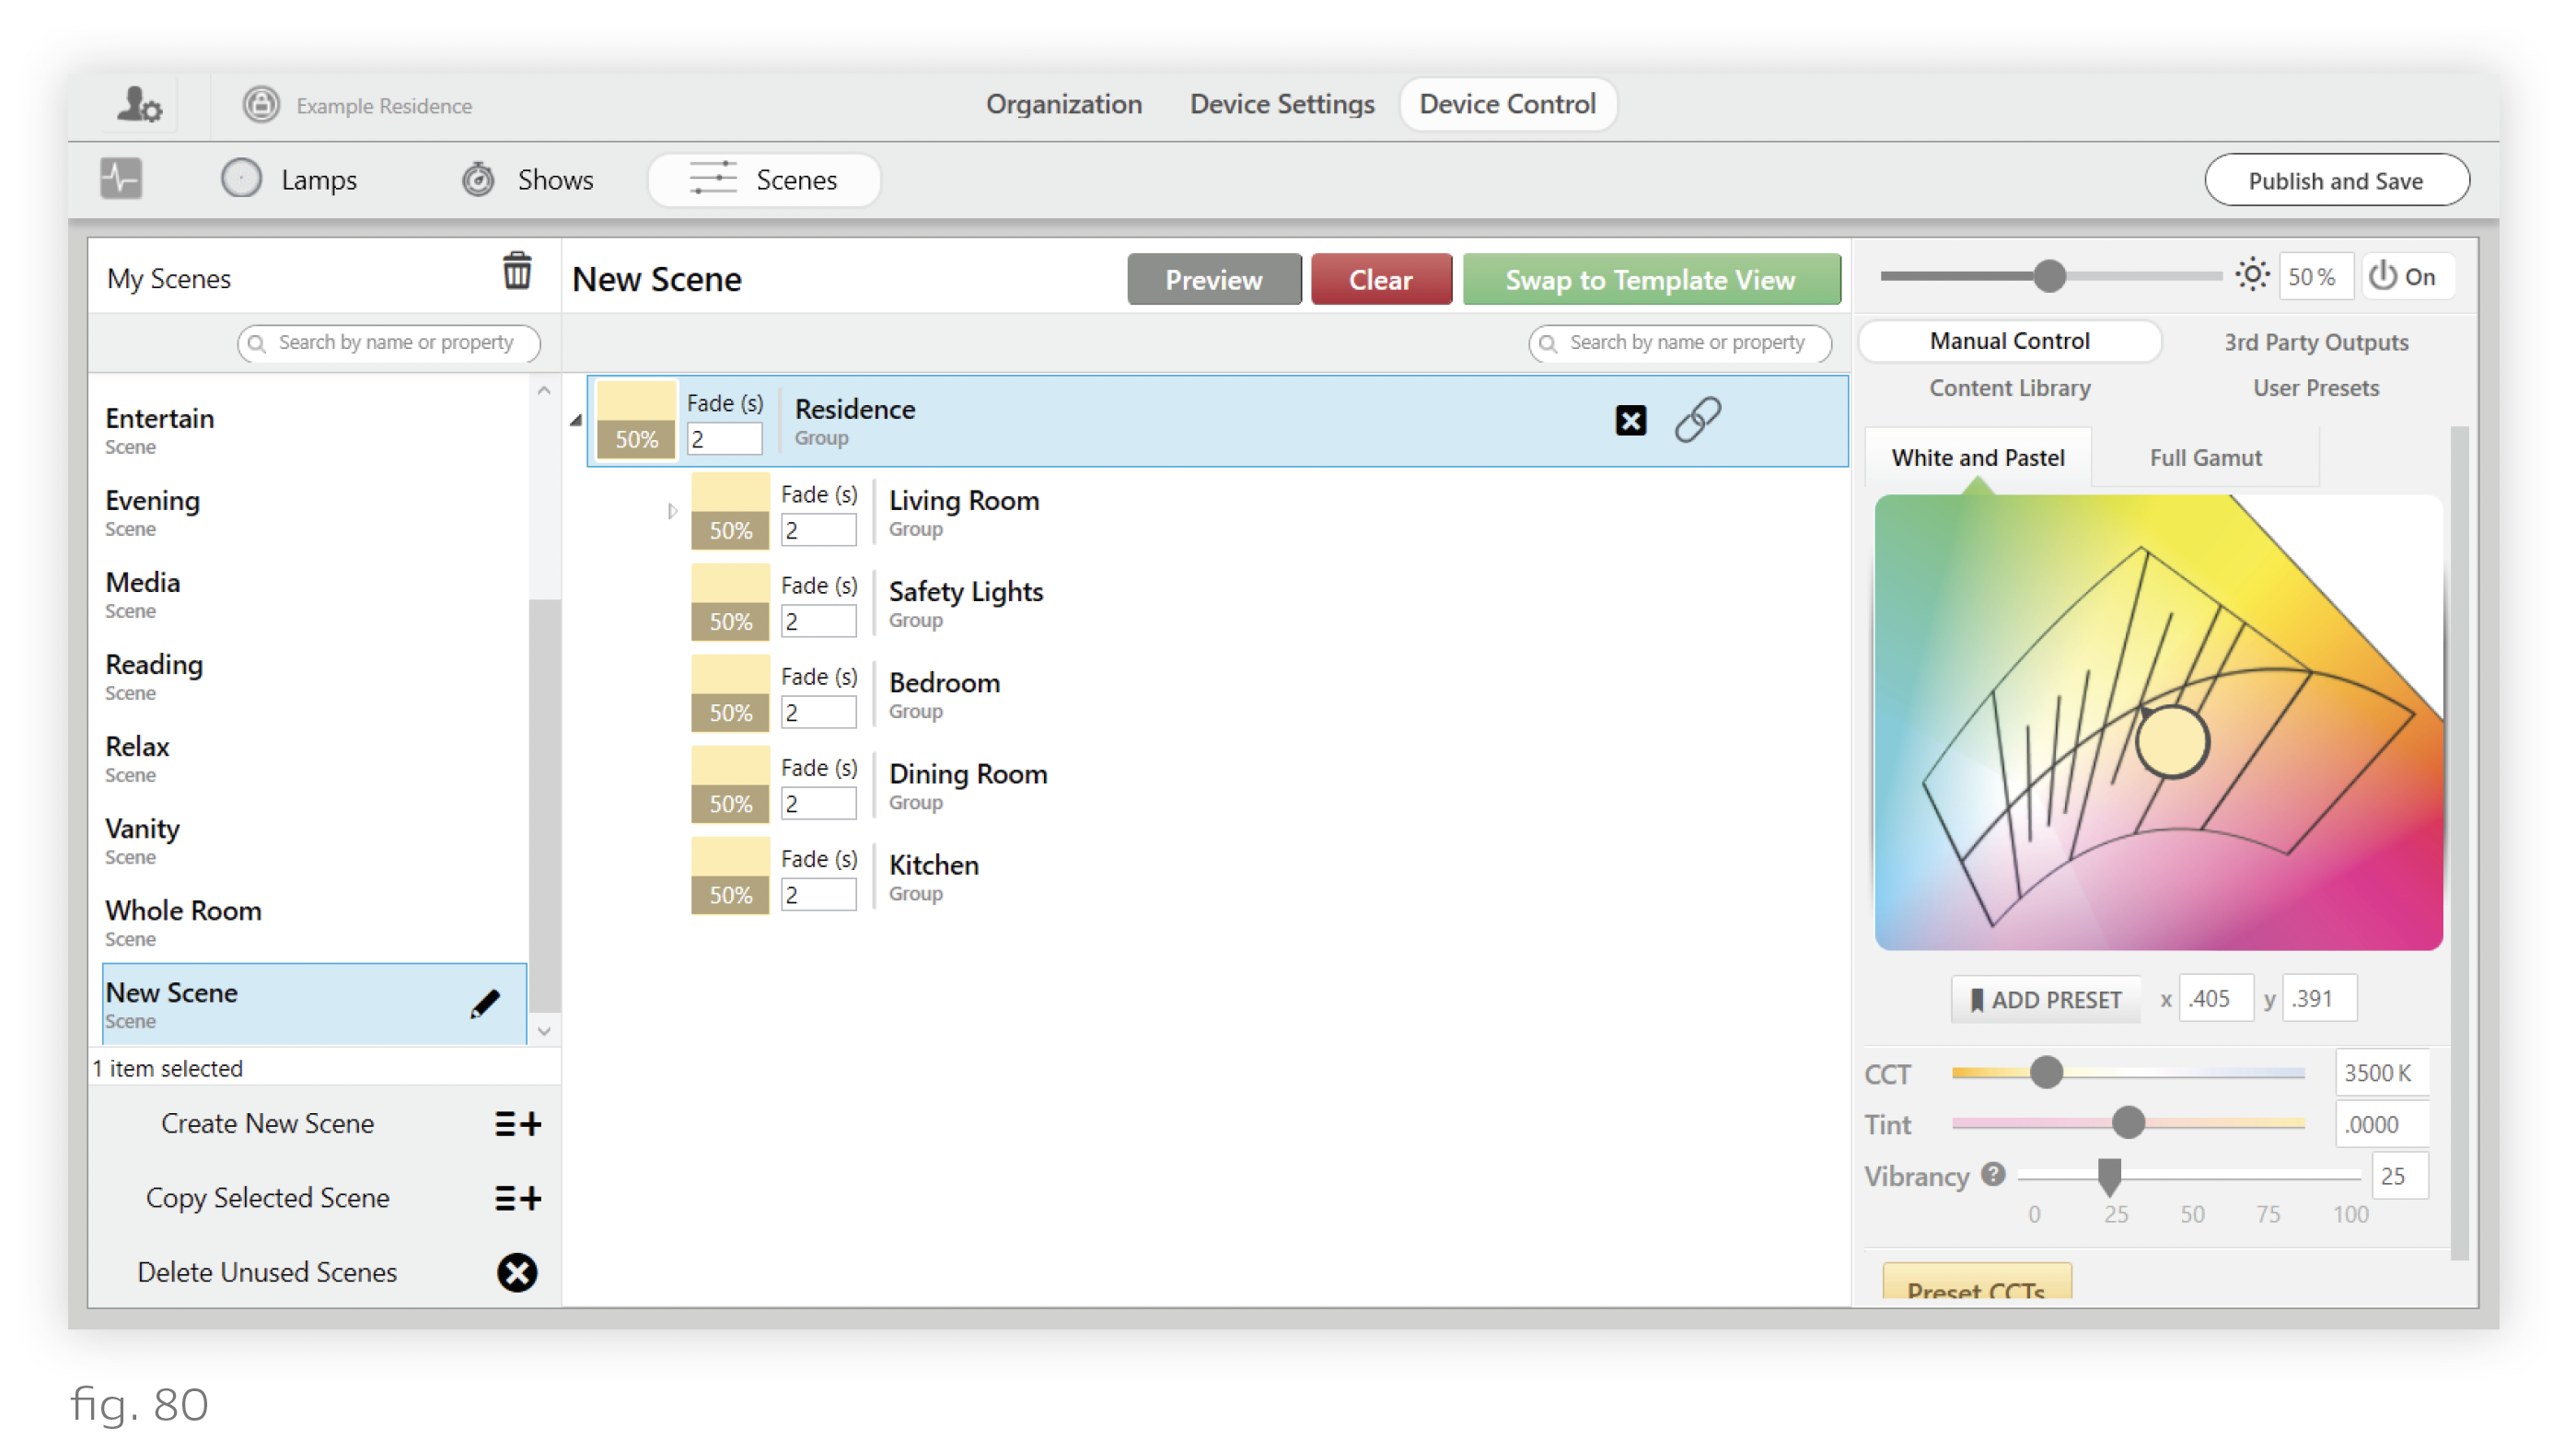
2. Click the Create New Scene button.
3. Set the highest-level group in the installation to the desired color and intensity setting. This causes everything lower in the hierarchy to change as well.
Note: When you assign the scene to the keypad, it will only play on the subset of the grouping hierarchy that the keypad has access to.
Note: NA can be toggled on or off by clicking the X button. NA groups do not change content when the scene is triggered. However, they do respond to brightness controls when the scene is active and turn off when the scene is deactivated. To truly exclude a group from a scene such that it does not respond in any way to a trigger, you need to uncheck the group when assigning the scene.
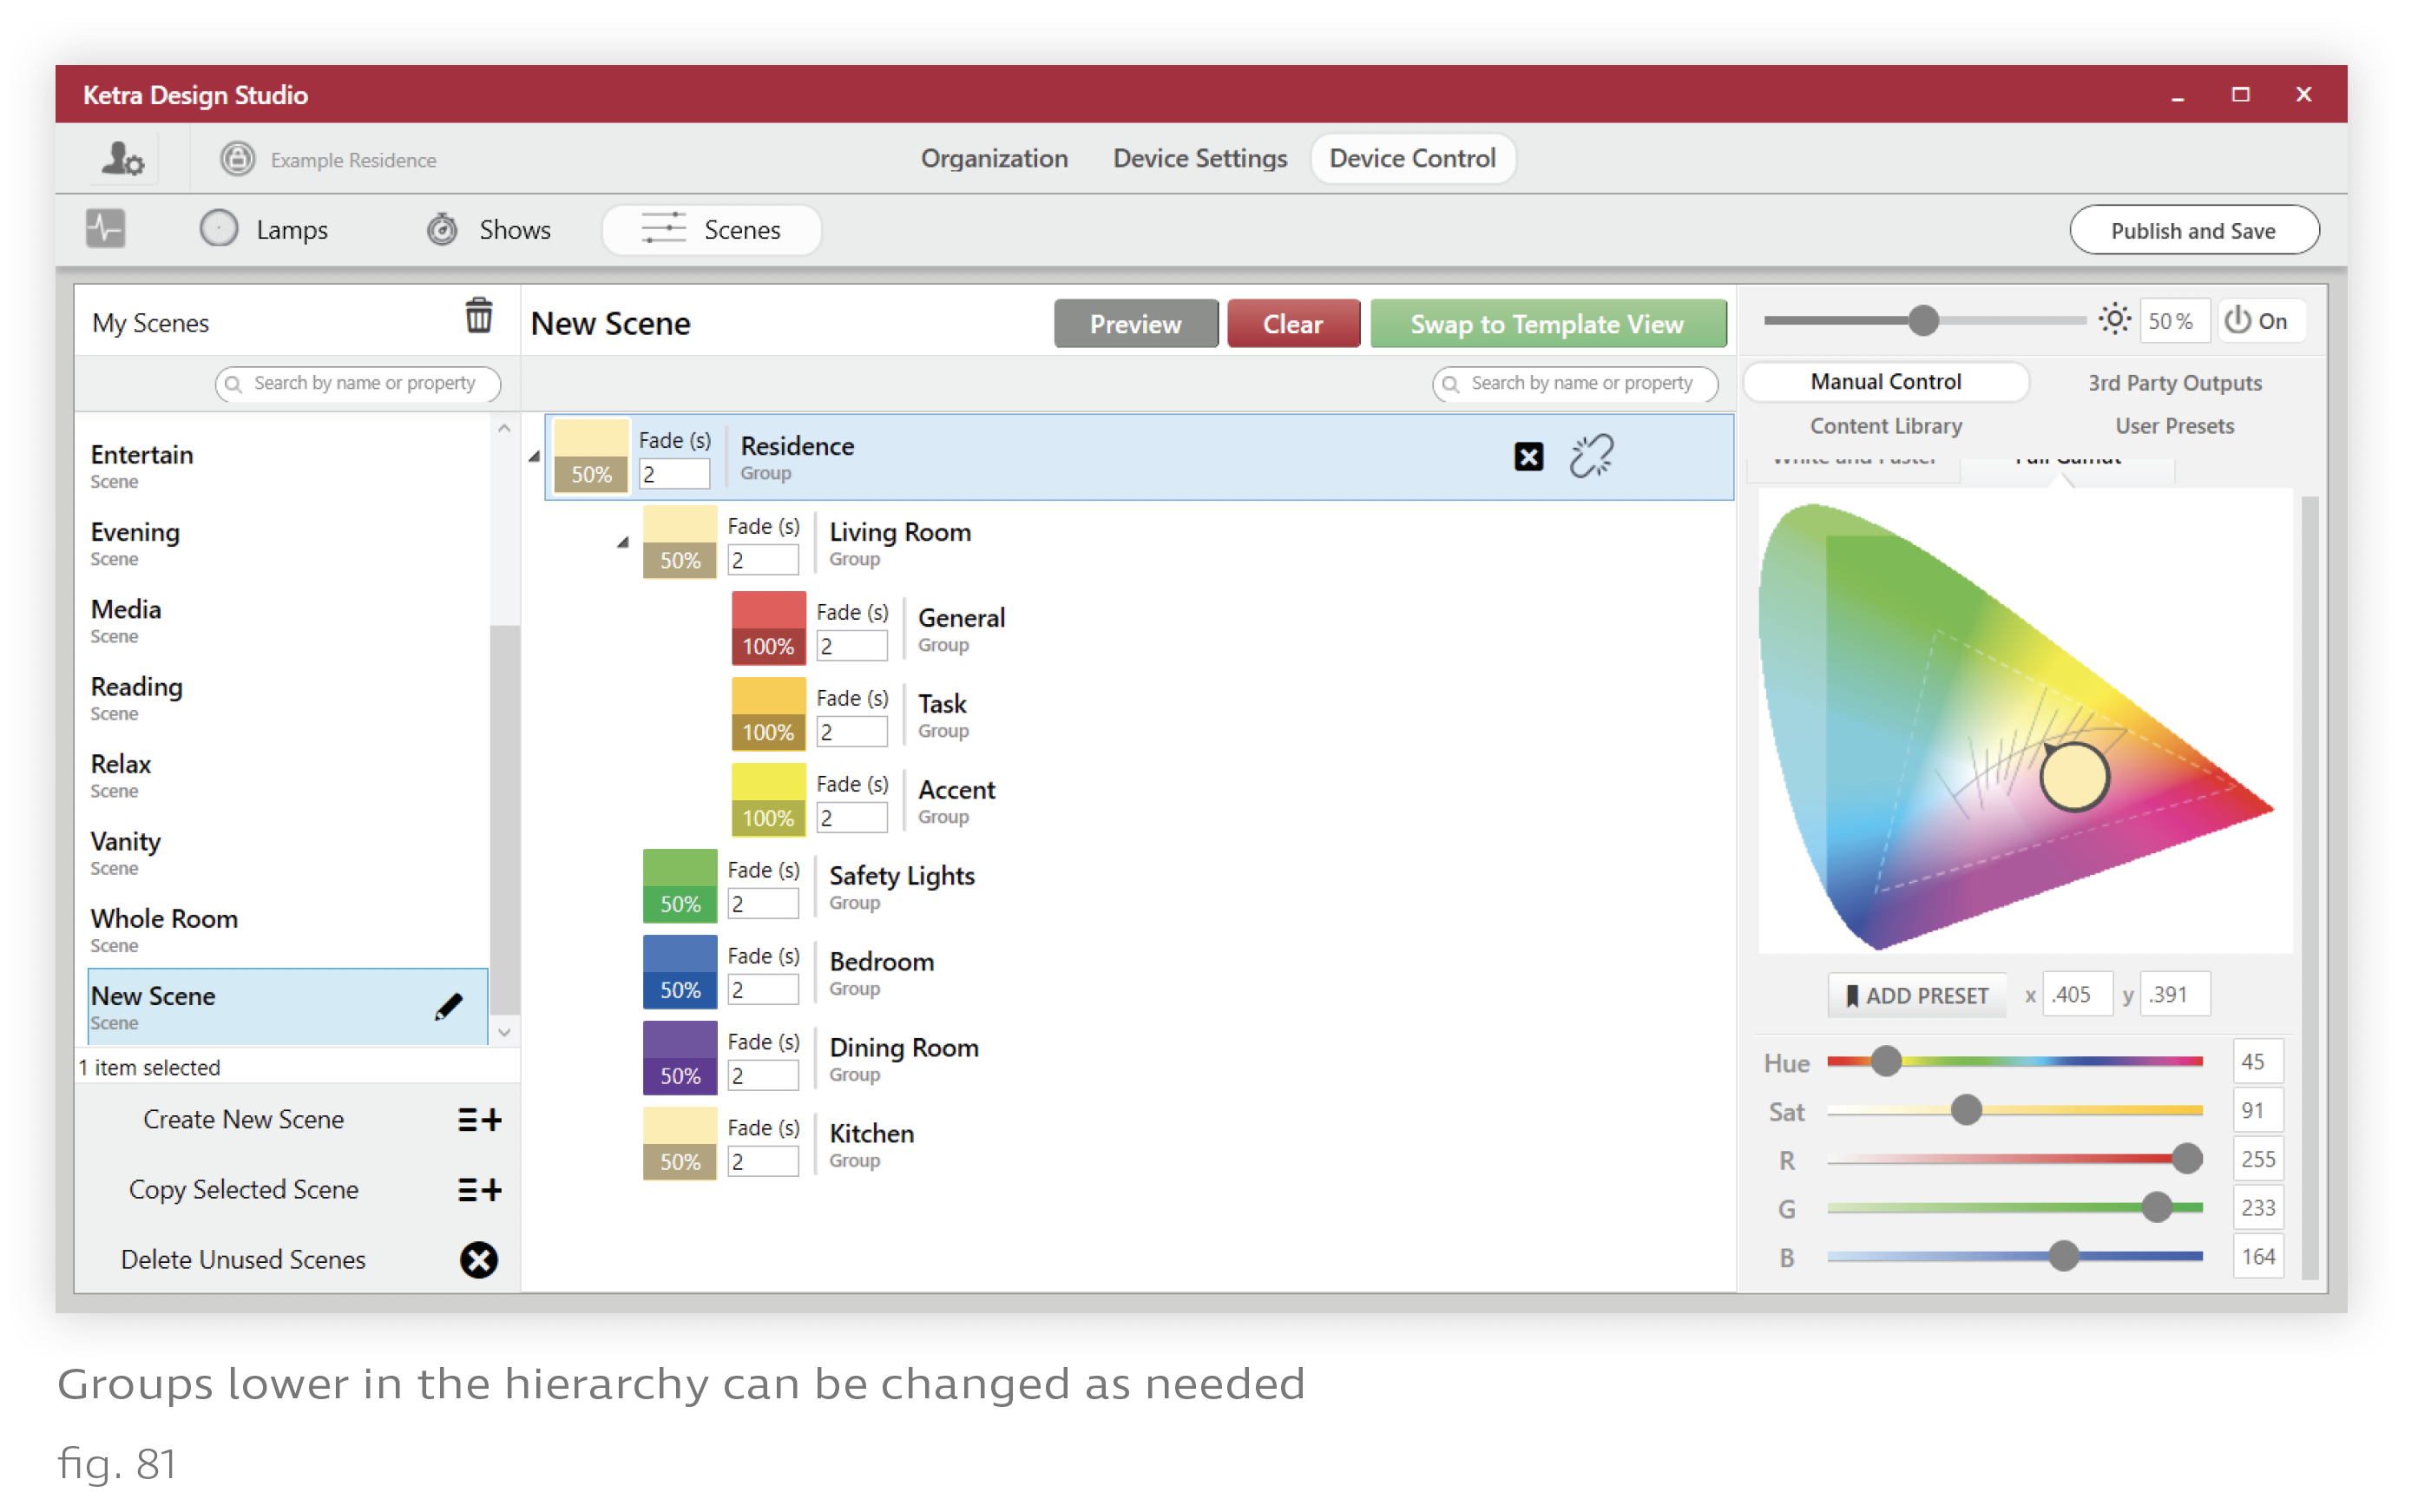
4. Optional: Make adjustments as needed to the lower levels in the hierarchy.
Template View
Template View lets the user vary content based on groups’ descriptors. It is ideal for building scenes that apply distinct color settings at different points in the hierarchy.
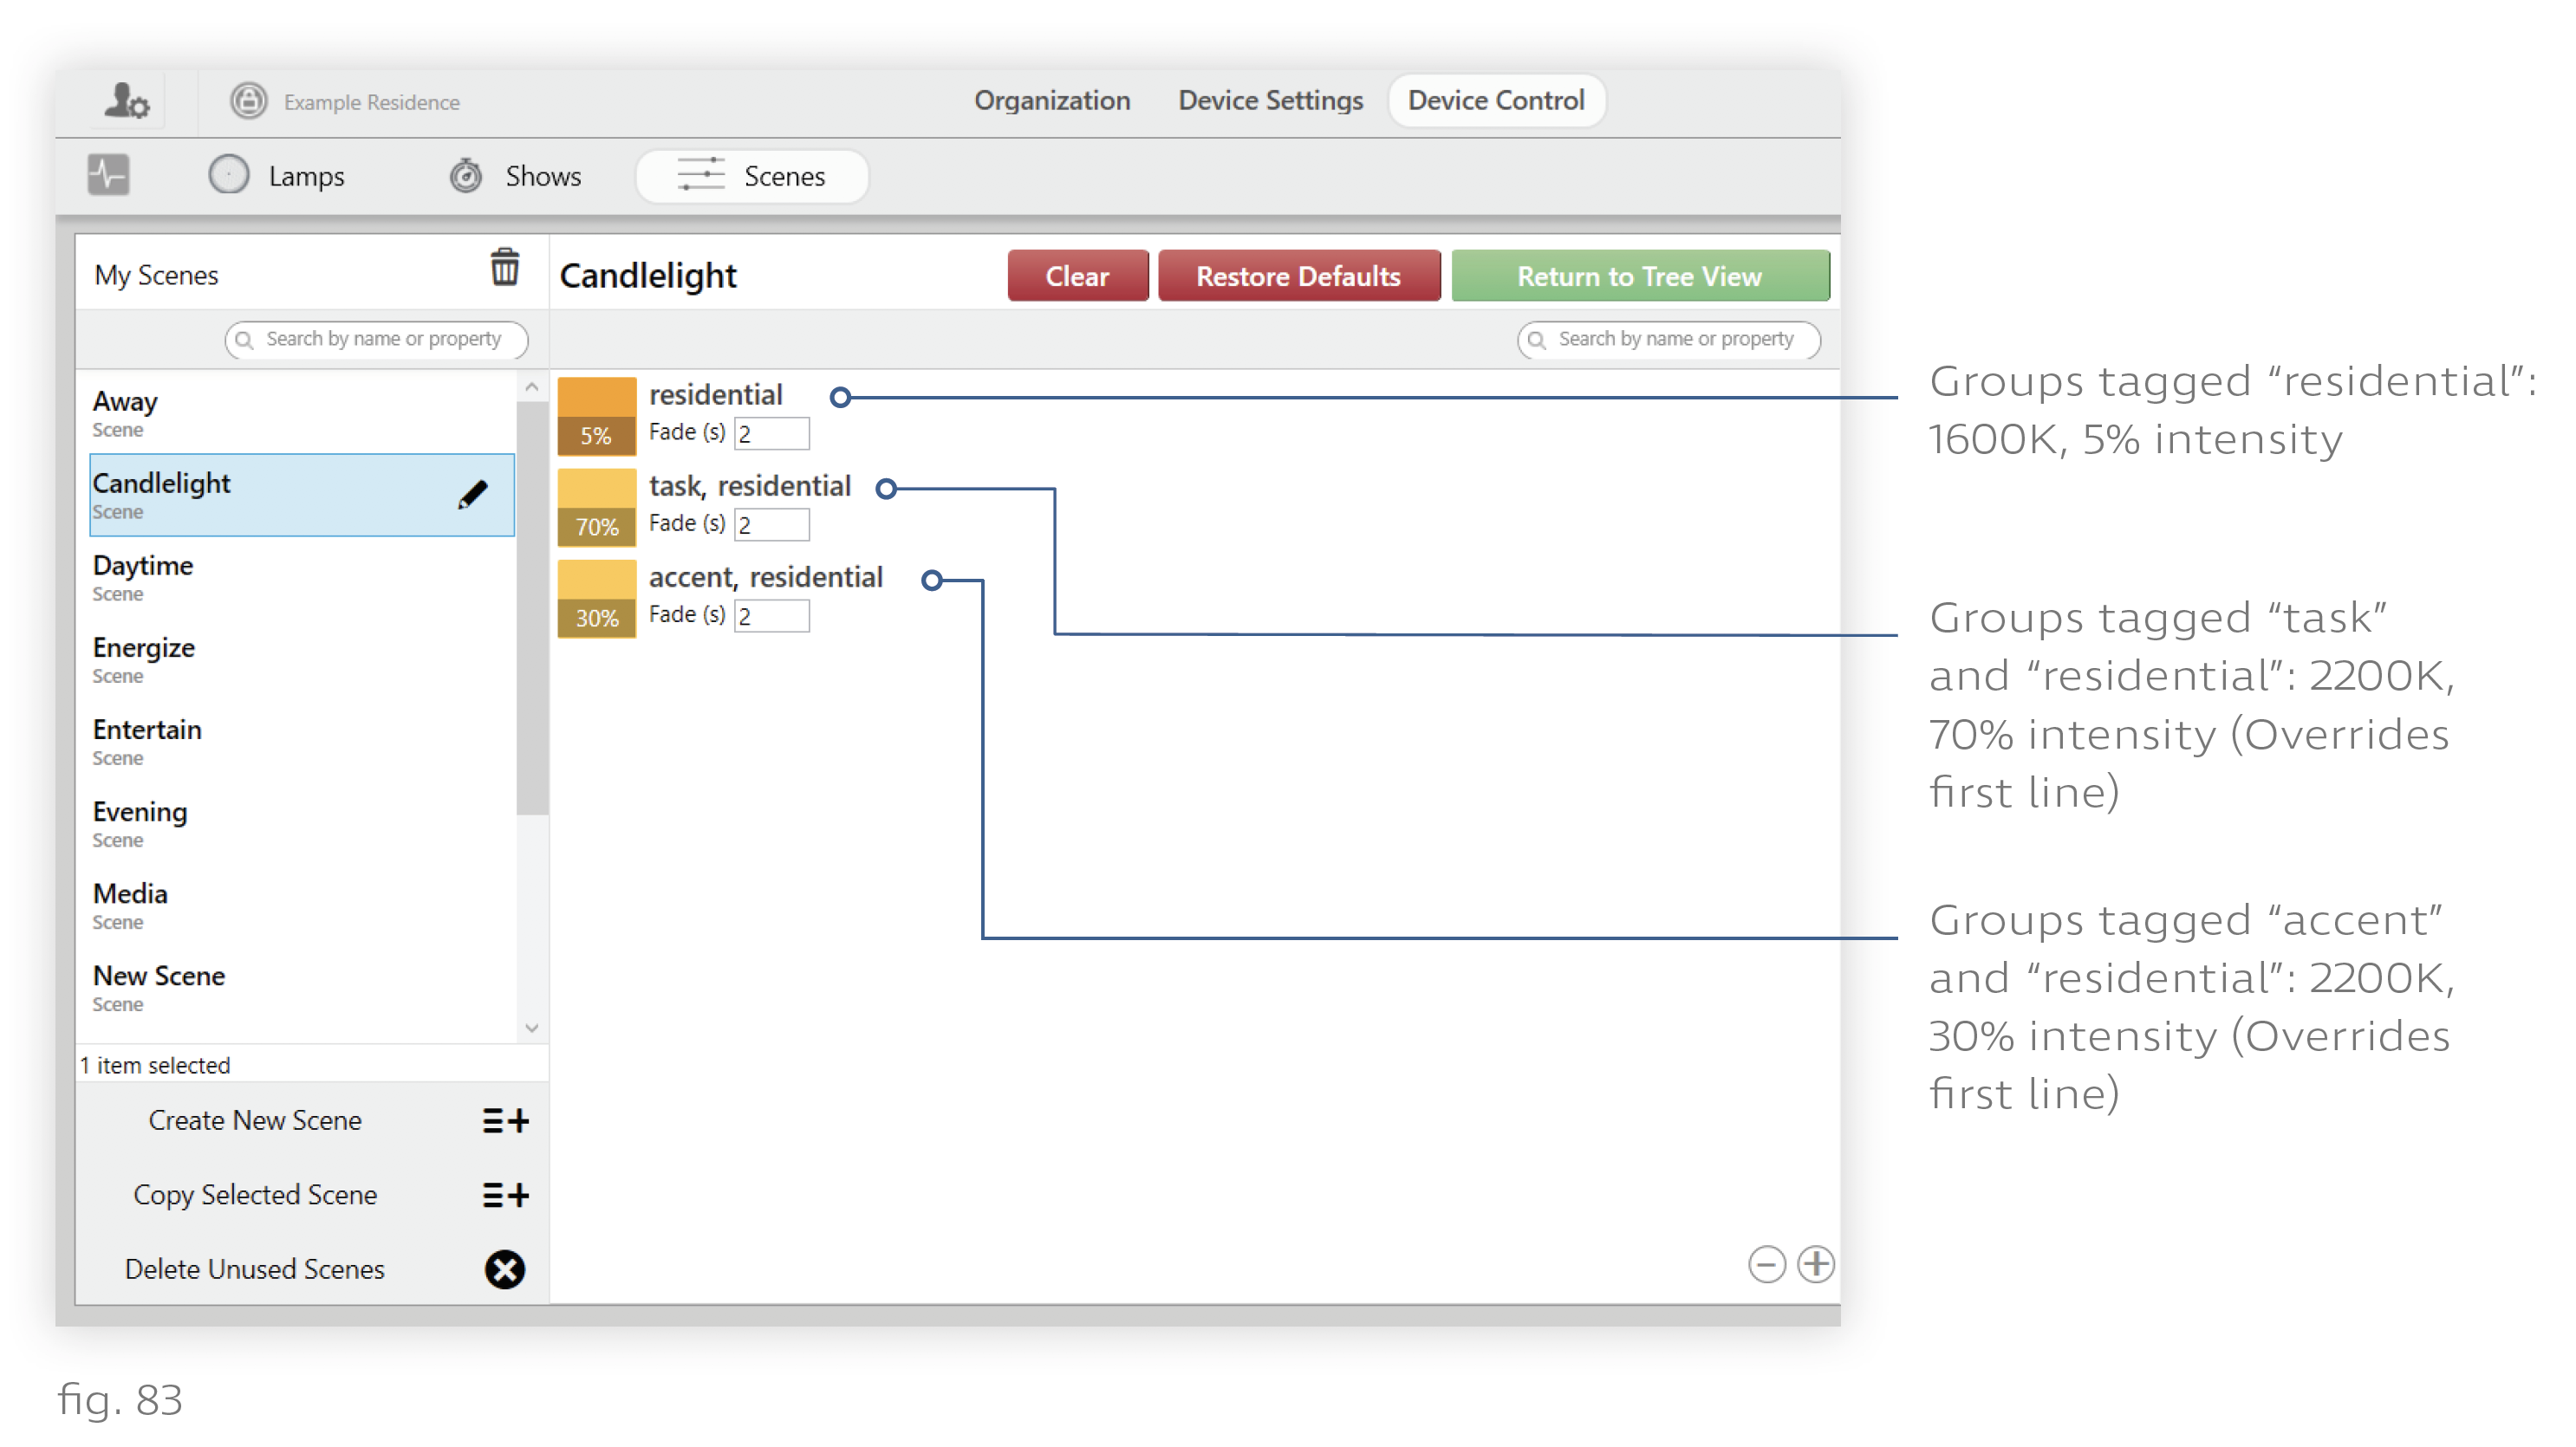
An effective use of Template View might look like the curated Candlelight scene. All the "Task" groups have one kind of content, all the "Accent" groups have another kind, and everything else has a third kind.
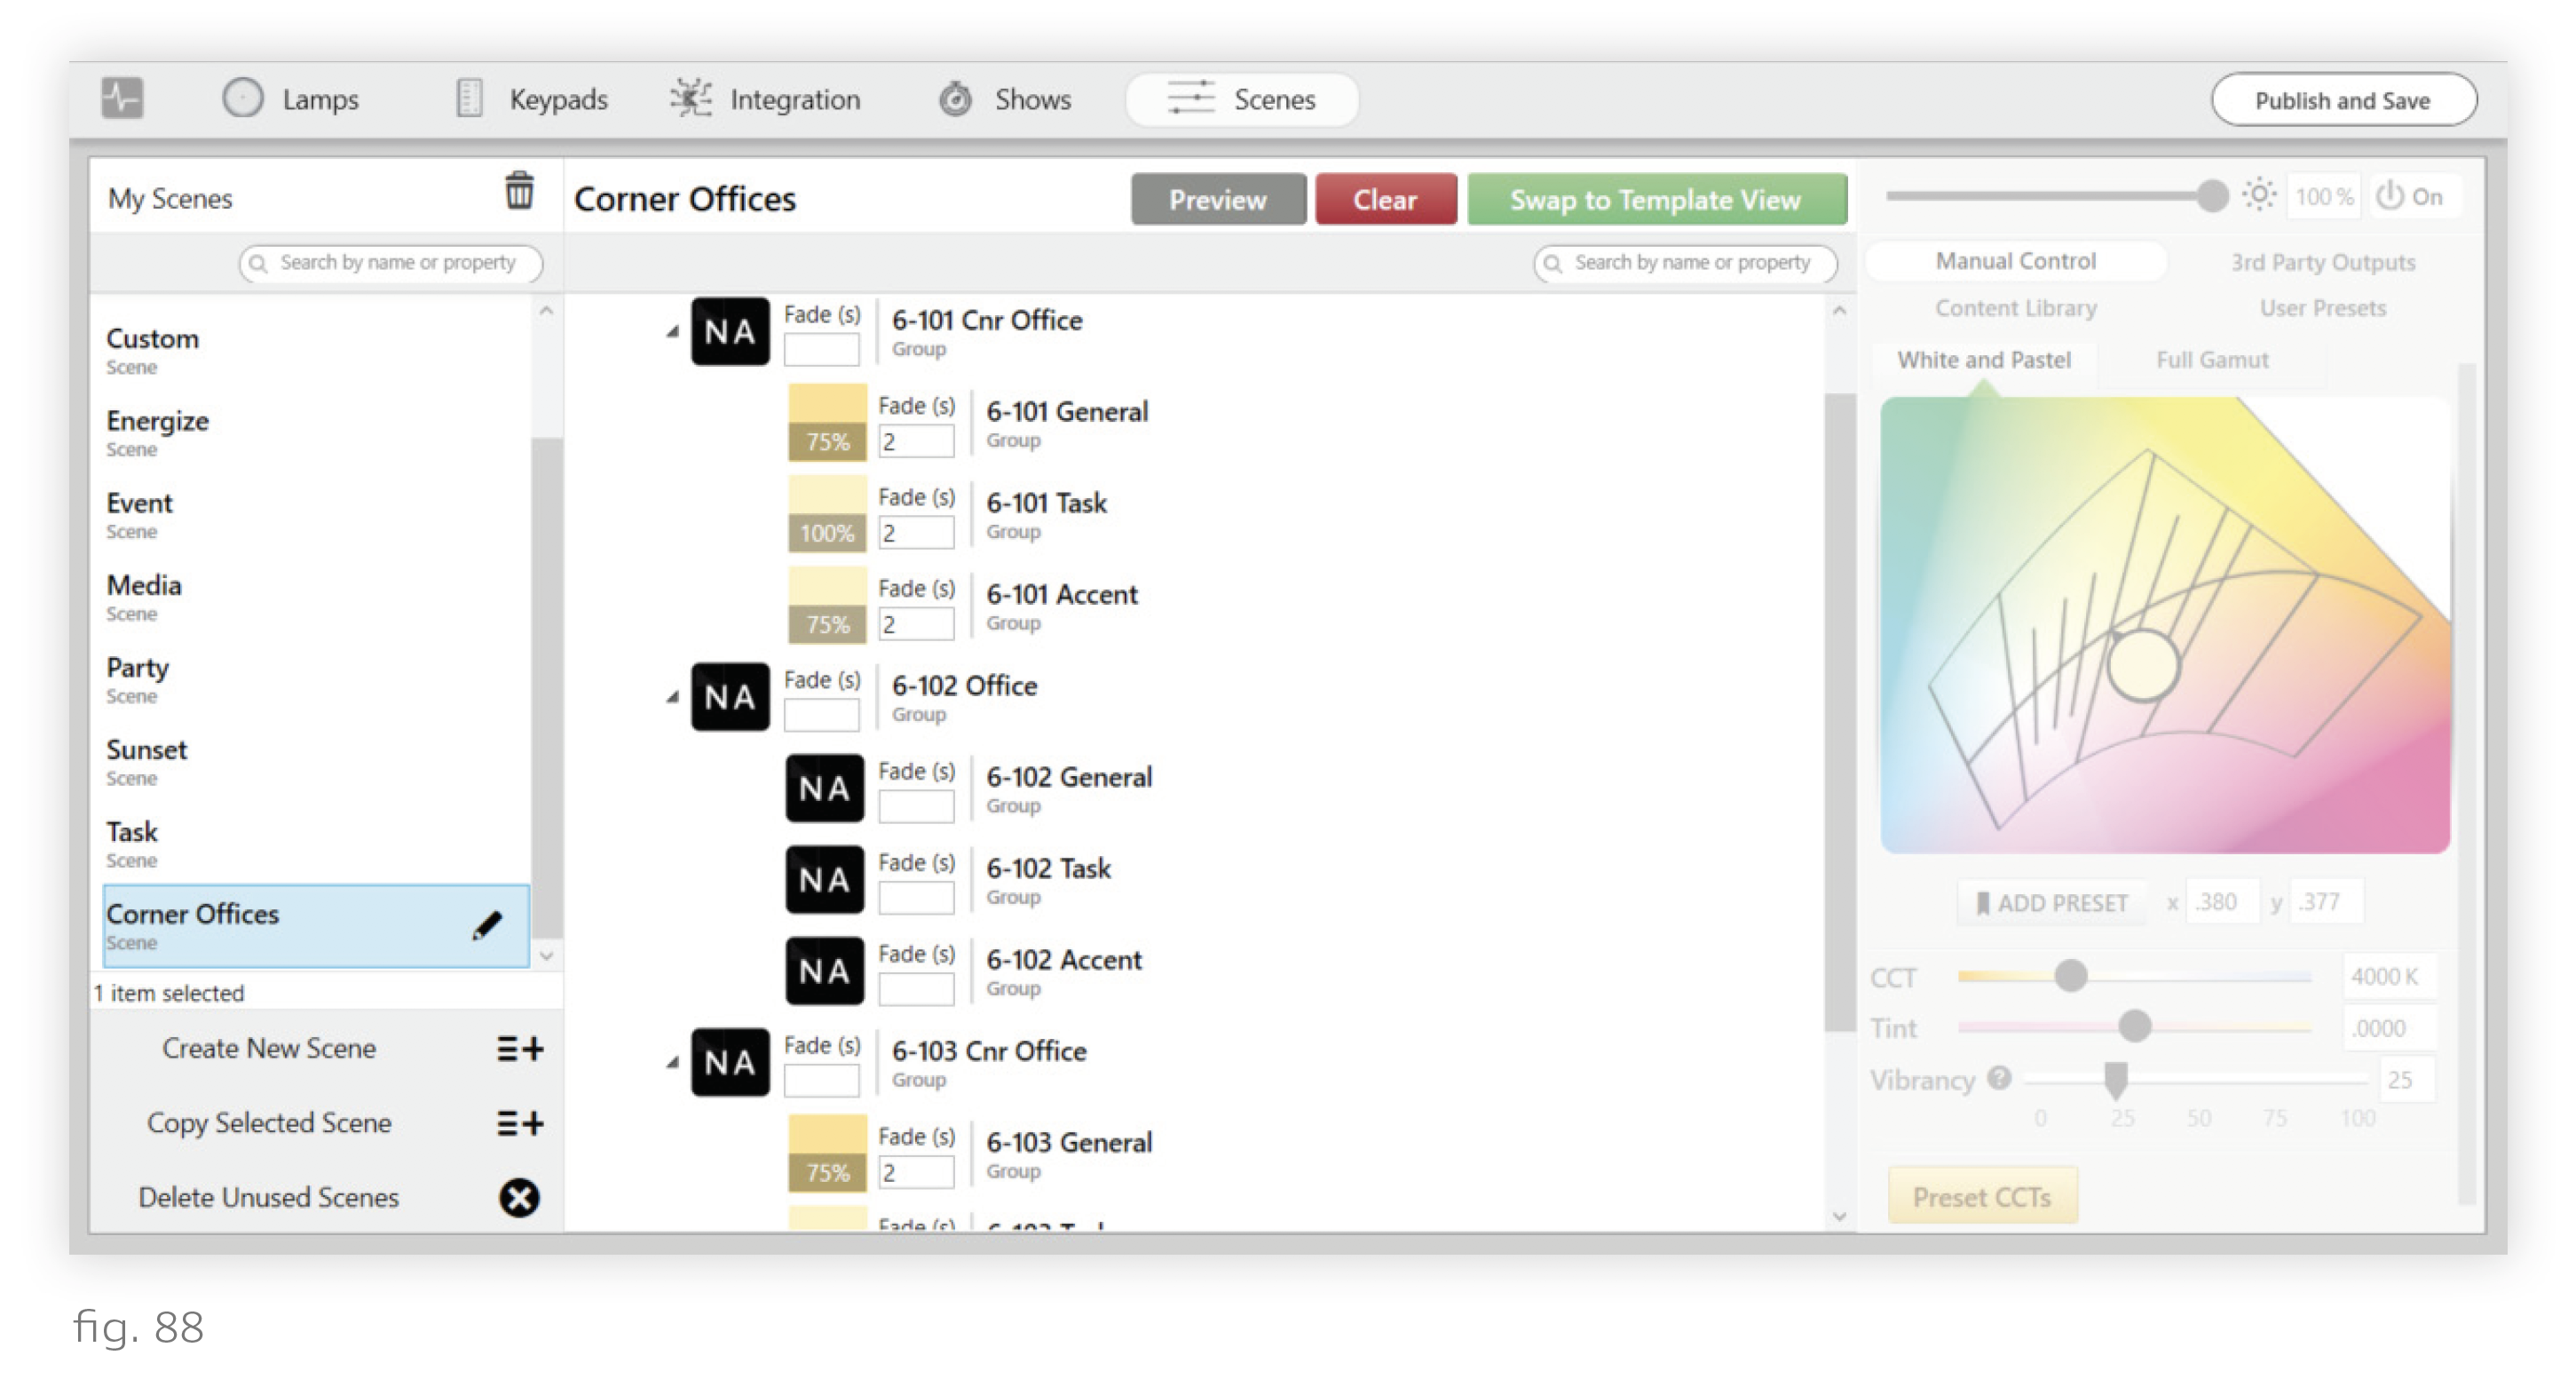
Note: The following image shows Candlelight in Tree View so you can easily see how the scene applies to the installation’s groups.
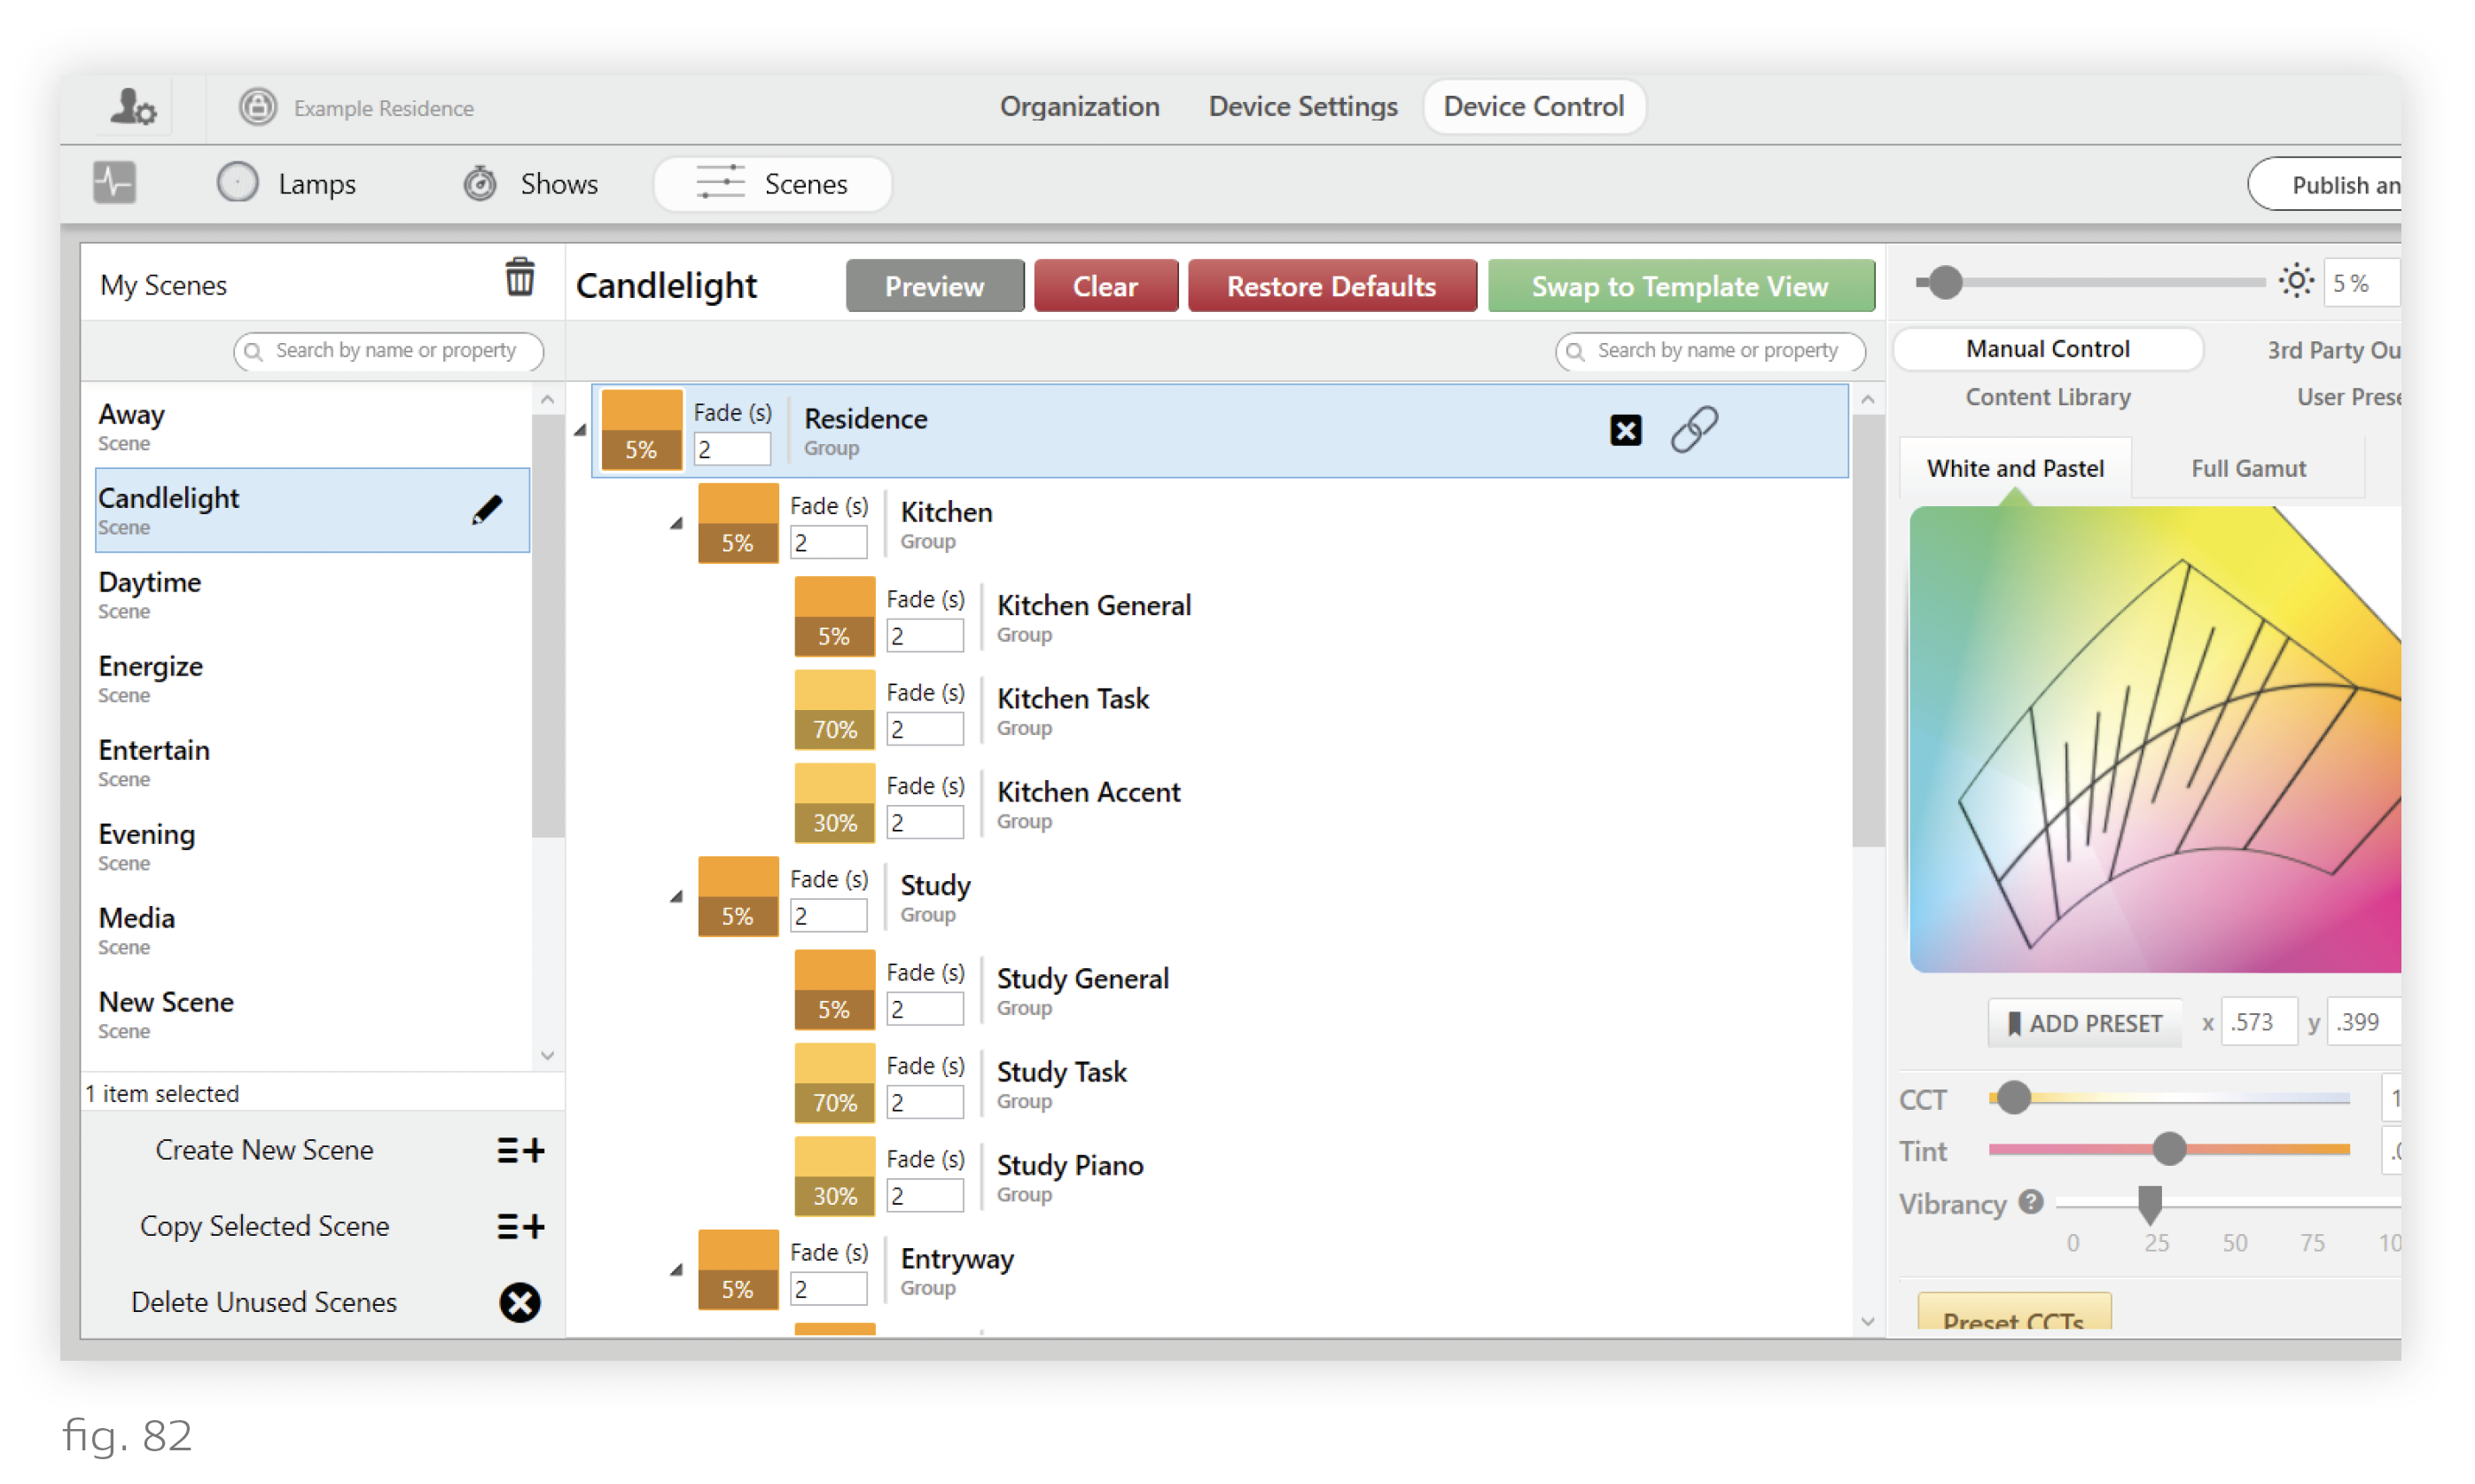
In Tree View, executing the Candlelight scene would require individual editing of every Task or Accent group. In Template View, it only requires three lines:
Template View Example
Let’s build a custom scene that can apply special content to any corner offices in an office building. Since corner offices have more natural light, imagine an energy code requires distinct content for them versus other offices.
Using Tree View would be inefficient: when building the scene, we would need to modify every corner office’s zones, one at a time. Using Template View will save time, because we can simply assign a shared descriptor to every corner office and set content for the descriptor.
We’ll start with this simple grouping structure already built on the Organization tab:
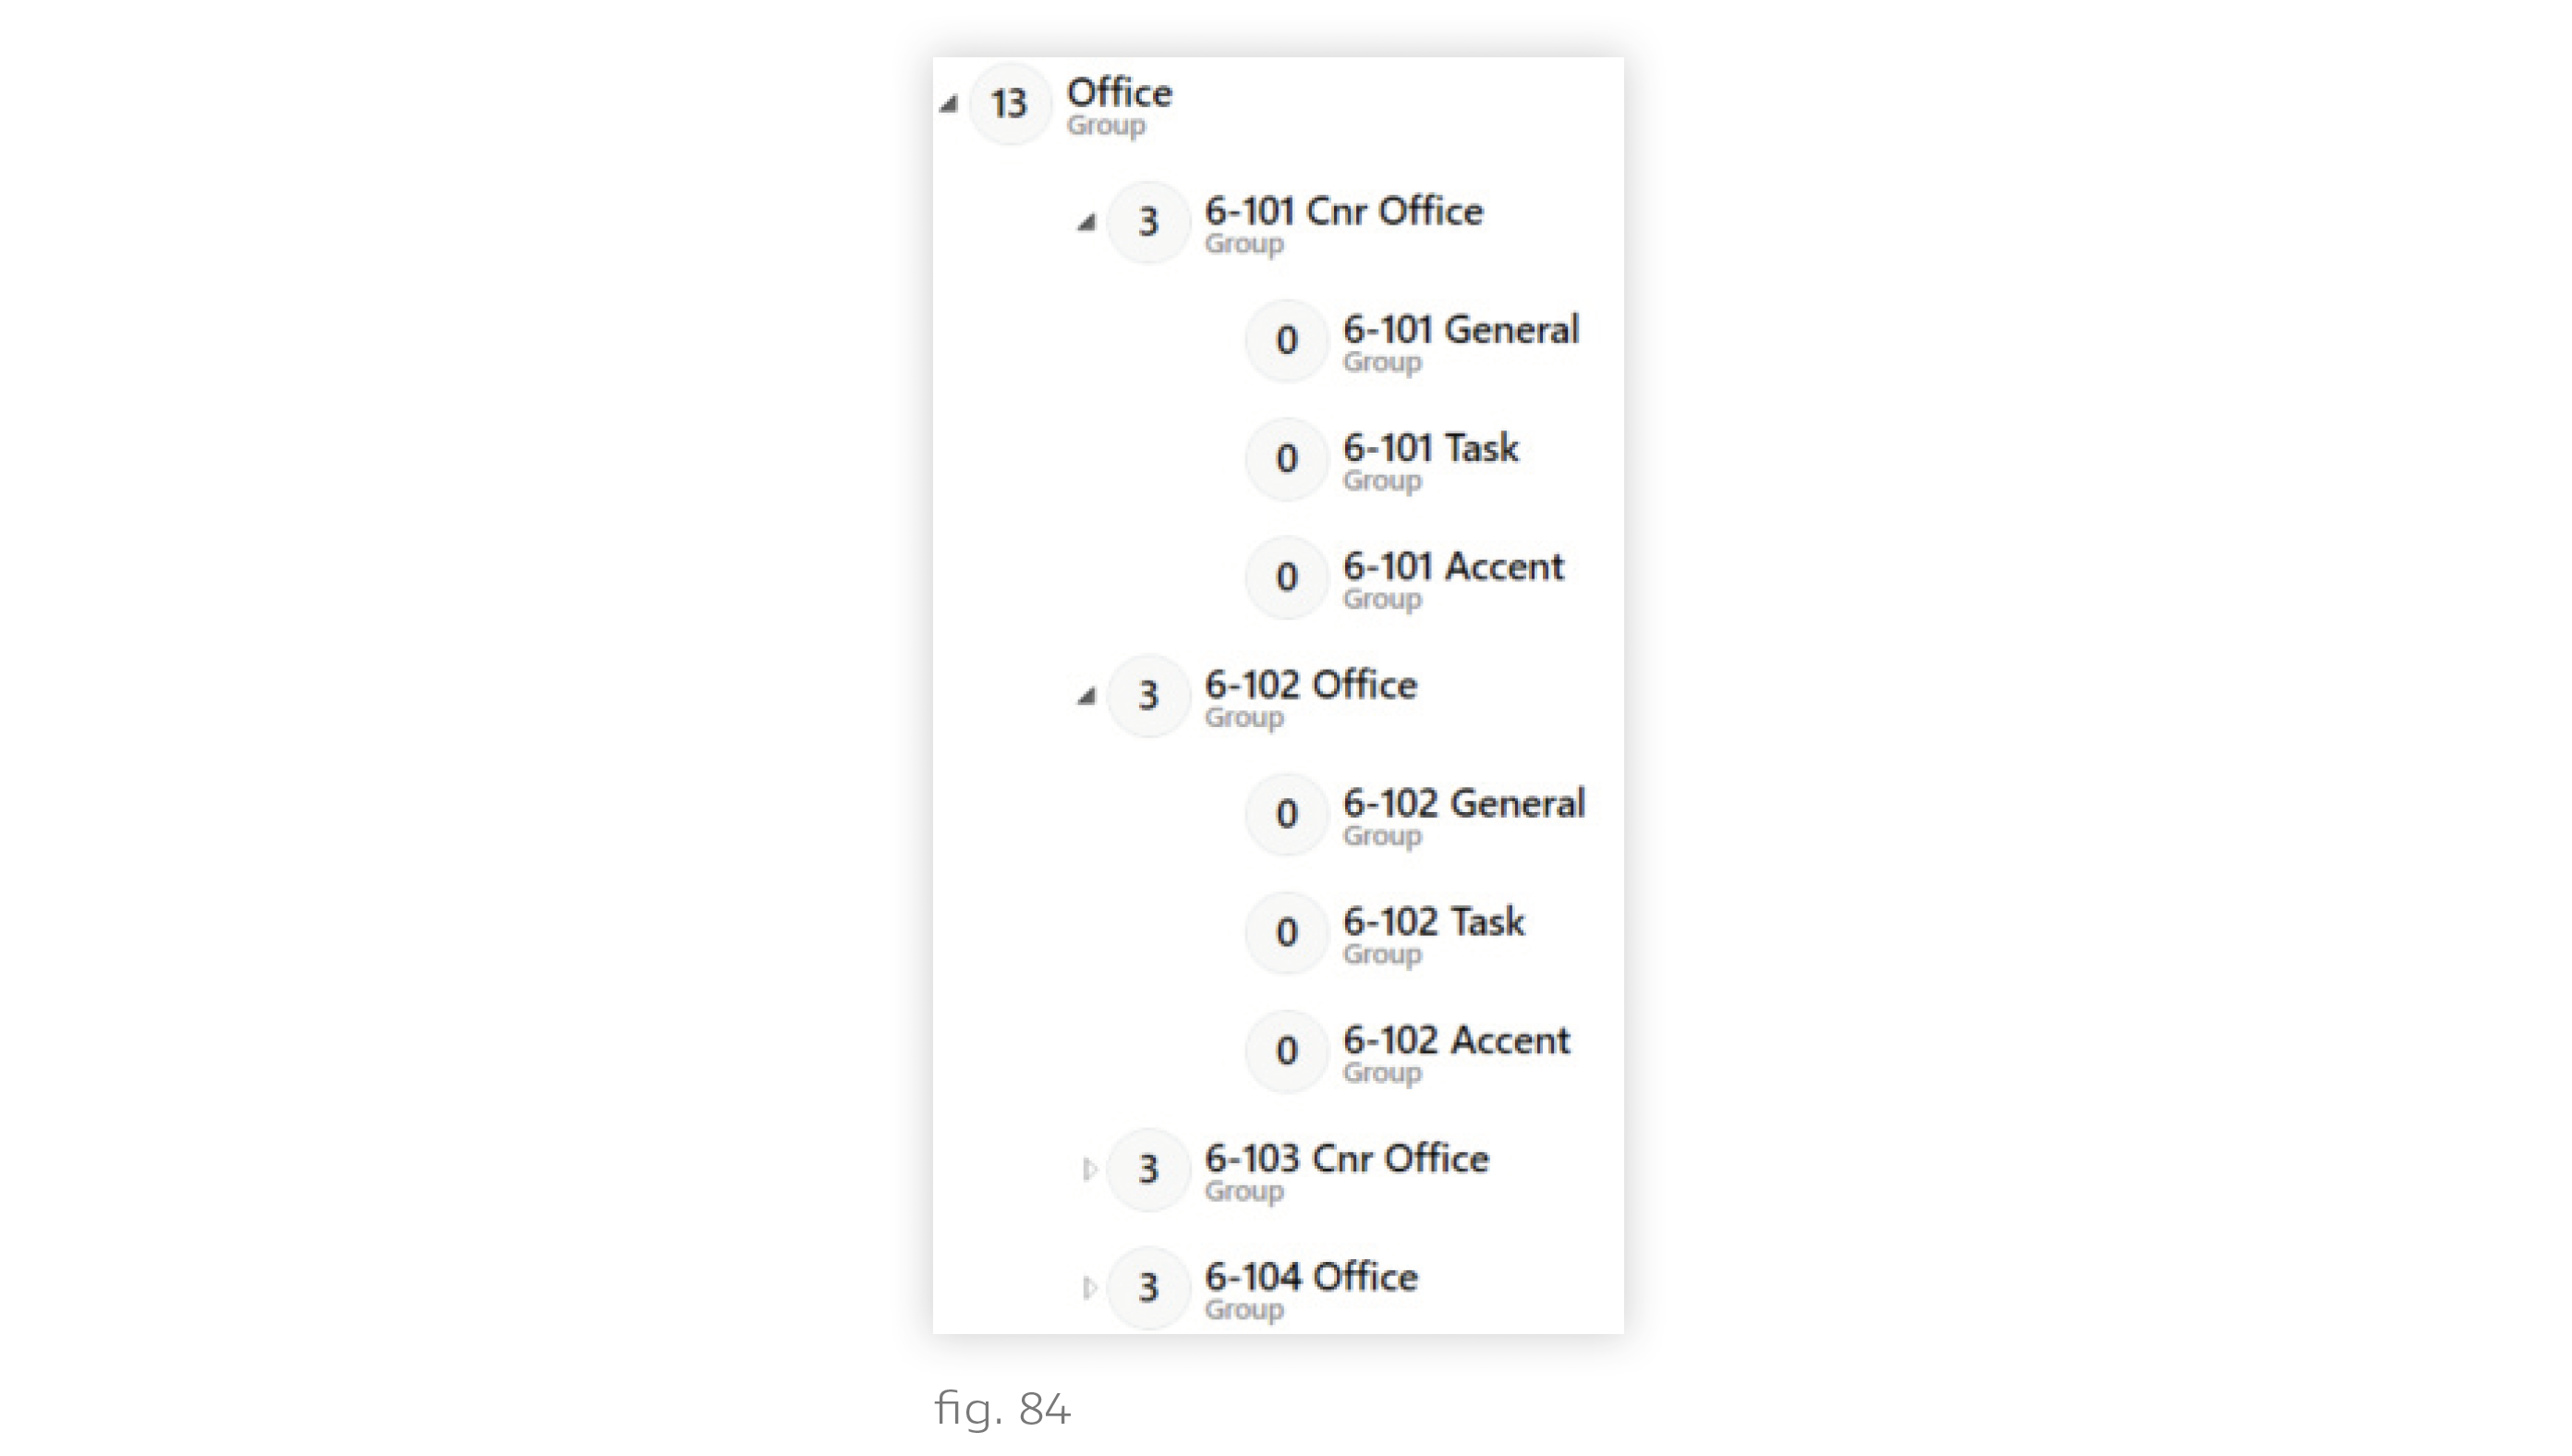
There are two corner offices and two regular offices. Each office has three zones: General, Task, and Accent. To create a scene that affects any corner office, follow these steps:
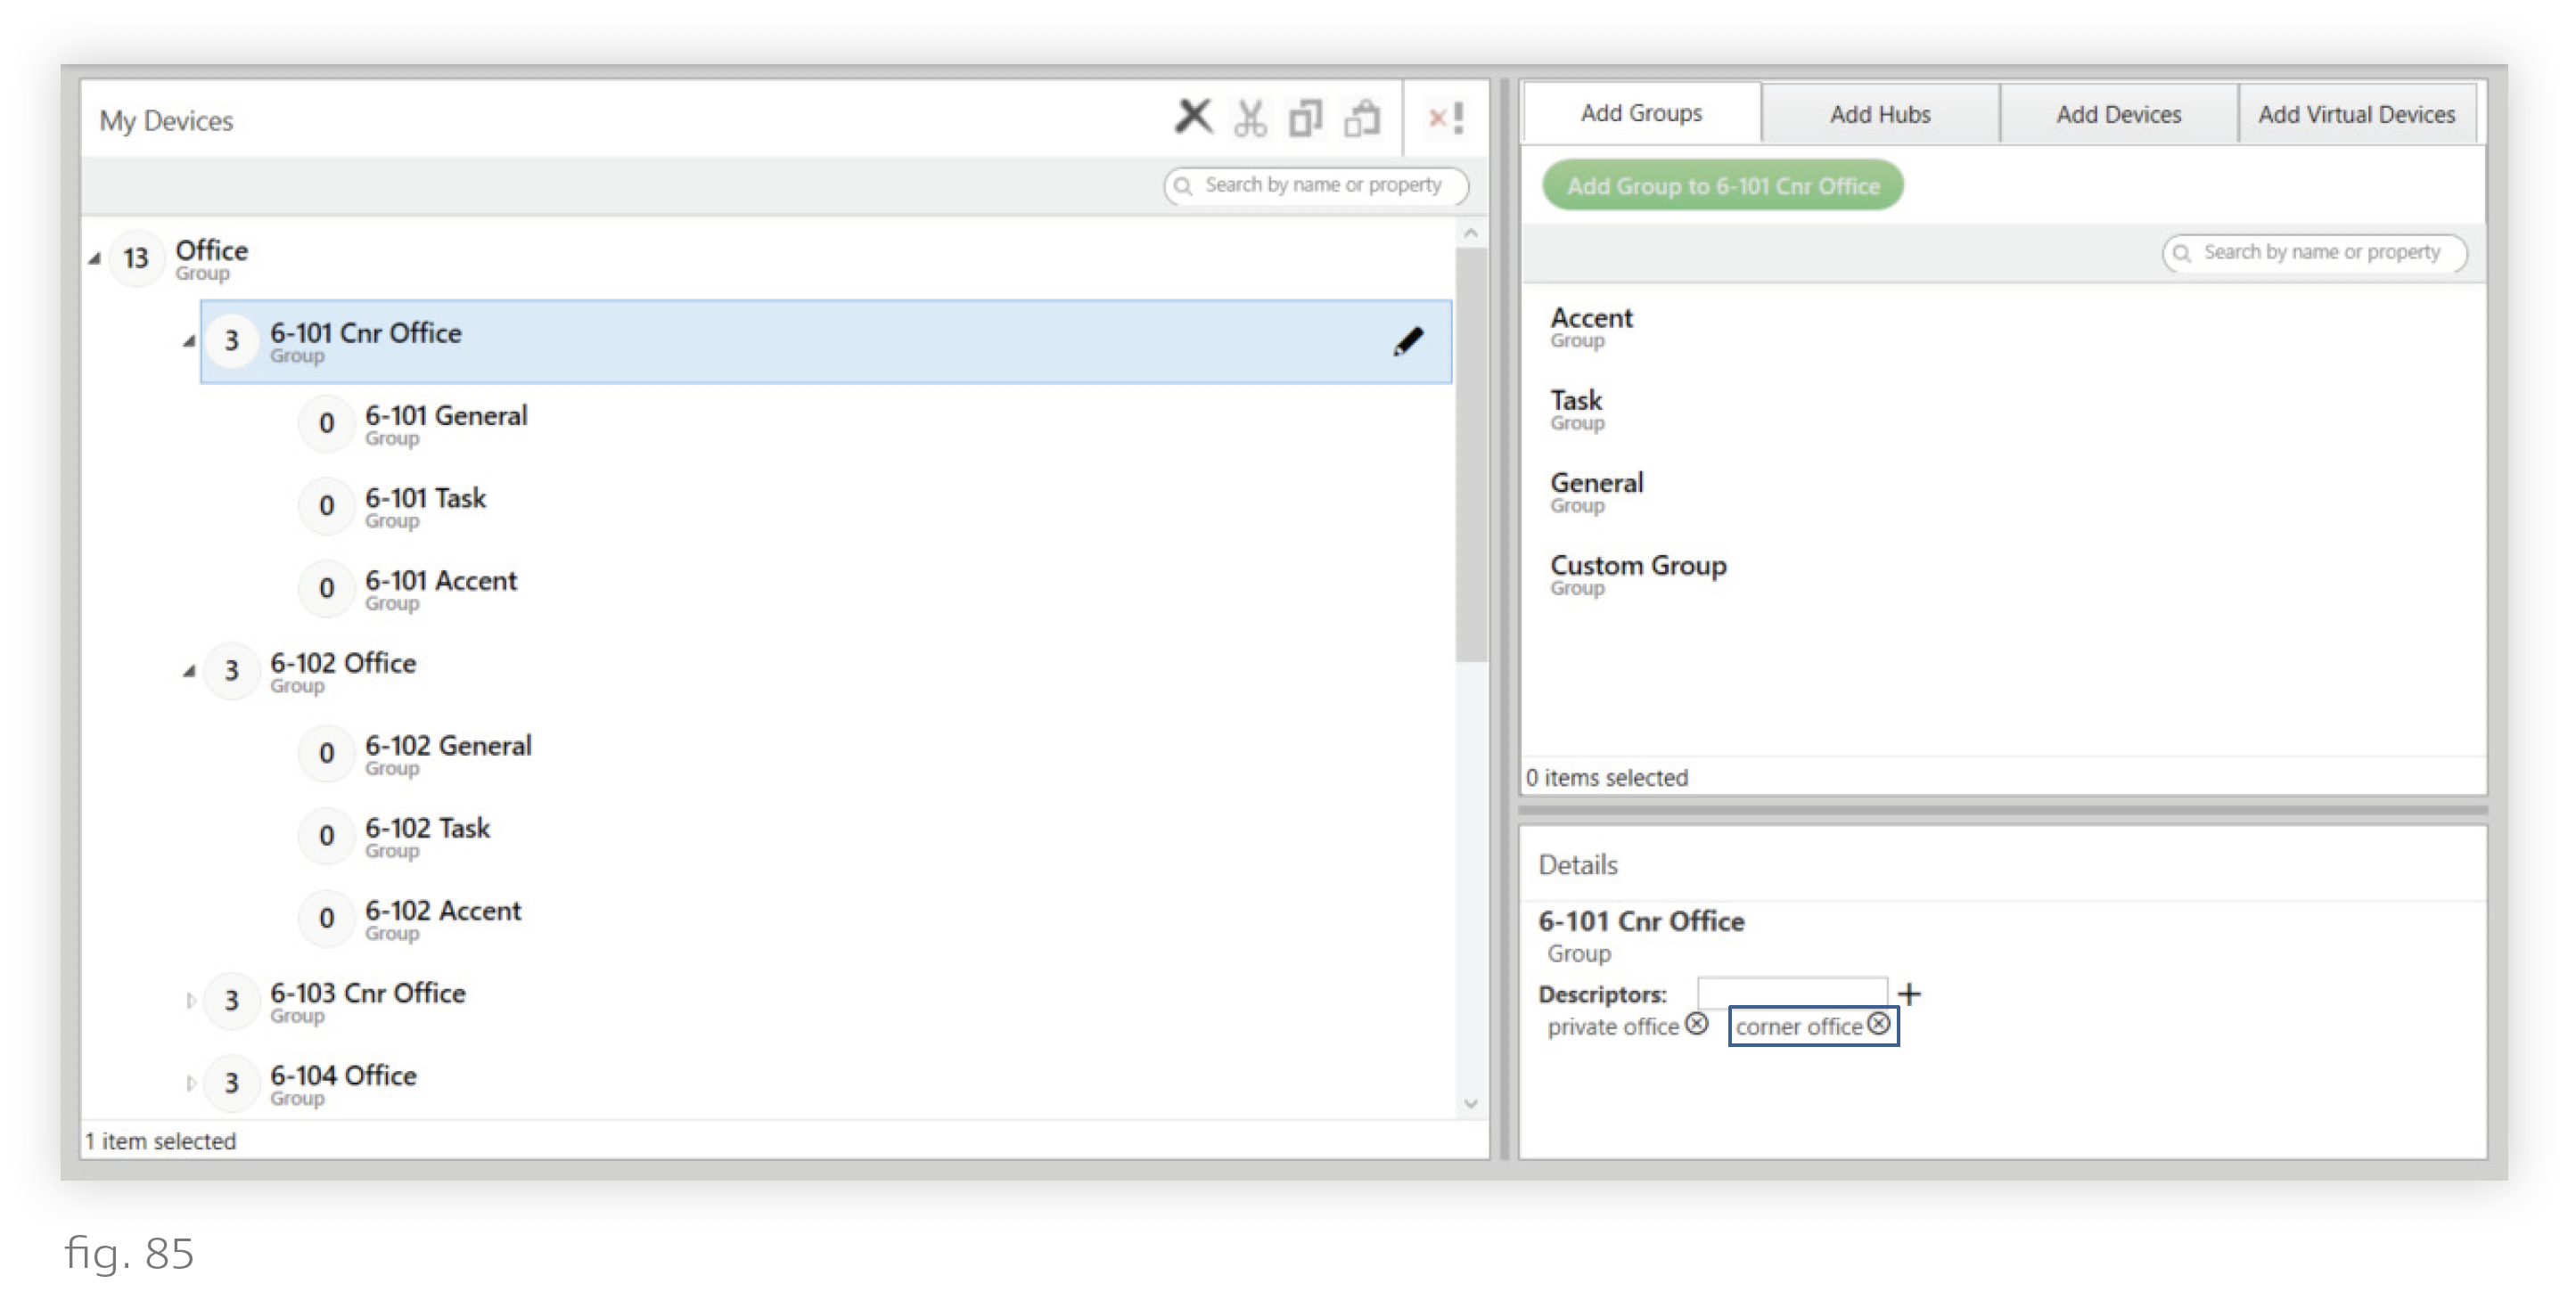
1. On the Organization tab, set a “corner office” descriptor for each corner office. To add descriptors, select the group and enter the descriptor name into the bottom-right text field.
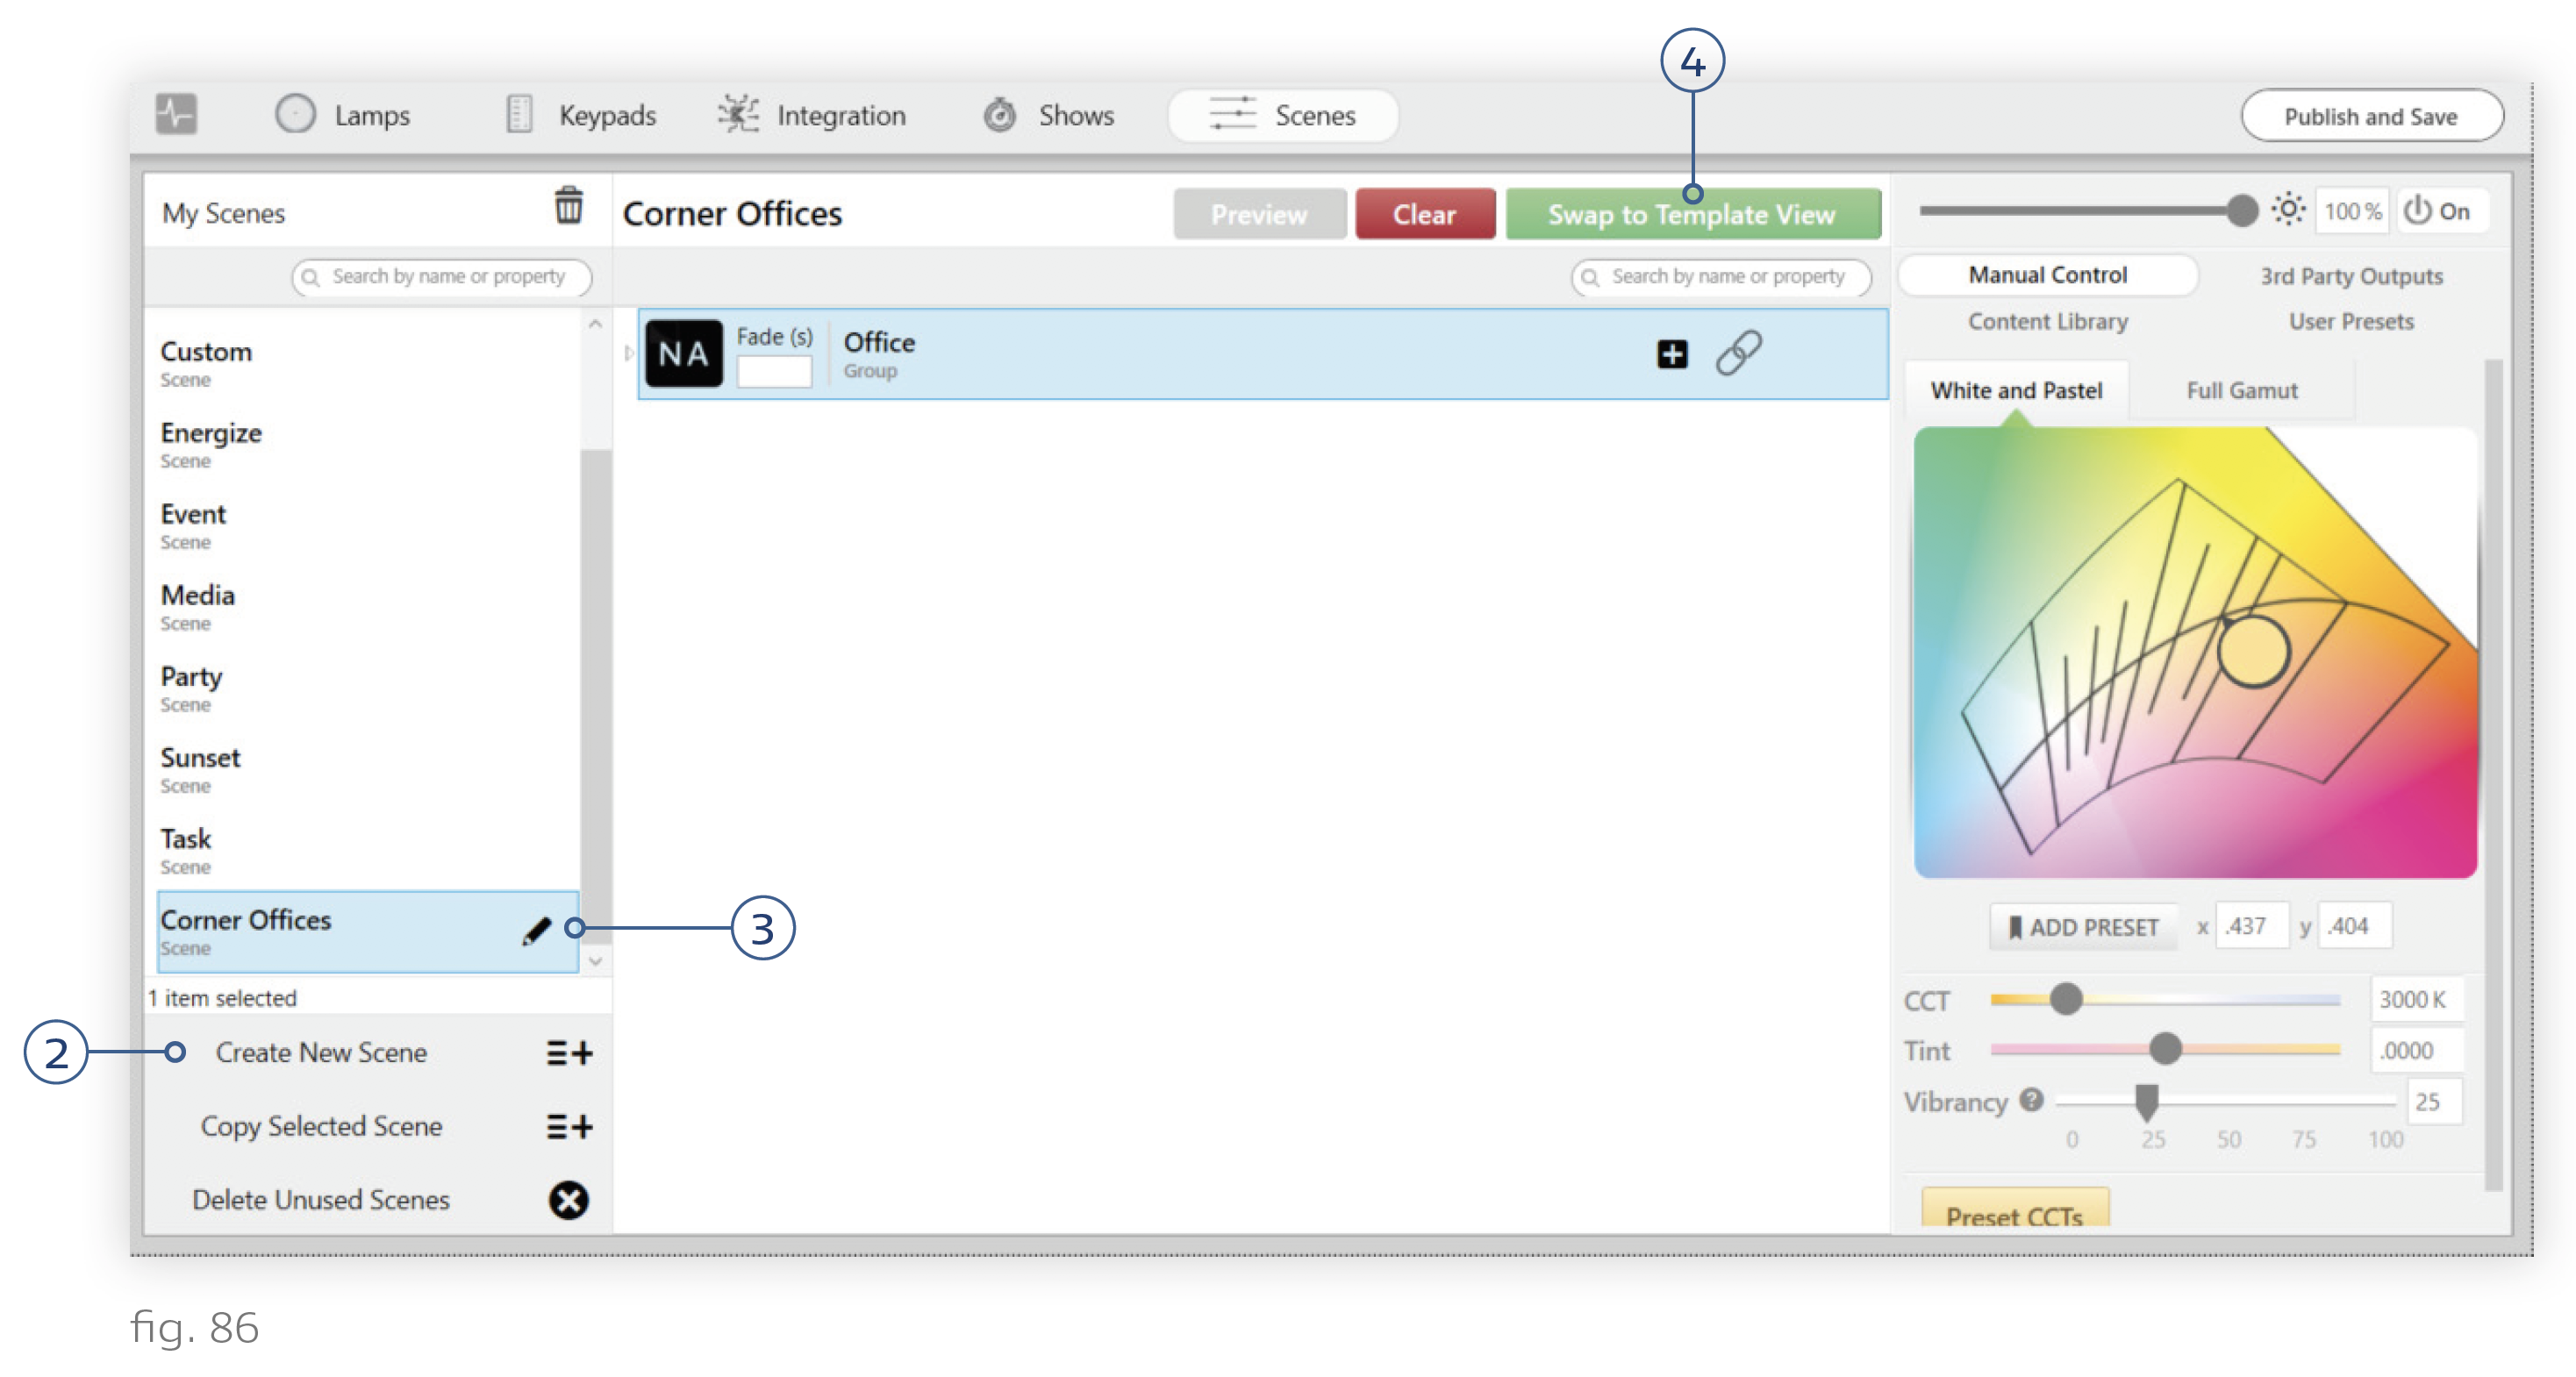
2. In Device Control > Scenes, click the Create New Scene button.
3. Rename the scene something like Corner Offices.
4. Click the Swap to Template View button.
5. Click the + button three times—once for each corner office zone. Since our corner offices have three zones—General, Task, and Accent—we’ll add three lines.
6. For each line, add the zone’s descriptor and the “corner office” descriptor. You should press Enter after each value rather than using comma-separated values. In our example, the first line will target any groups with both the “task” and “corner office” descriptors. This way, no other groups that have the “task” descriptor will be affected.
Note: Groups inherit descriptors from higher-level groups.
7. Customize each line’s color content. Note that you can toggle NA on or off for each line by clicking the X button. A group marked NA will not be affected when the scene is triggered.
Note: NA can be toggled on or off by clicking the X button. NA groups do not change content when the scene is triggered. However, they do respond to brightness controls when the scene is active and turn off when the scene is deactivated. To truly exclude a group from a scene such that it does not respond in any way to a trigger, you need to uncheck the group when assigning the scene.
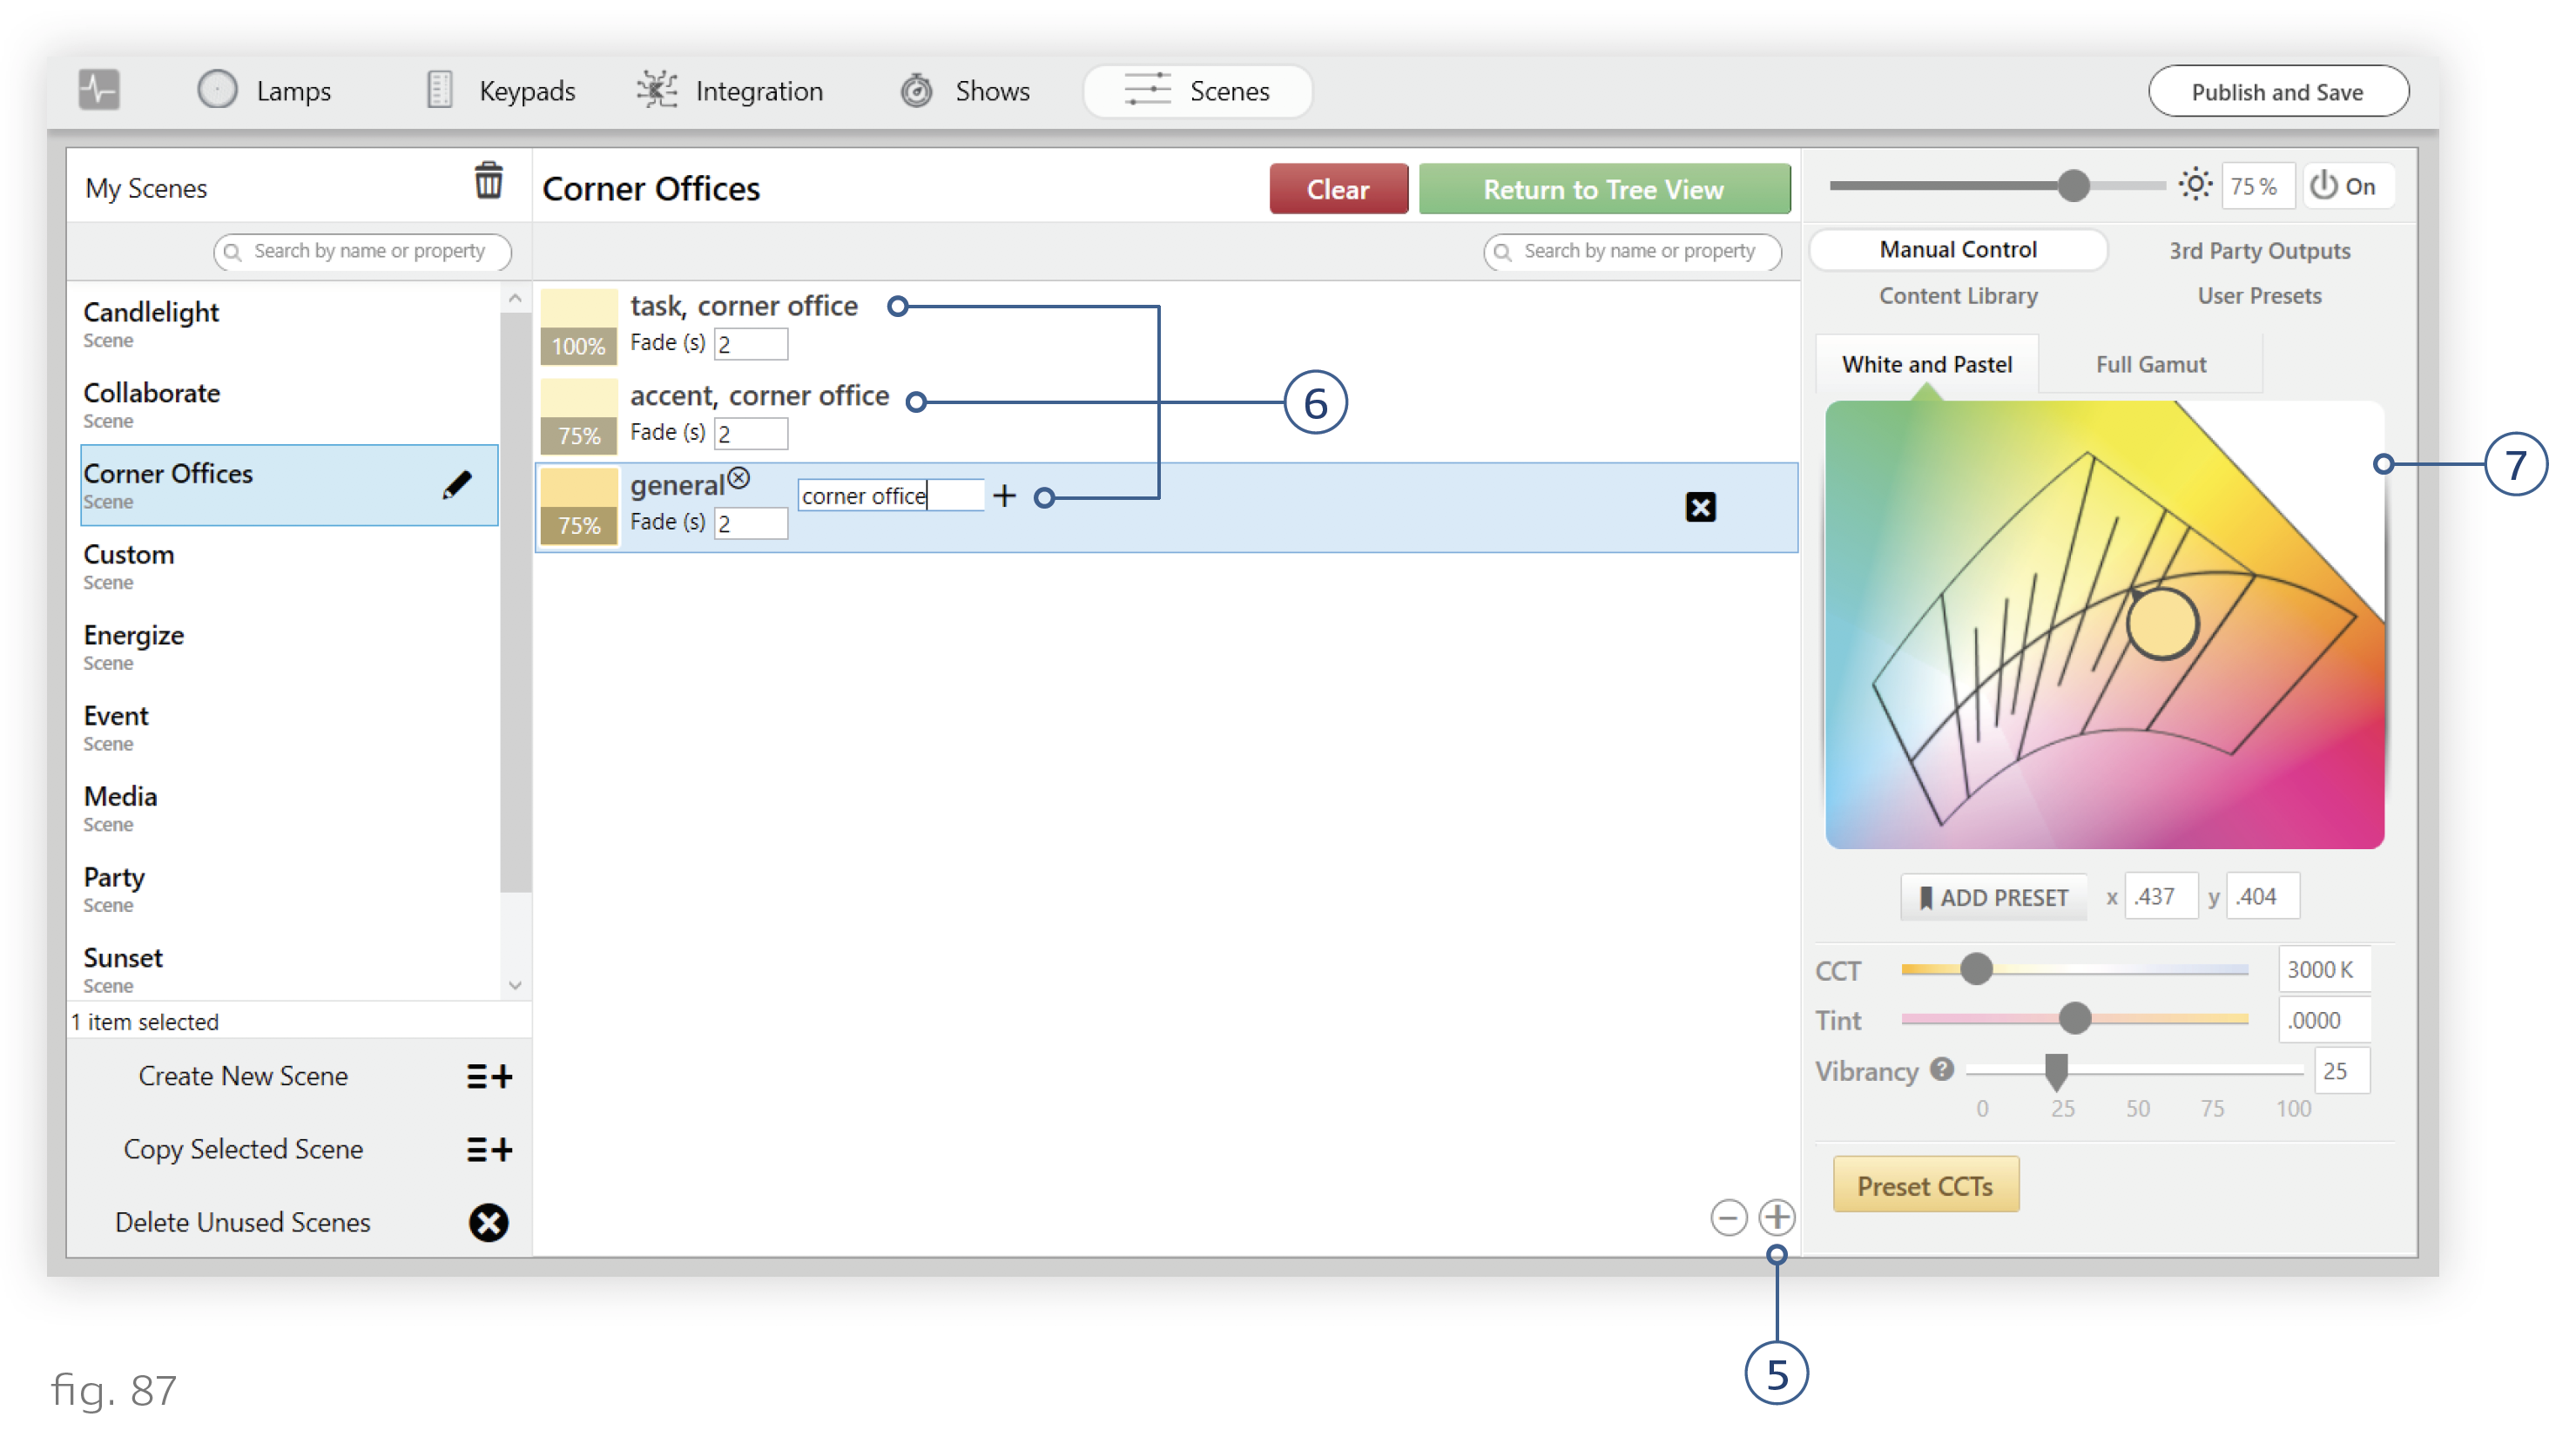
8. Return to Tree View to confirm your settings. In our example, the corner offices now have special content for each of their zones. When we assign the scene to each corner office’s keypad, only the given office’s zones will be affected.