
To integrate a Design Studio installation with Quantum, you have to export a command set from Design Studio, enable at least one N4 for telnet communication, import the command set into Lutron’s Q Design software, and then link the command set to an N4.
Exporting a Command Set from Design Studio
A Design Studio command set lists every possible action that can be performed on every possible group. For example, “Group A-Intensity Up” or “Group B-Scene 1” might be lines in your command set. Once you import this list into Q Design, the Quantum system will be able to send any of these commands to an N4 Hub via telnet.
Caution: A command set is a static snapshot. If you make changes to the installation after exporting, you should also export a new command set, import that into Q Design, and link it to the N4.
When you export a command set, Design Studio creates one or more CSV (spreadsheet) files. The number of CSVs determines the number of N4s you will need to enable for telnet in the next step.
For now, follow these instructions to export a command set:
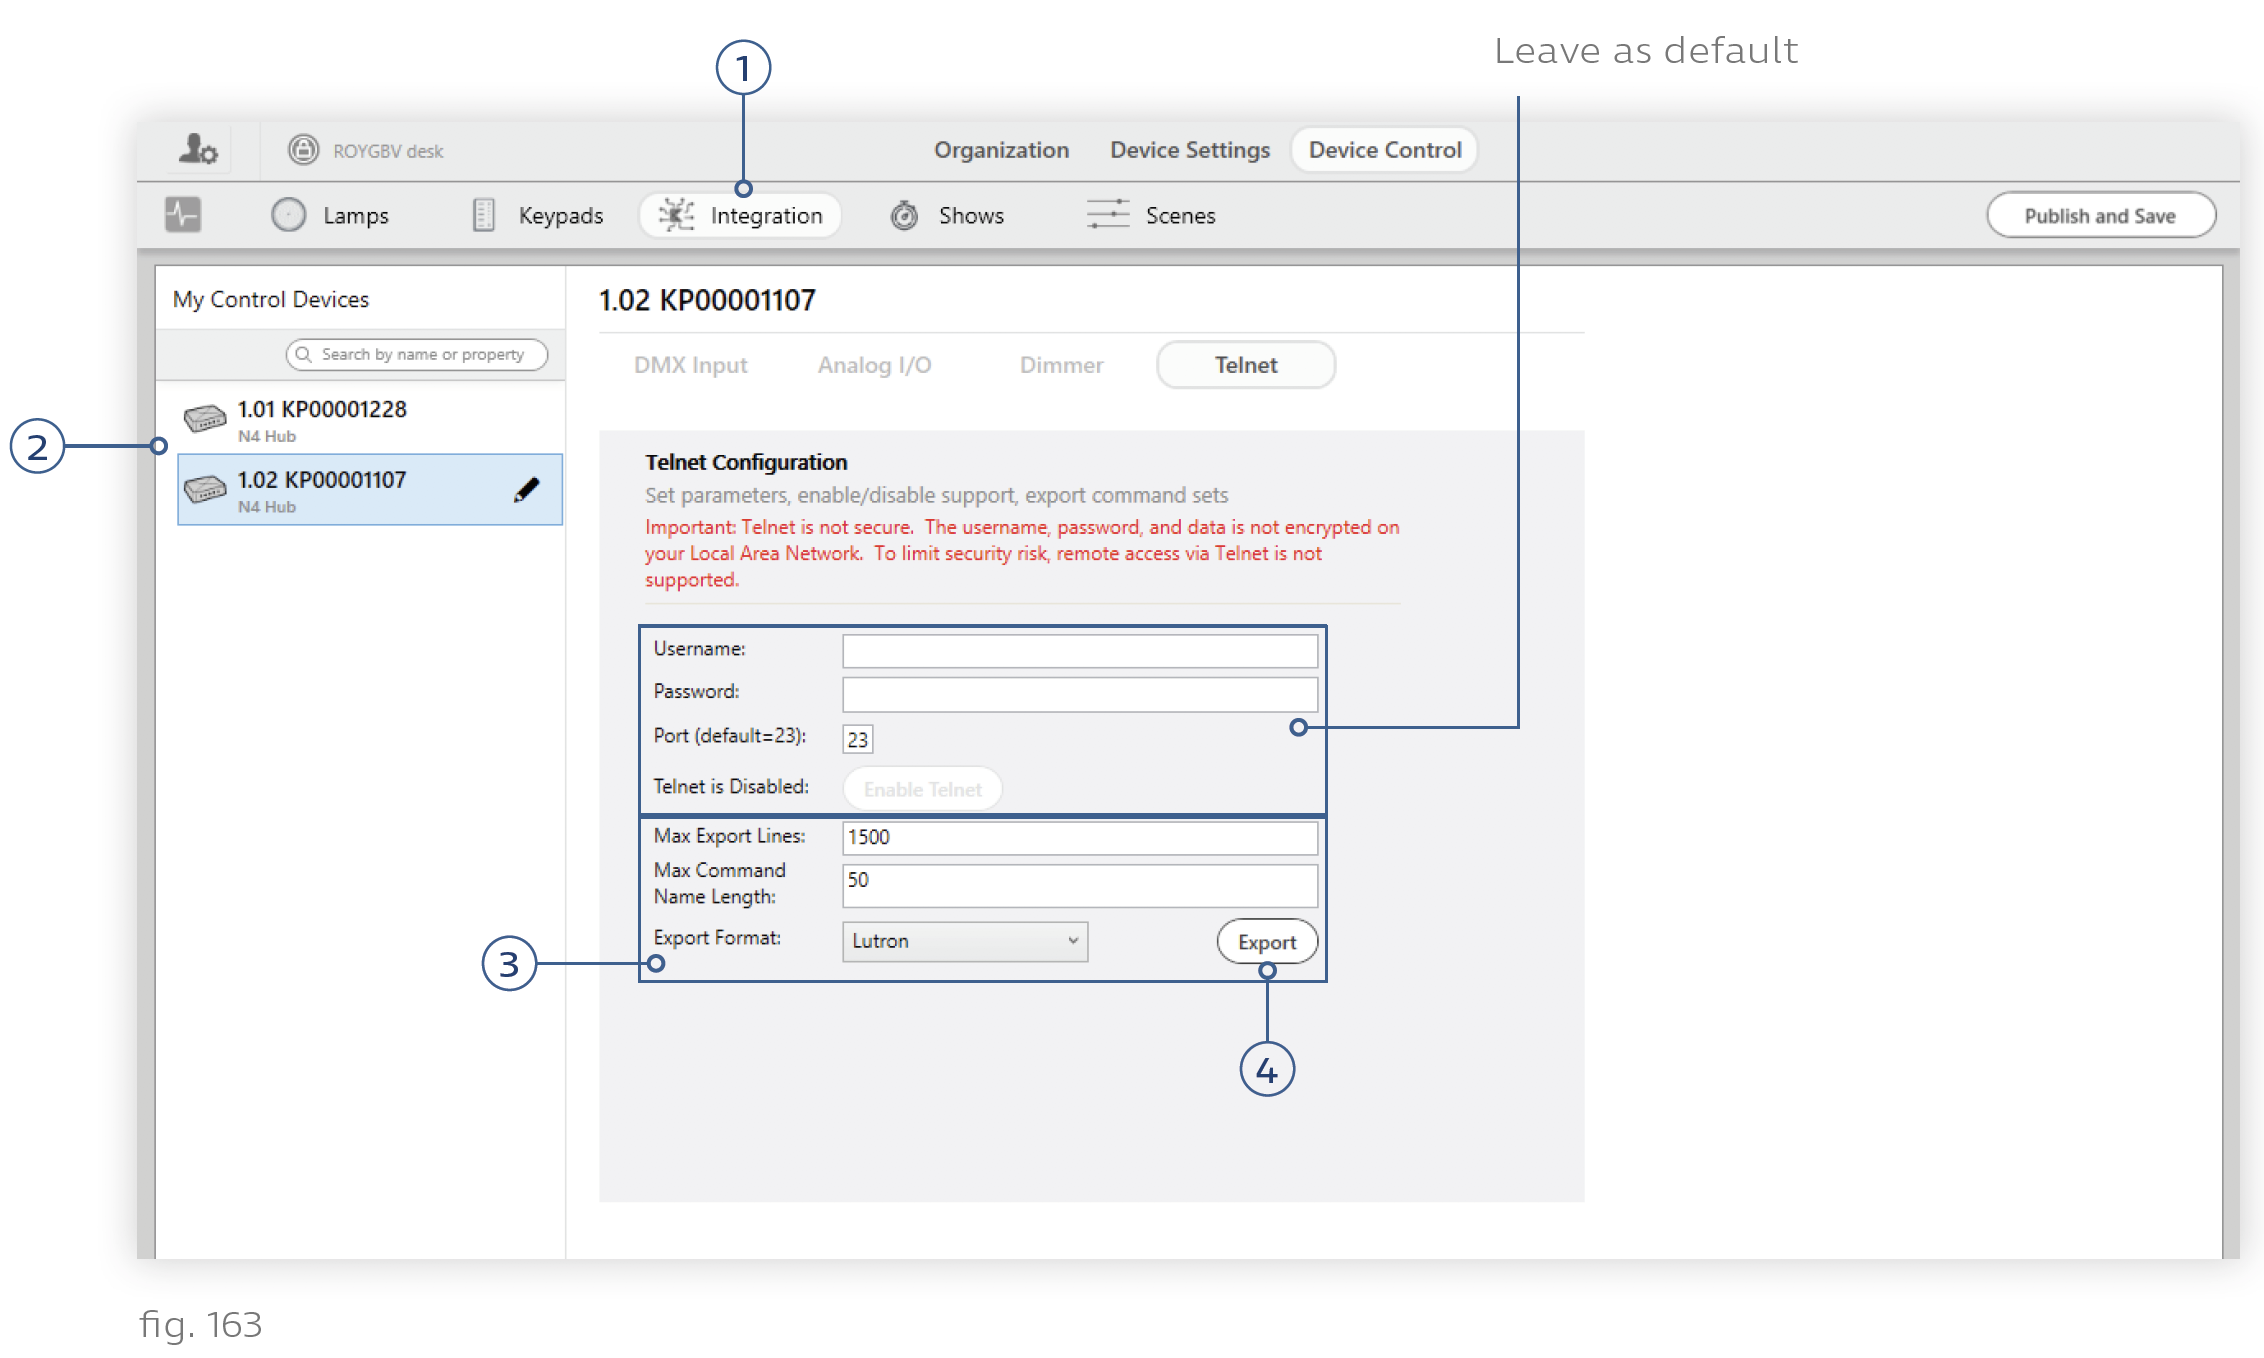
1. Navigate to Device Control > Integration.
2. Select any N4 Hub from the My Control Devices list. At this point, it doesn’t matter which N4 you select.
3. In the Telnet Configuration pane, confirm that the Max Export Lines, Max Command Name Length, and Export Format fields look like fig. 163.
Note: You can modify those fields, but Q Design will not accept CSVs with more than 1500 lines, or commands with names longer than 50 characters.
4. Click Export.
5. Click Proceed in any popup windows.
6. In the Save As window, select a place to save the CSV(s) and click Save.
Enabling N4 Hubs for Telnet Integration
Quantum telnet commands reach the Ketra system via the N4 Hub. The hub then propagates those commands wirelessly to other Ketra devices.
This setup requires that you enable telnet on 1 N4 per CSV. For example, if the export generates 3 CSV files, you should enable telnet on 3 N4s. It doesn’t matter which N4s you choose, because any hub is capable of relaying commands to others as necessary.
To see the number of CSVs that were automatically generated when you exported your command set, use the Windows File Explorer to navigate to the command set’s folder.
To enable telnet on an N4, follow these steps:
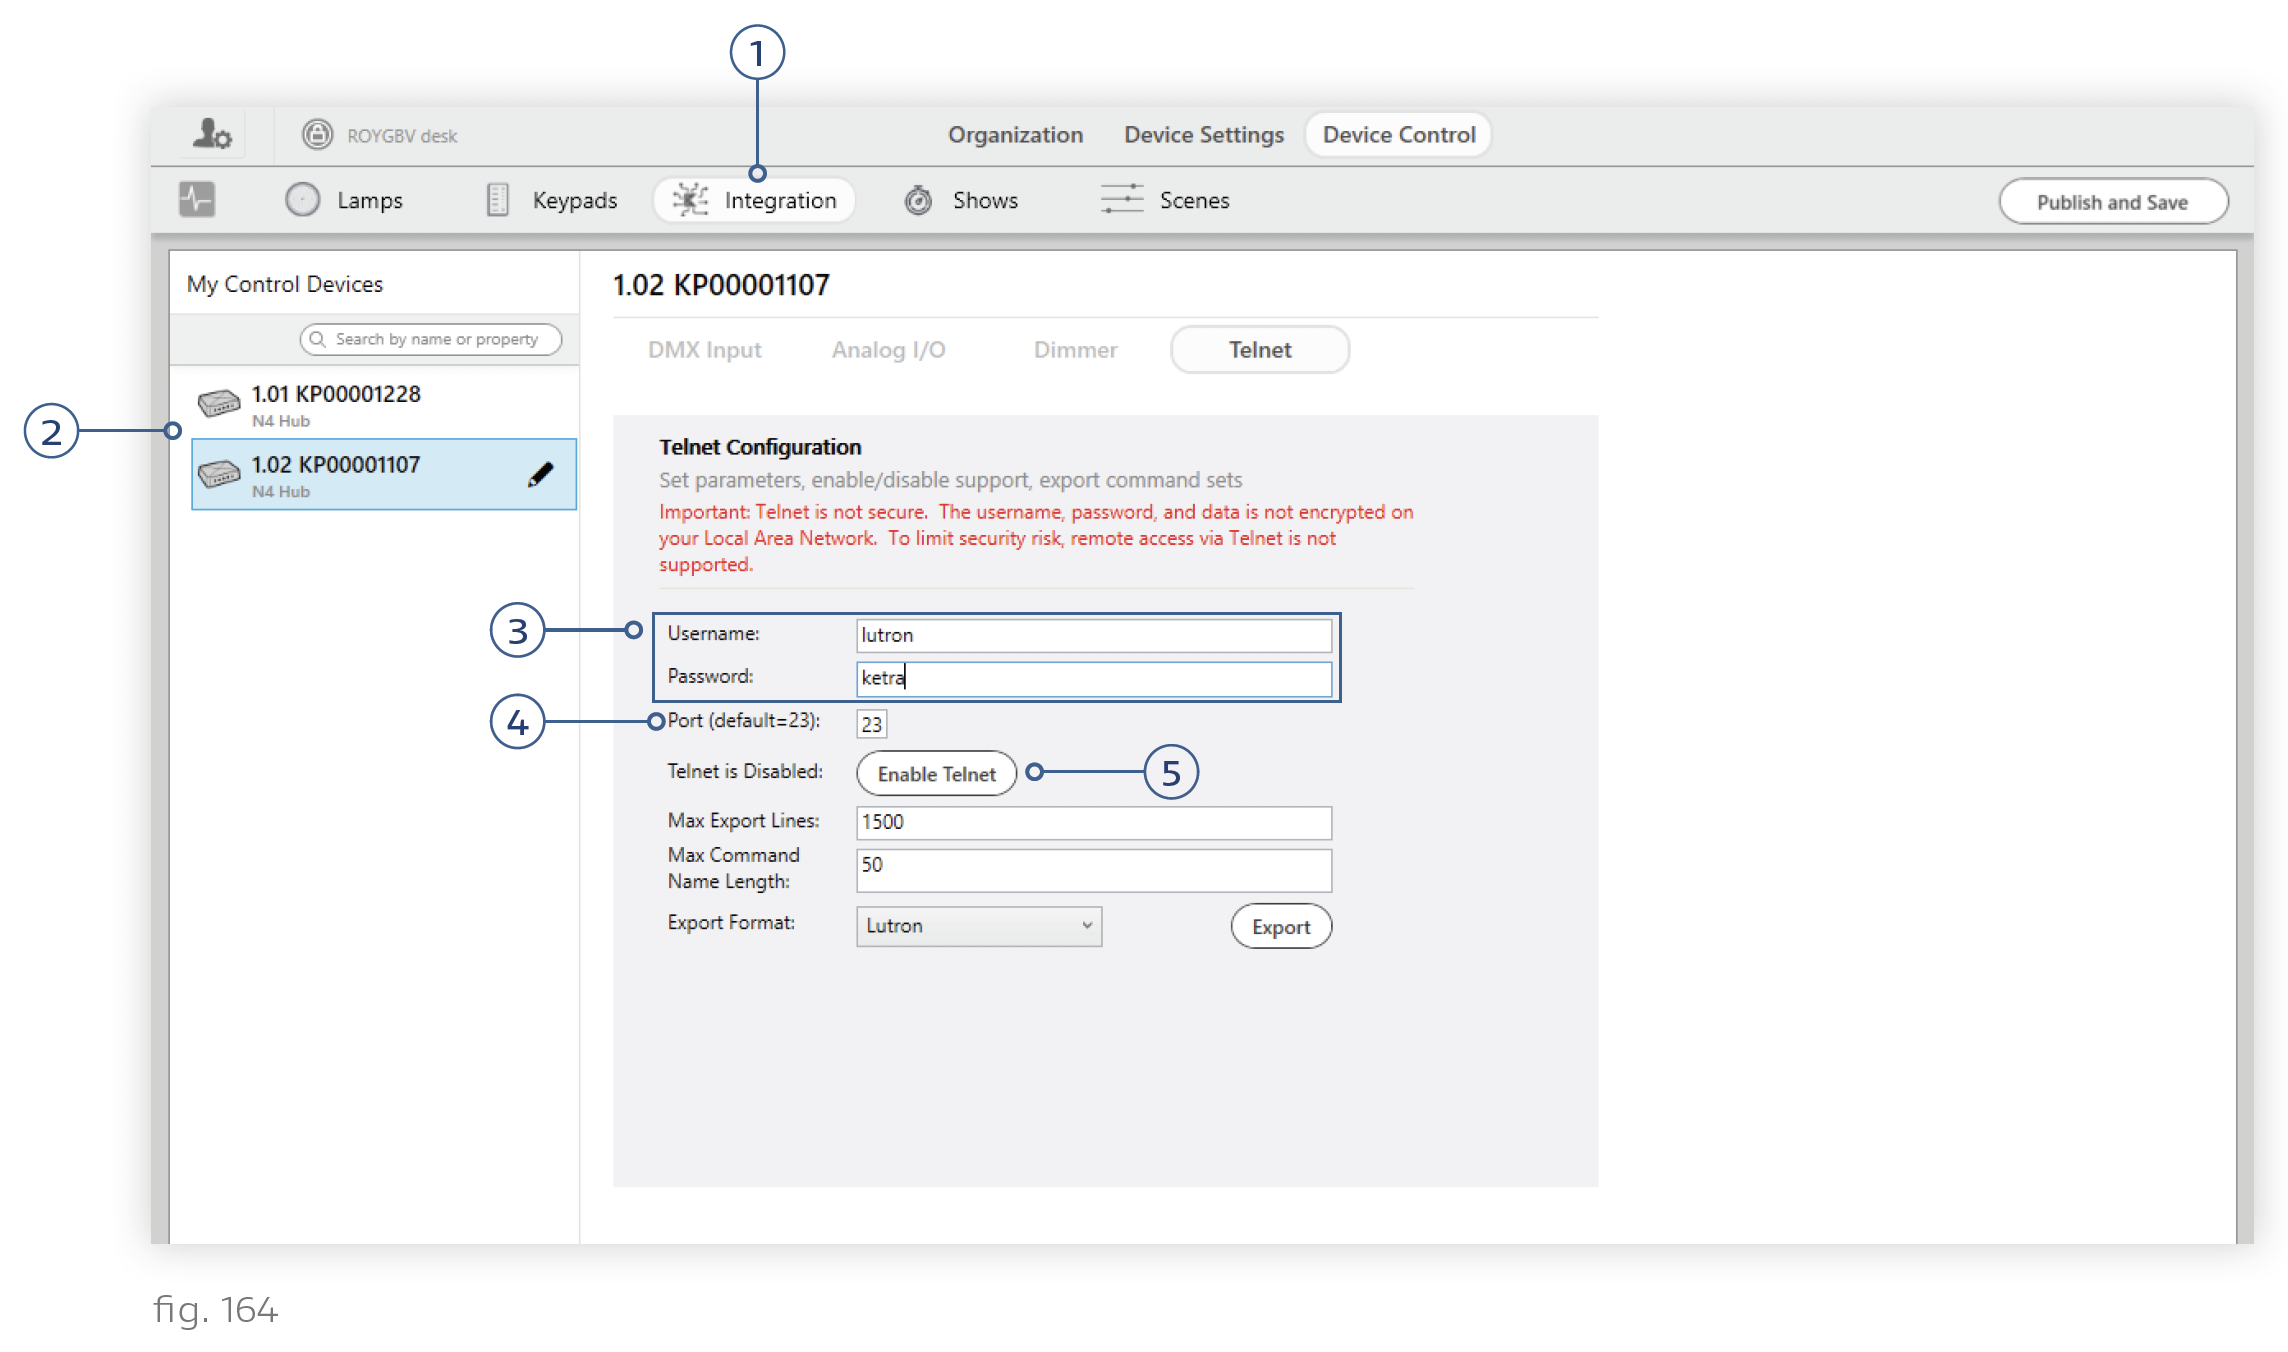
1. Navigate to Device Control > Integration.
2. Select any N4 Hub from the My Control Devices list. Again, it doesn’t matter which N4 you pick, because any N4 can relay commands to any other N4.
3. In the Telnet Configuration pane, set the username and password that the N4 will look for in each command. If you have already set a telnet username and password in Q Design, use the same values here.
Note: Telnet is not encrypted. Do not use sensitive passwords.
4. Optional: Change the port number for the integration. Use port 23 unless told otherwise by a facility IT administrator.
5. Click Enable Telnet.
6. If necessary, repeat steps 2-5 for additional N4 Hubs. You should enable telnet for 1 N4 per CSV file in the command set.
7. Click Publish and Save in the top-right corner of the screen.
Note: We recommend keeping Design Studio open as you perform the remaining integration steps in Lutron Q-Design. If not, make a note of the telnet-enabled N4s’ serial numbers and IP addresses before closing Design Studio. IP addresses can be found on the Organization tab by selecting the hub in the My Devices panel.
For instructions on integrating third-party products with the Quantum system through Q Design, refer to the relevant Lutron documentation.
Caution: Telnet integration requires that the N4 Hub keep the same IP address over time. To accomplish this, you can either set a static address for the N4 (see Setting Static IP Addresses for Hubs) or reserve an address in the DHCP server. If you do not do so, your integration will stop working as soon as the hub’s address changes.