1. Configure an Emergency Mode contact closure.
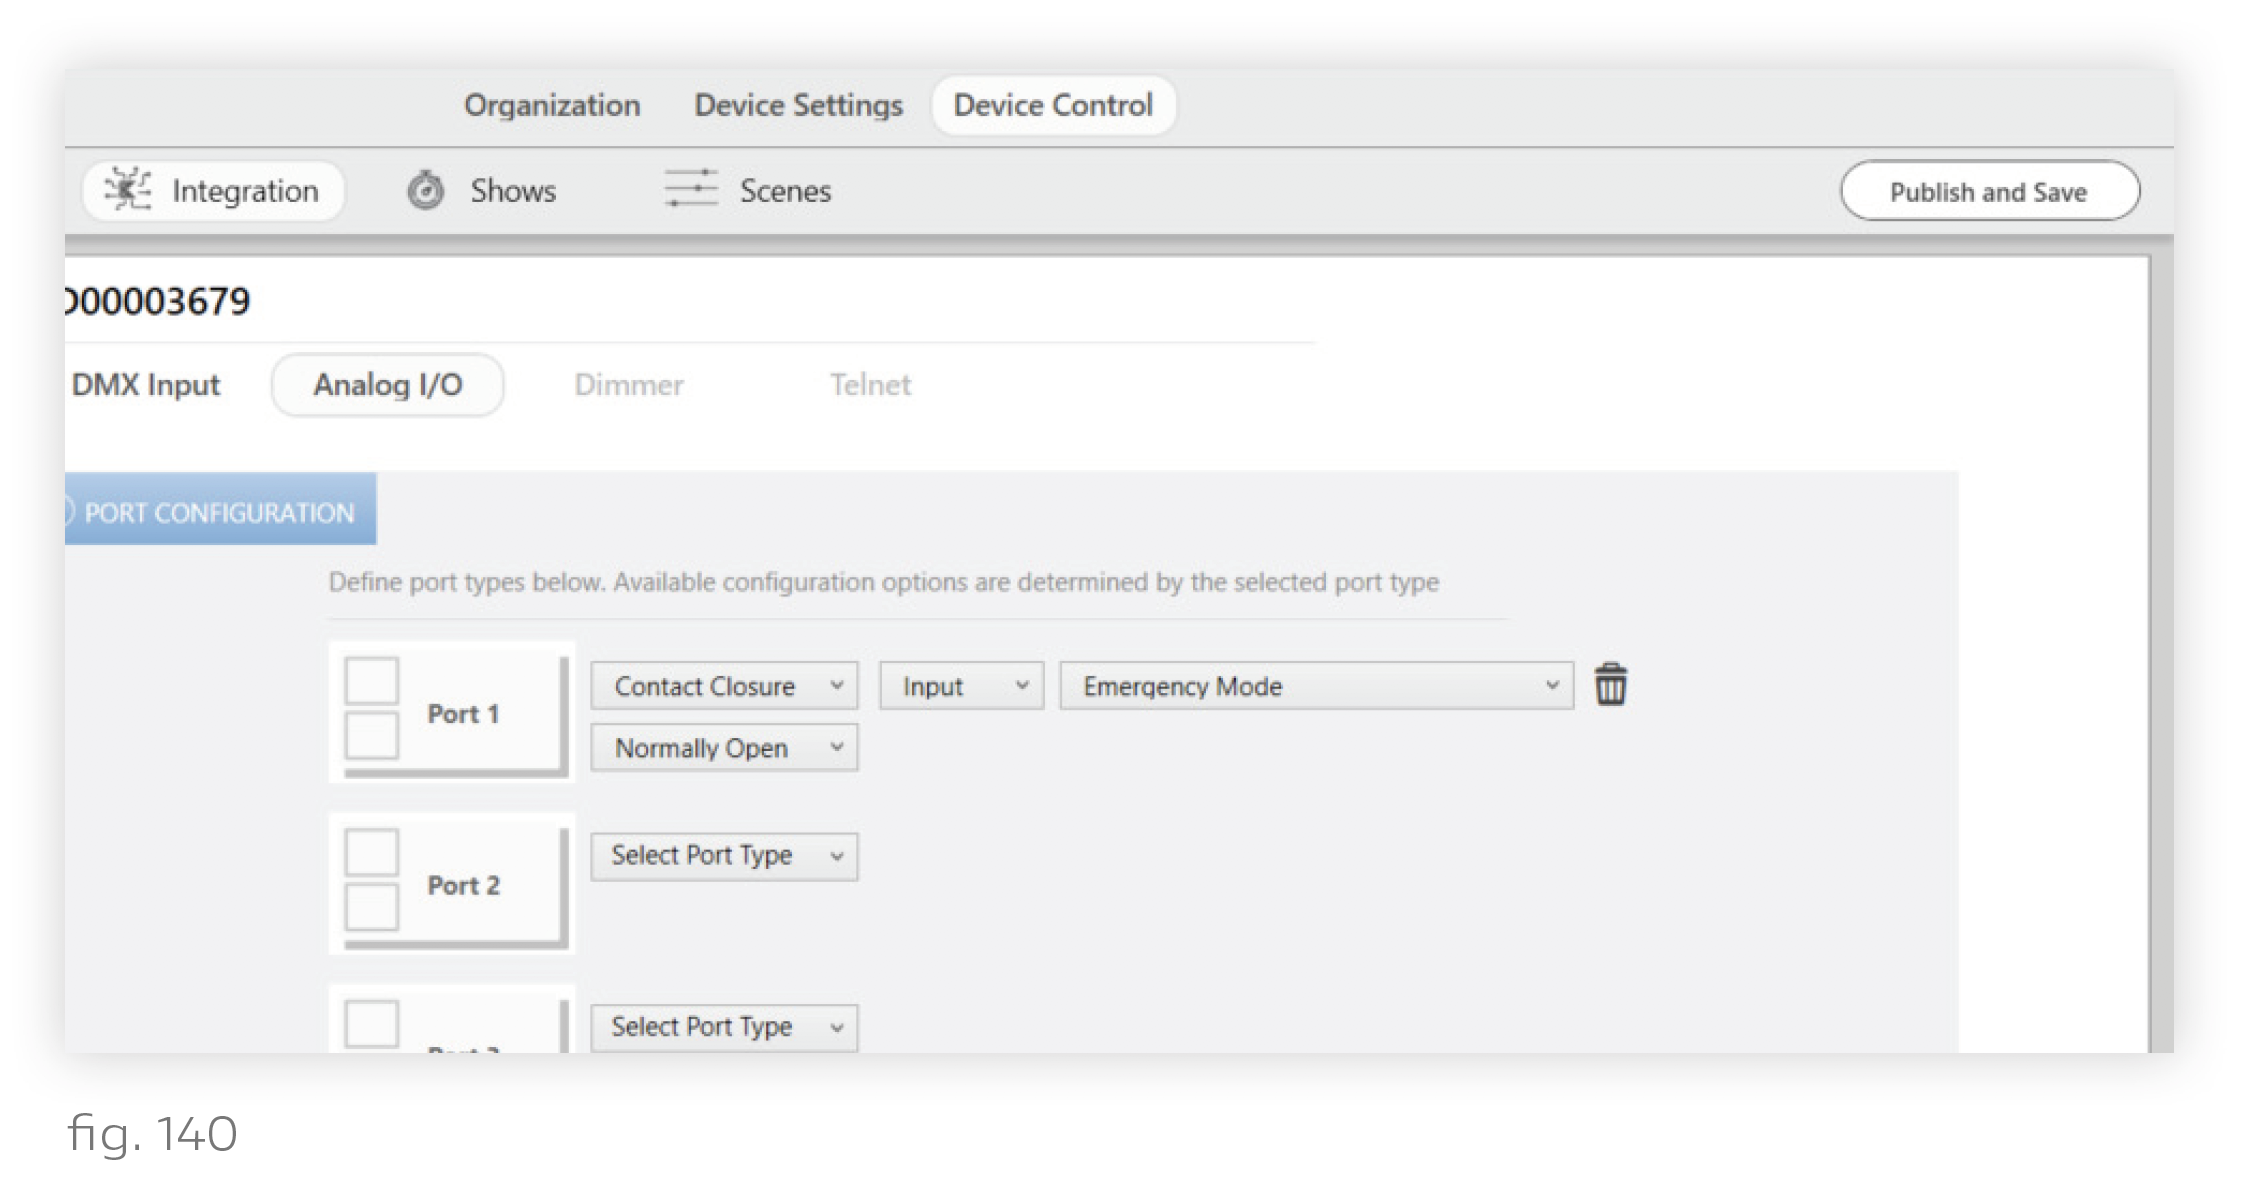
i. Go to Device Control > Integration.
ii. Select the appropriate N3 Satellite from the My Control Devices list on the left.
iii. Go to the Analog I/O tab.
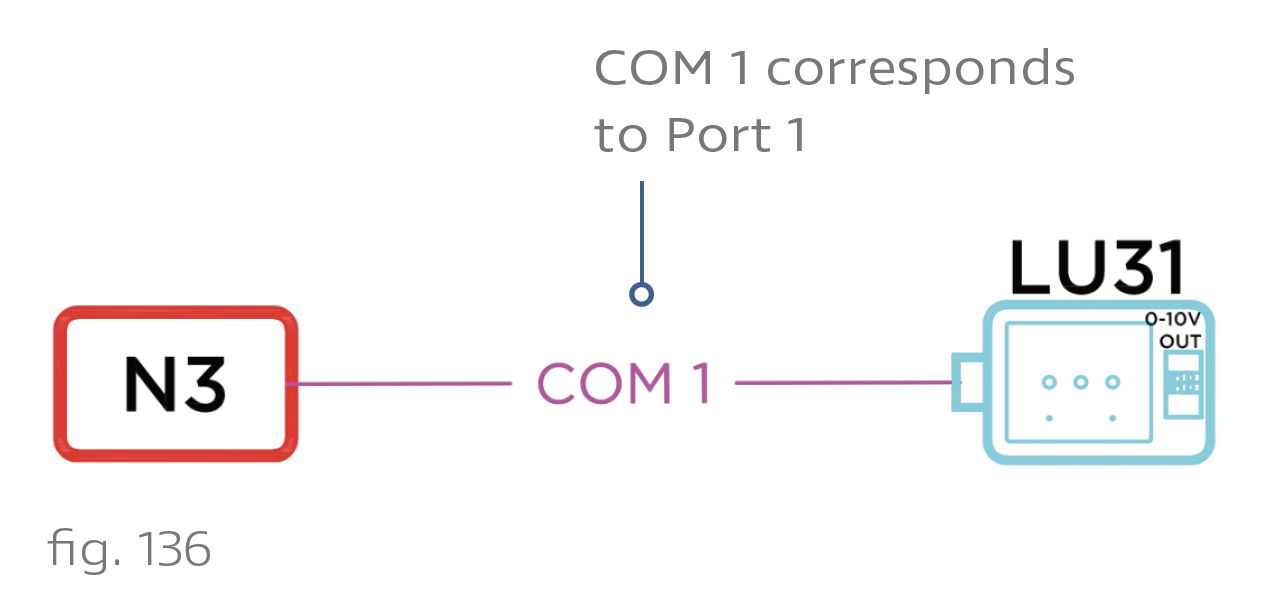
iv. Consult the Ketra submittal to see which port the relay or inverter is wired to. There are 4 Analog I/O ports on the N3 Satellite. In the Ketra submittal, “COM1” corresponds to Port 1, “COM2” to Port 2, etc.
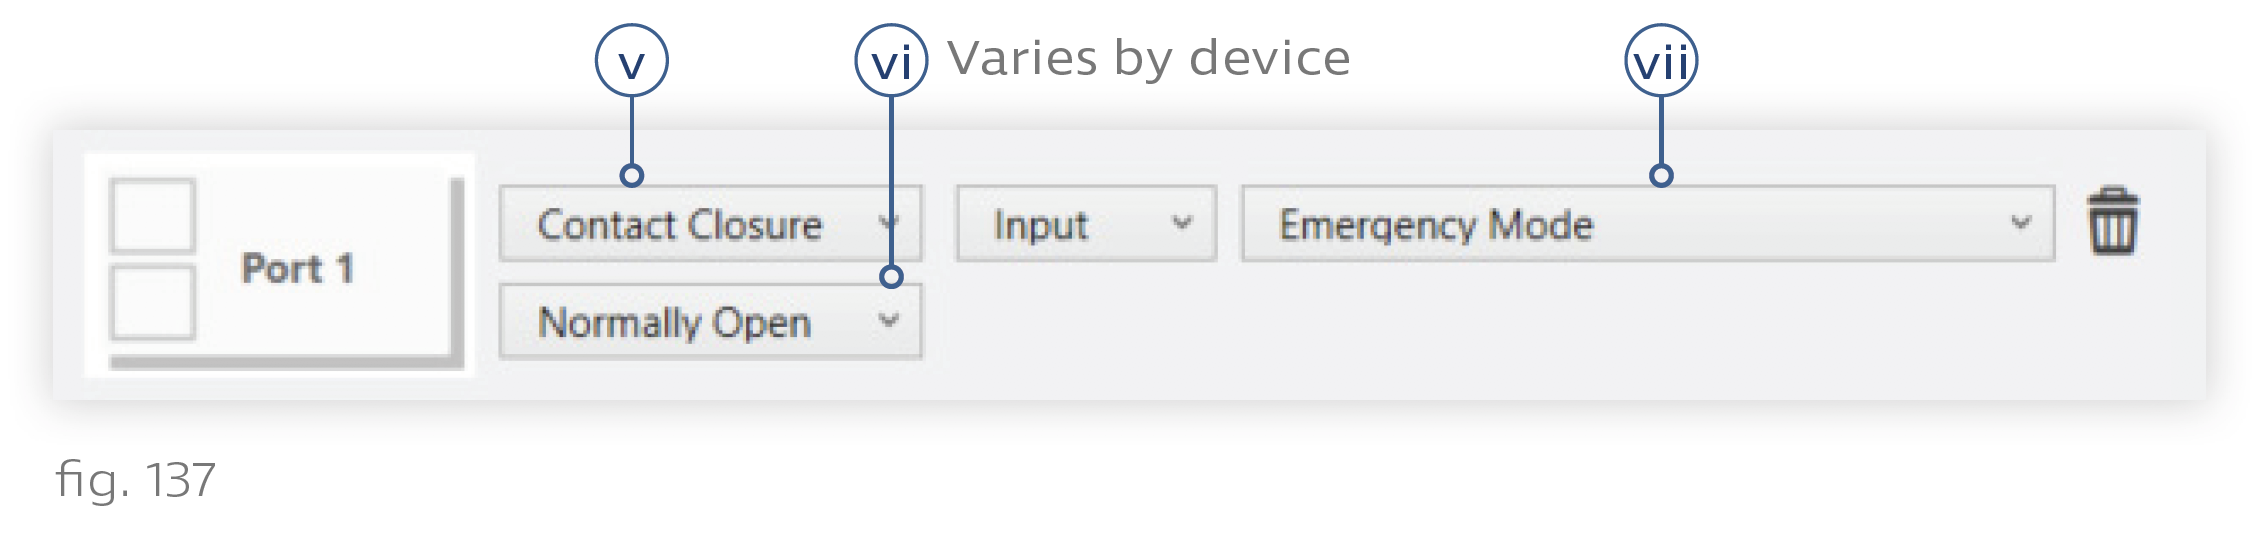
v. Set the Port Type dropdown to "Contact Closure".
vi. Set whether the port is normally open or normally closed. Each contact-closure port has two states—open and closed—depending on its input. Whether the port is normally open or normally closed depends on the emergency relay/inverter.
vii. In the dropdown on the right, select the Emergency Mode profile.
viii. Click Next.
ix. Publish your configurations by clicking Publish and Save in the top-right corner.
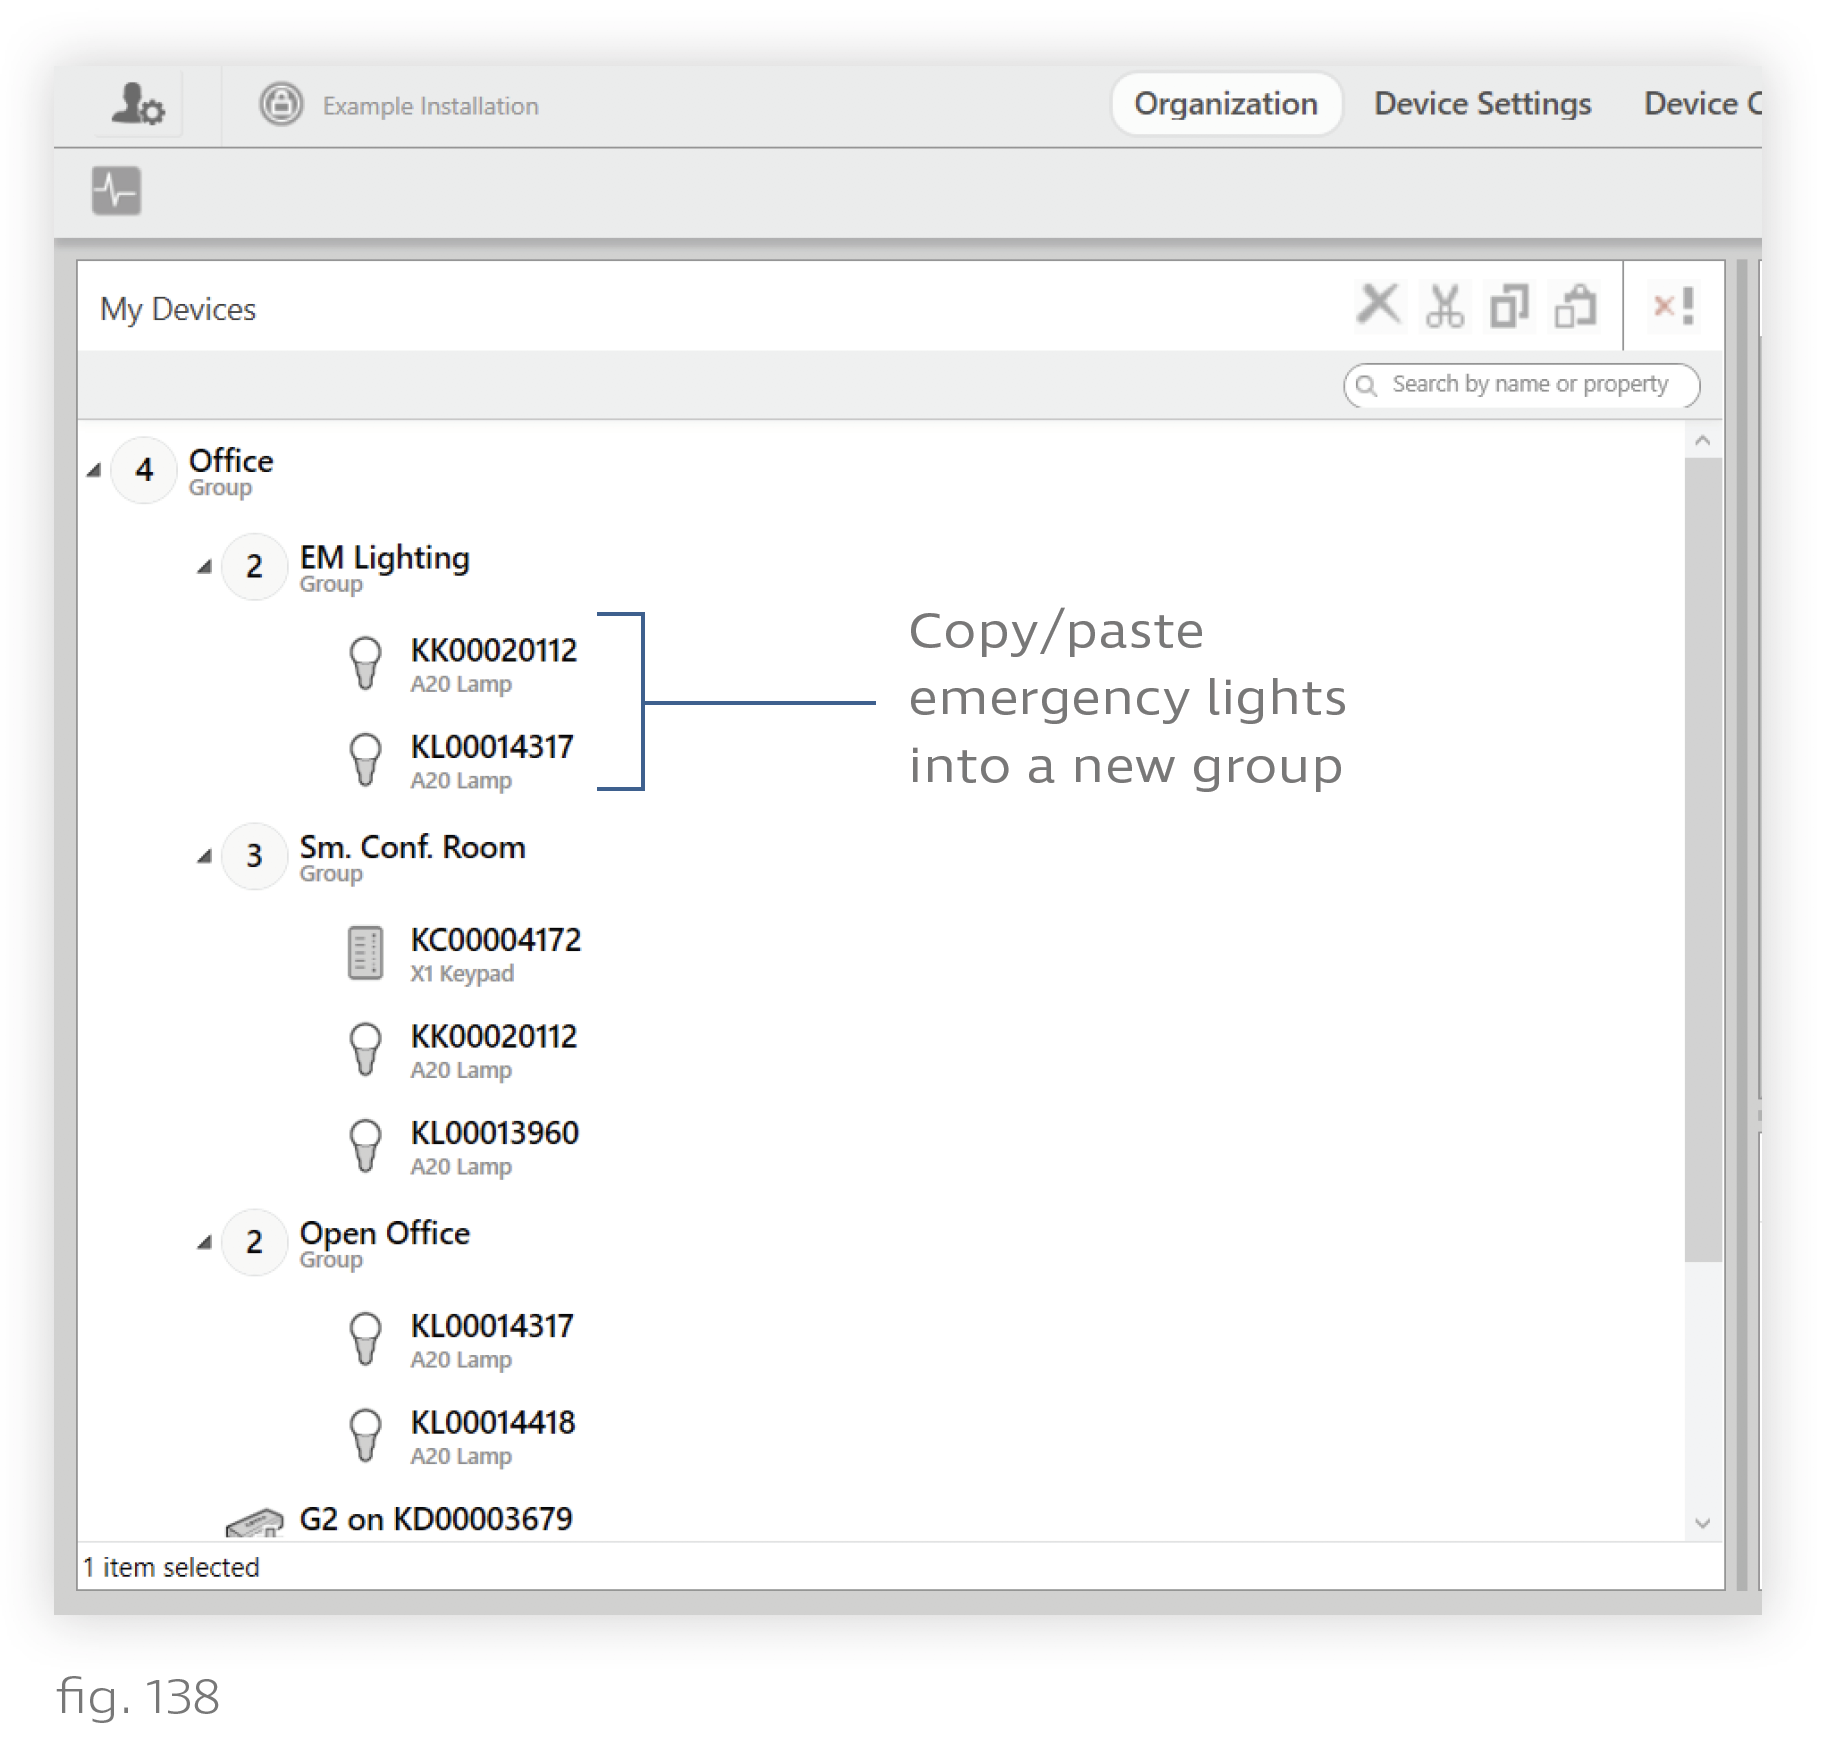
2. Create a group for the emergency lights. Go to the Organization tab.
i. Add a custom group to the highest-level group in the hierarchy.
ii. Rename the group something like “EM Lighting.”
iii. Select the lights you intend to use for emergency lighting, then copy/paste them into the new group.
Note: You can copy and paste using Ctrl+C and Ctrl+V. Make sure to use the copy function, not cut.
Caution: Do not put any lights into the EM Lighting group that also belong to groups with unusual default power-restore states. The usual default is 3000K, 100% intensity. For example, if you have configured KA00110101’s group to restore to a dim blue, you should not use KA00110101 as an emergency light.
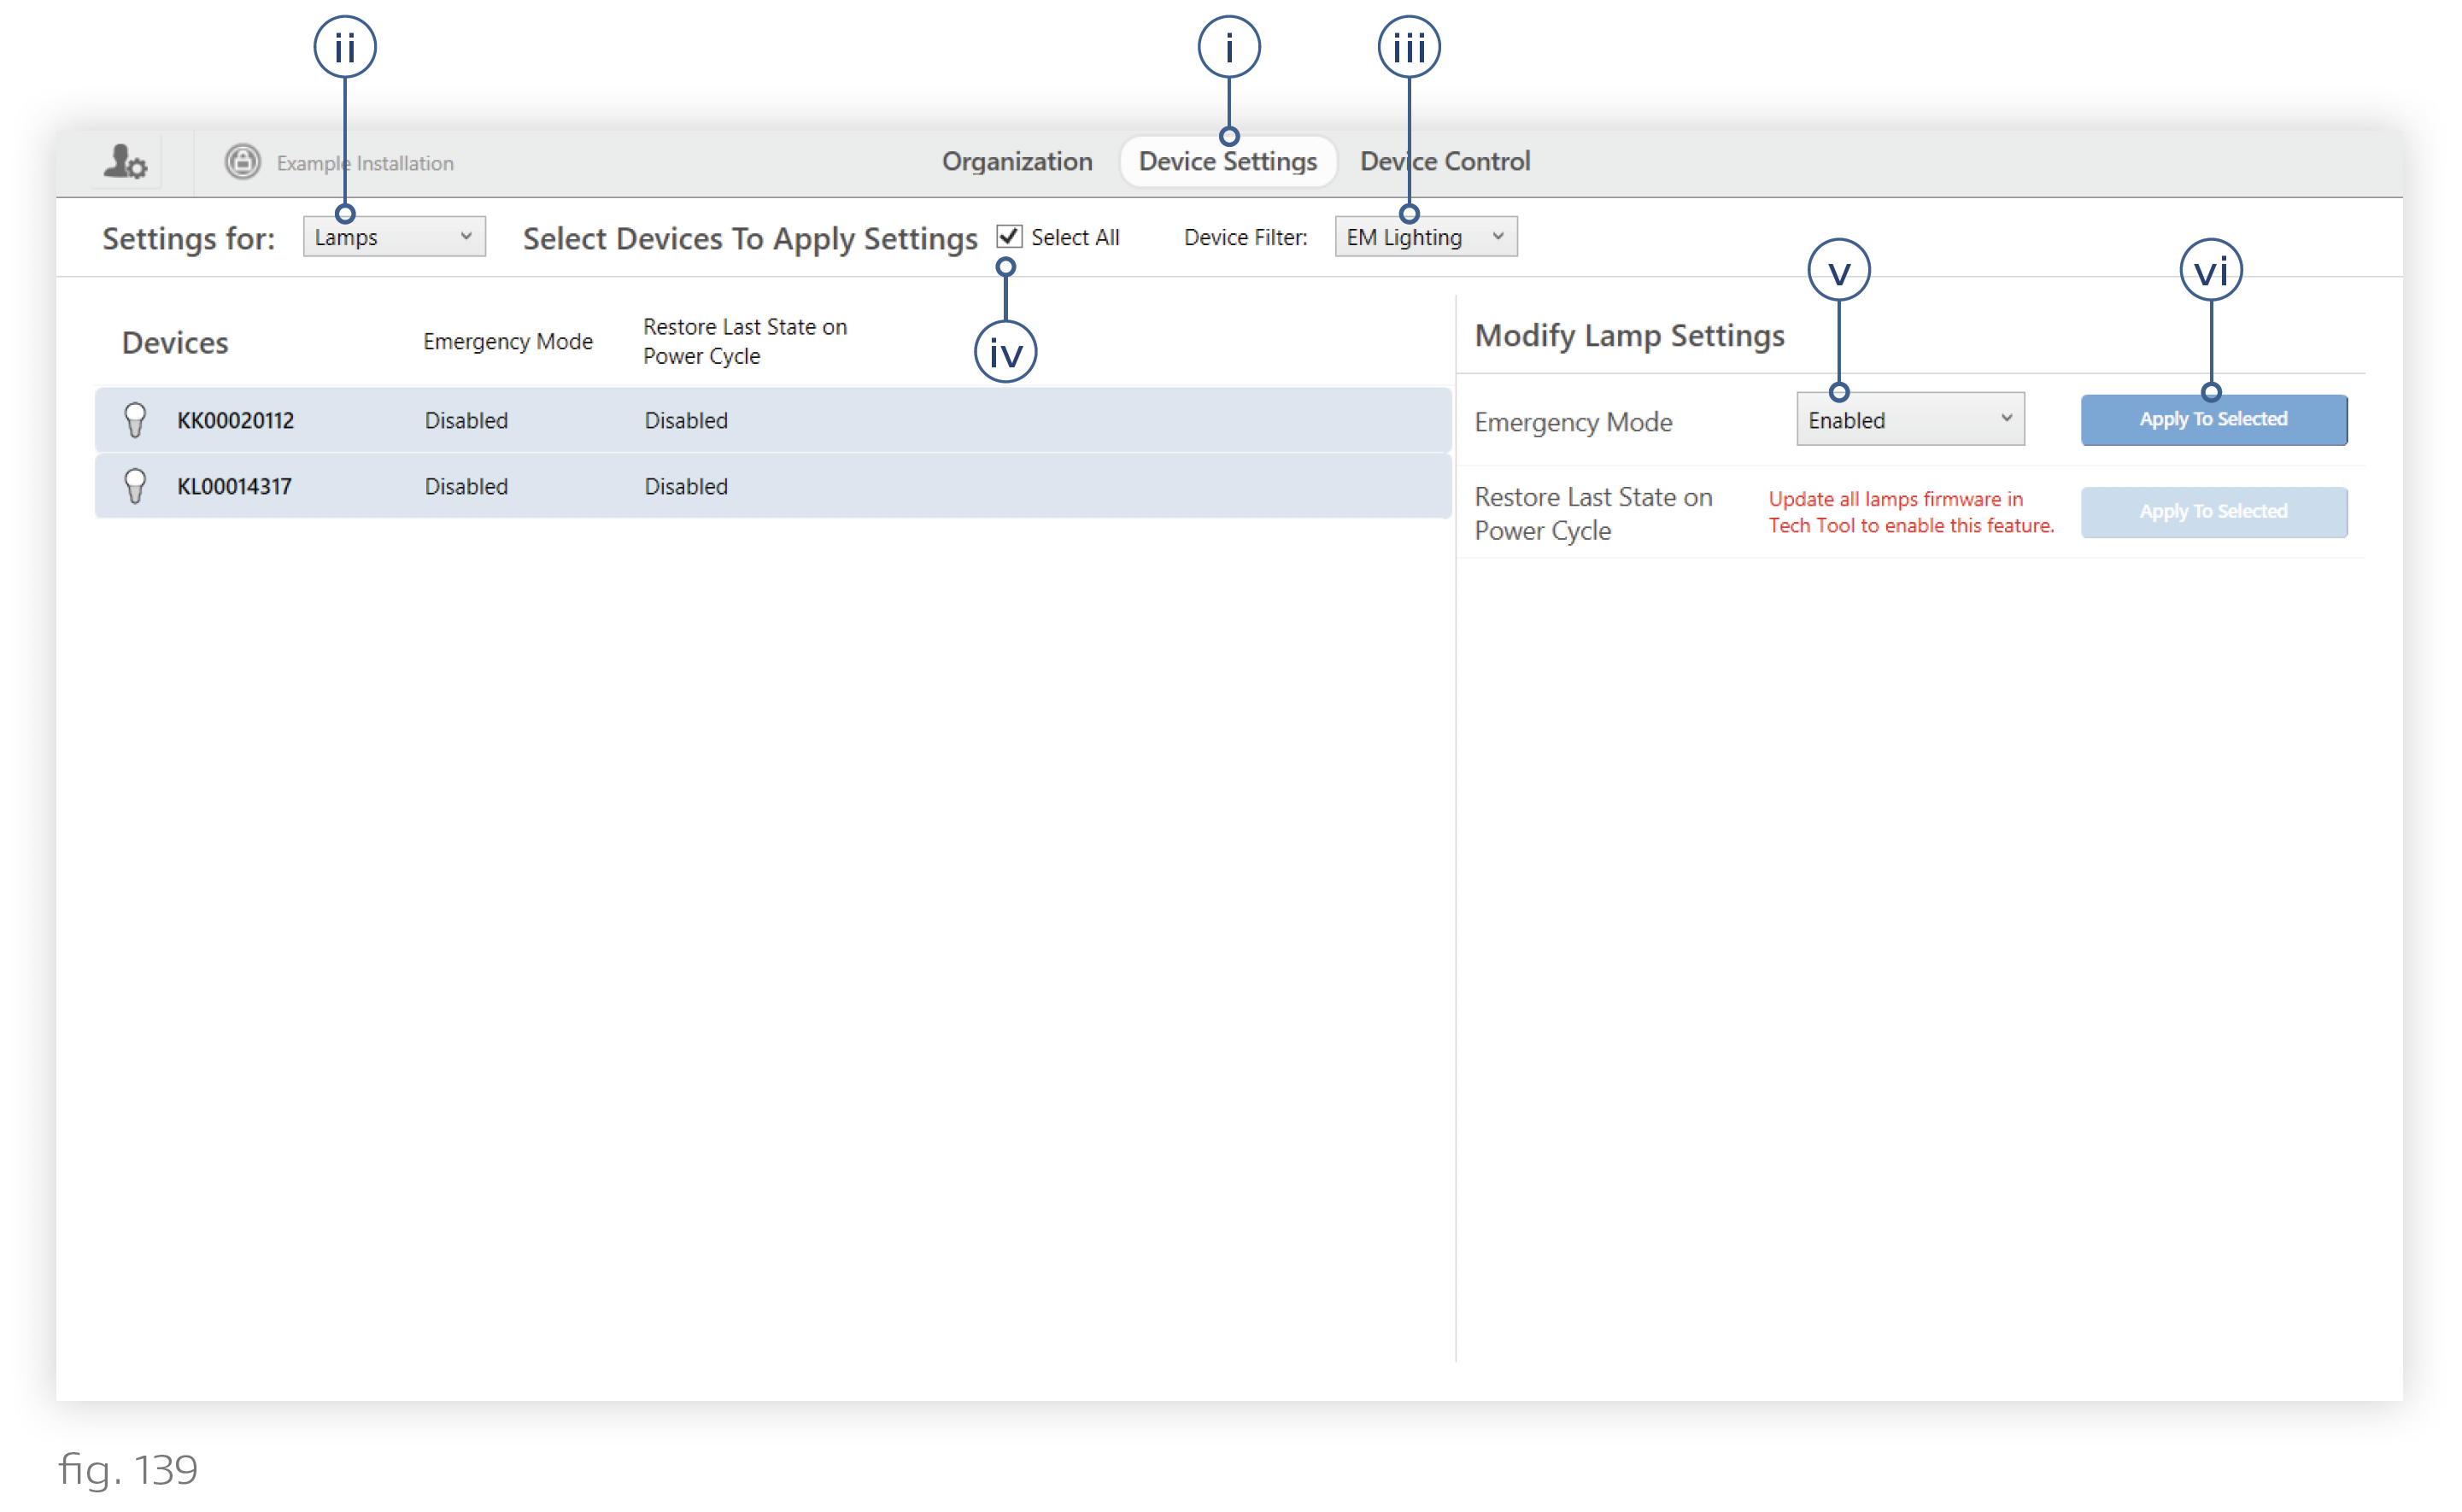
3. Enable Emergency Mode on KetraNet Mesh fixtures. (See fig. 139)
i. Go to the Device Settings tab.
ii. If necessary, set the Settings For dropdown to "Lamps".
iii. Use the Device Filter dropdown to select the EM Lighting group you just created.
iv. Check the Select All box to highlight all devices in the group.
v. In the Modify Lamp Settings pane, set the Emergency Mode dropdown to "Enabled".
vi. Click Apply to Selected.
Caution: Check to make sure that none of the lighting devices in the EM Lighting group shows “Enabled” in the Restore State on Power Cycle column. If any do, we strongly recommend disabling that feature on those devices.
4. Publish configurations
i. Go to the Device Control tab.
ii. Click Publish and Save in the top-right corner.