
A run of linear fixtures is all of the Ketra fixtures attached to a single N3 Satellite. By default, Design Studio requires all fixtures in a run to be grouped together. However, you can divide a run into multiple groups to enable discrete control.
To do so, use Tech Tool’s ii feature. Emitter Grouping can sort individual linear fixtures into groups, and even sort individual emitters within the fixtures into groups. It can also put fixtures and emitters from different runs into a group together.
Example applications:
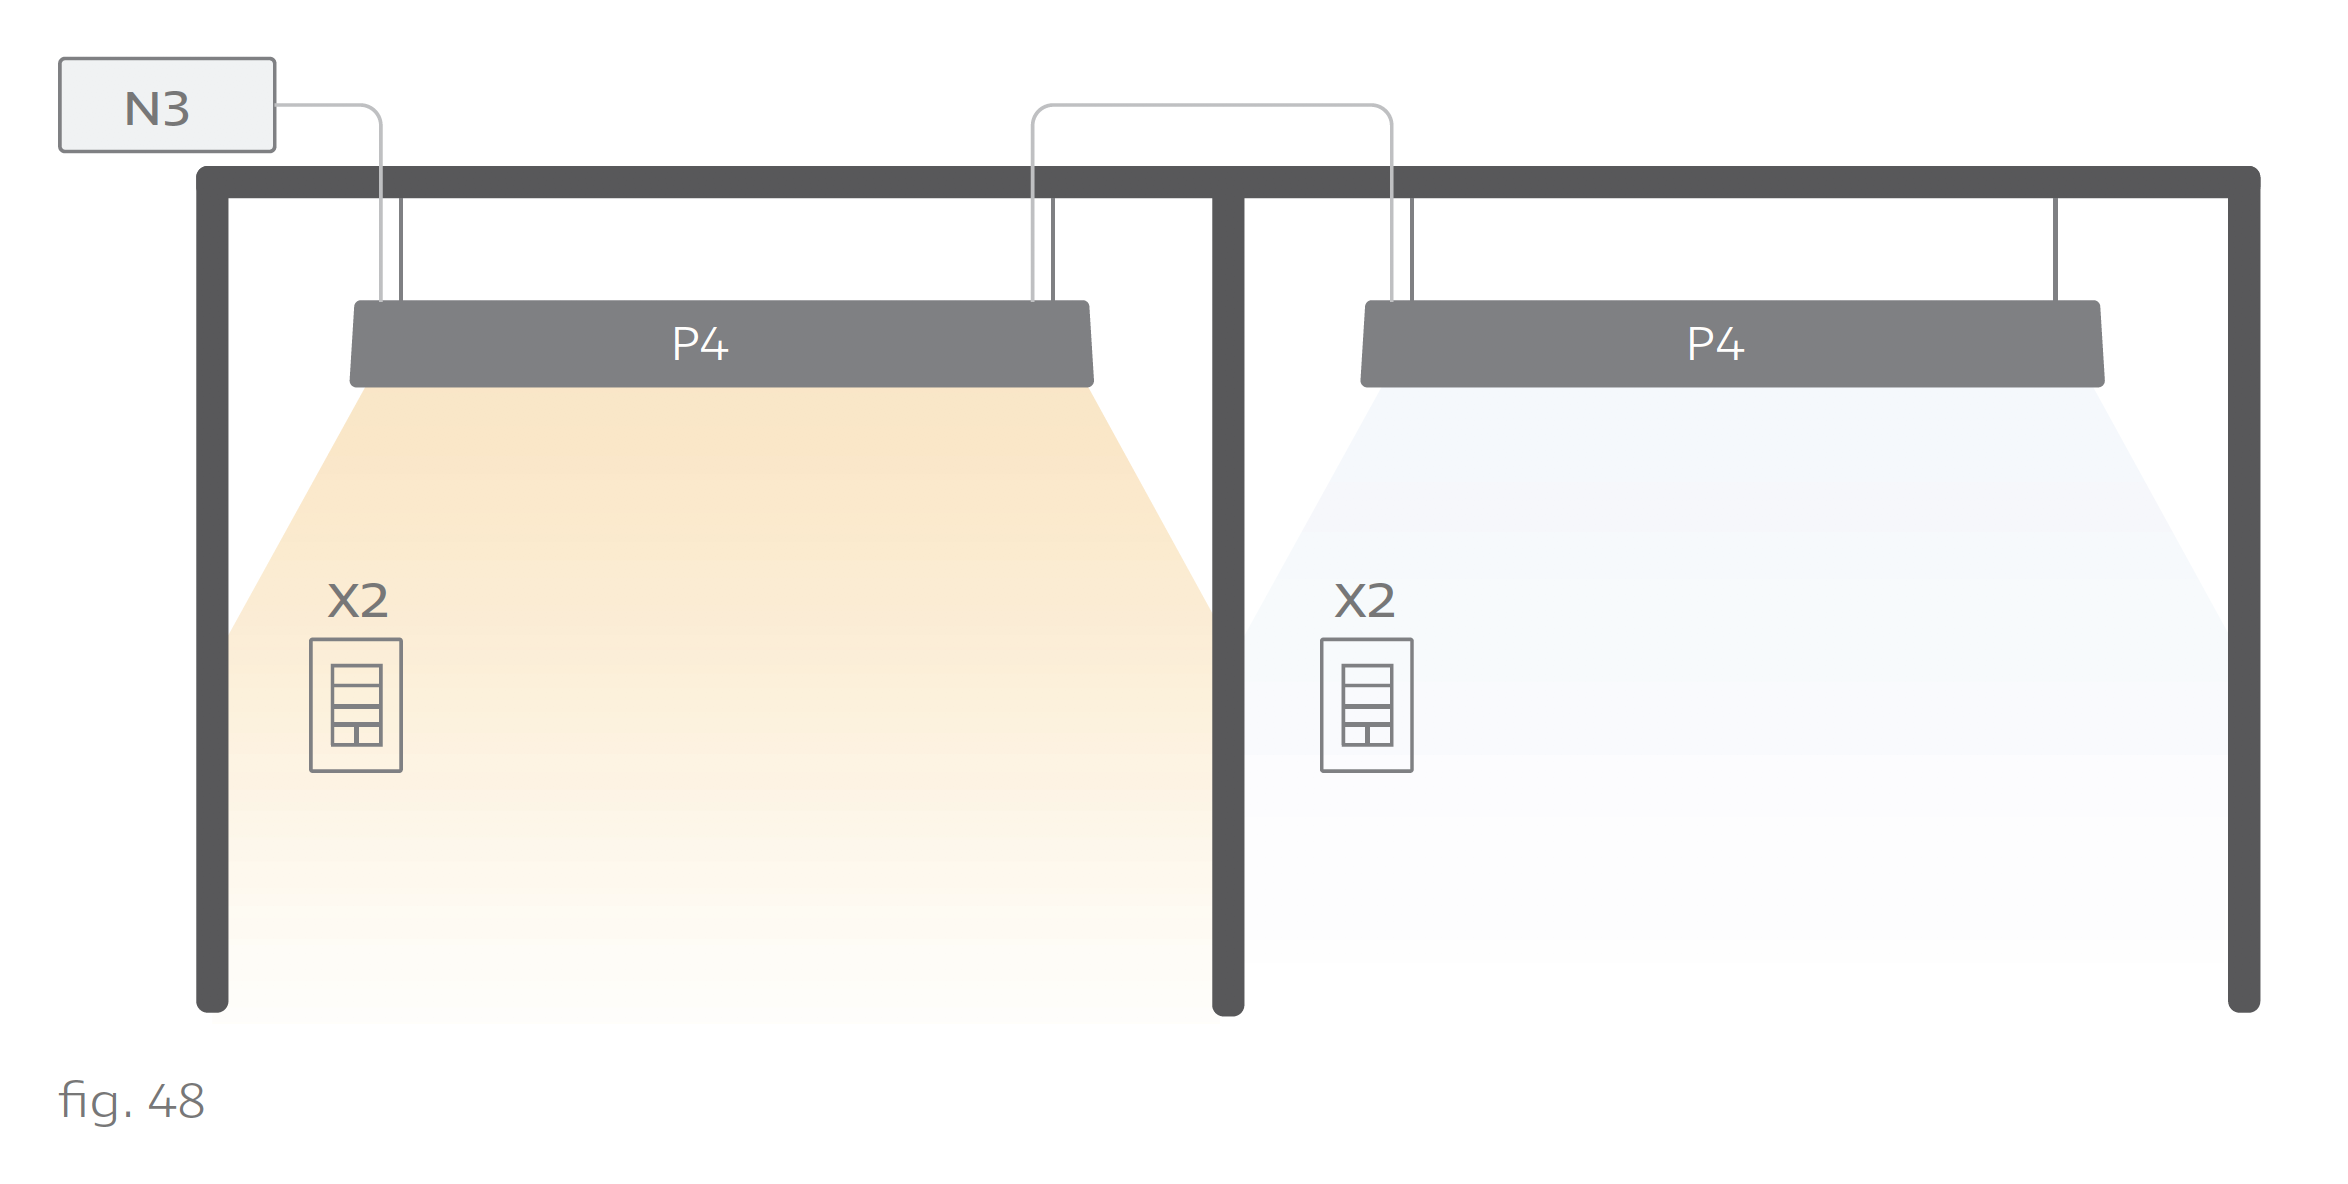
- If a single run contains overhead fixtures in more than one room, use Emitter Grouping to divide the run into two groups—one per room. Each room can then be configured and controlled independently.
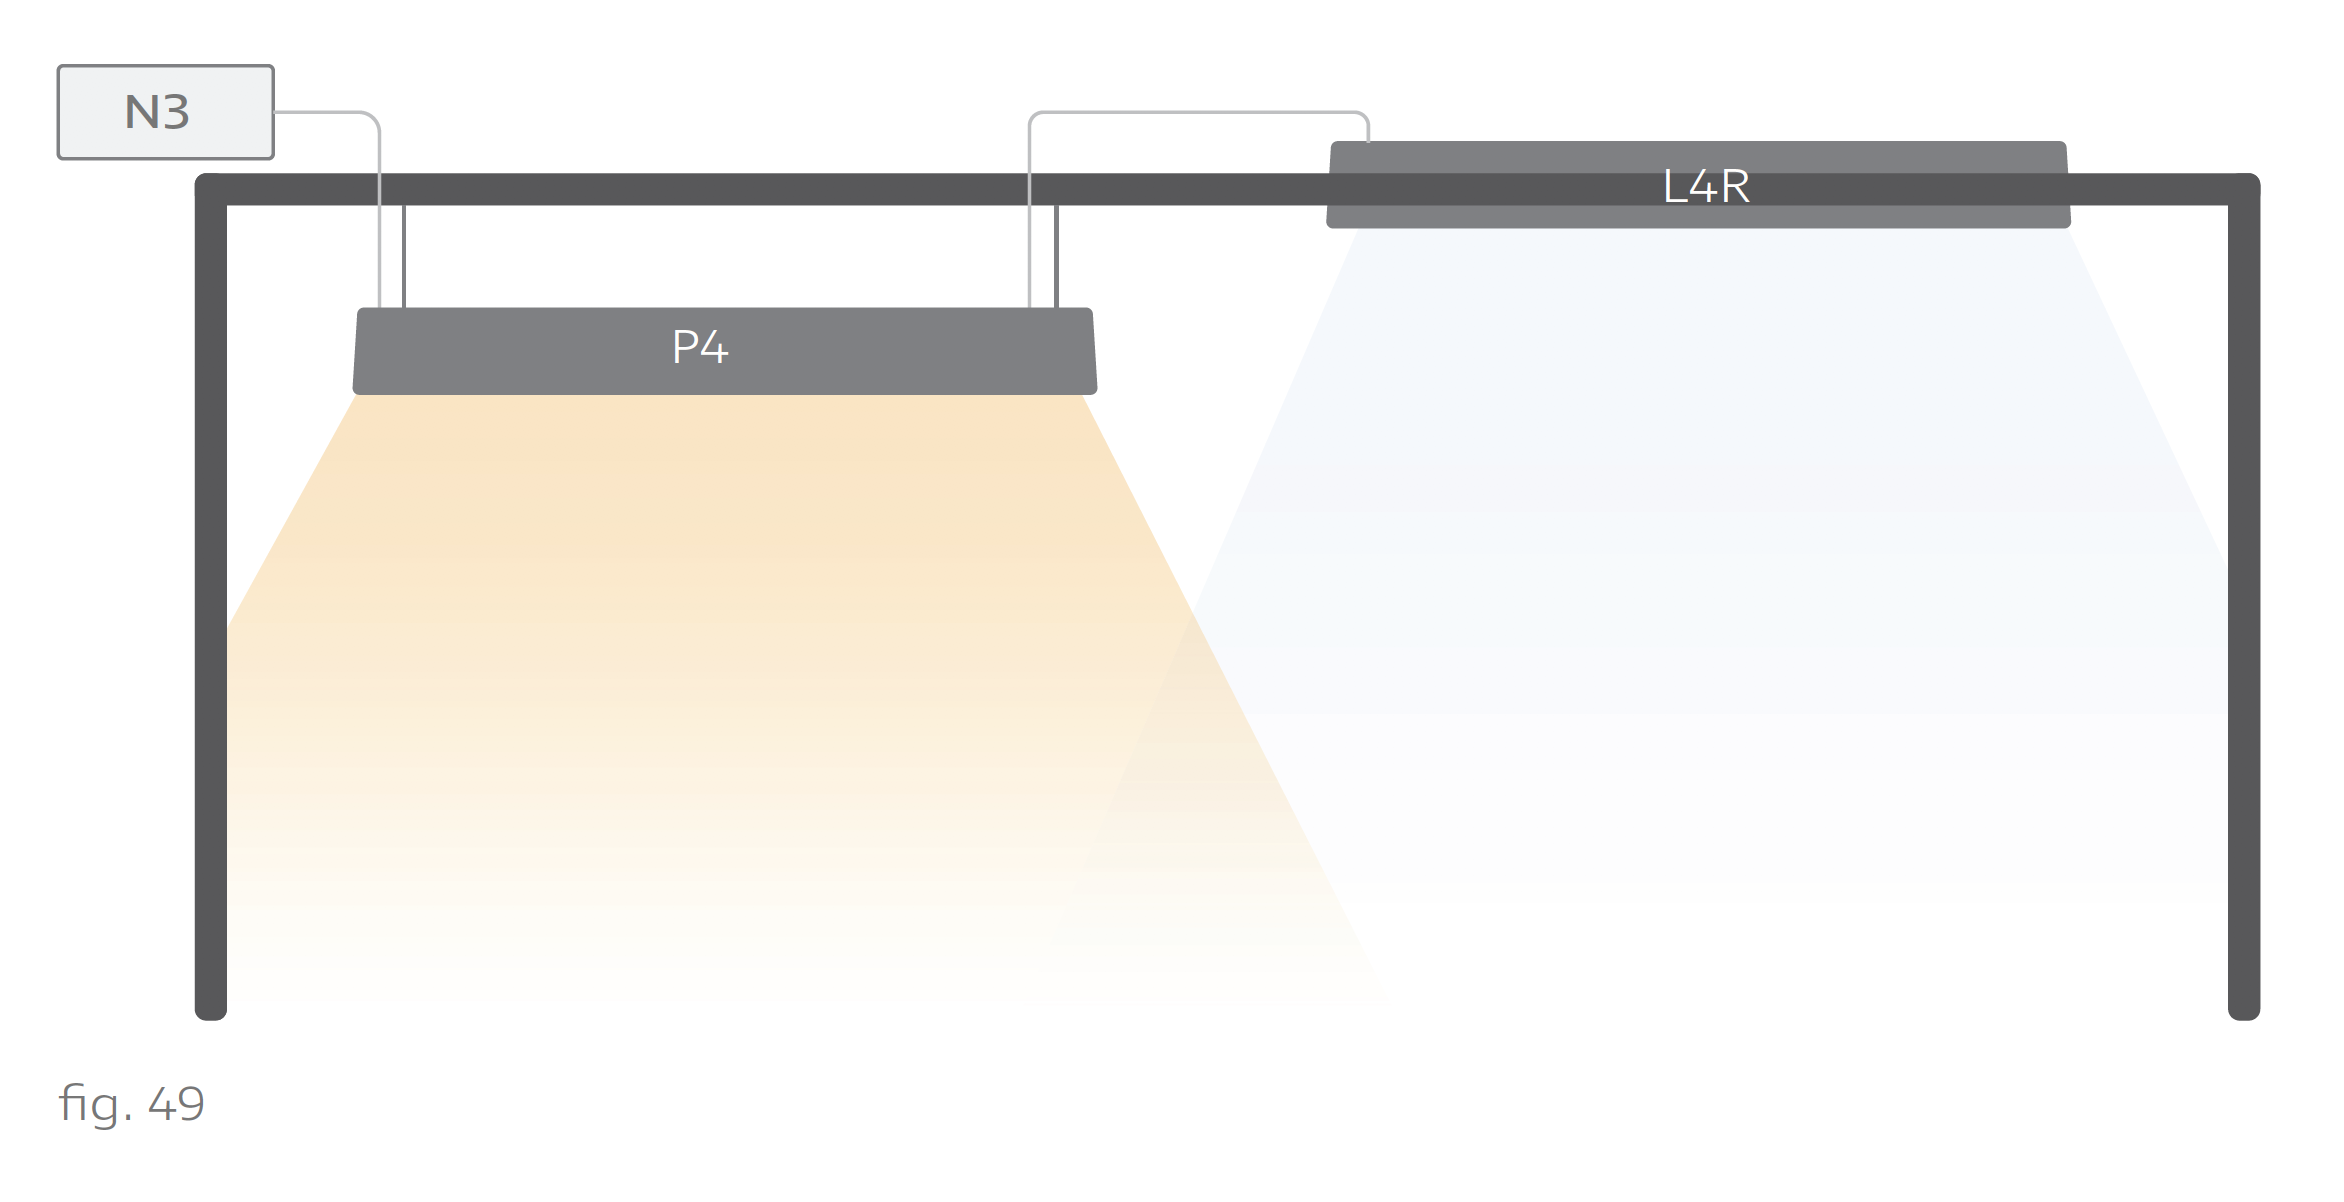
- If a single run contains recessed and pendant fixtures, you can use Emitter Grouping to divide the run into two groups—one per type of fixture. Each type of fixture can then be configured and controlled independently. (The groups can use consecutive or nonconsecutive fixtures.)
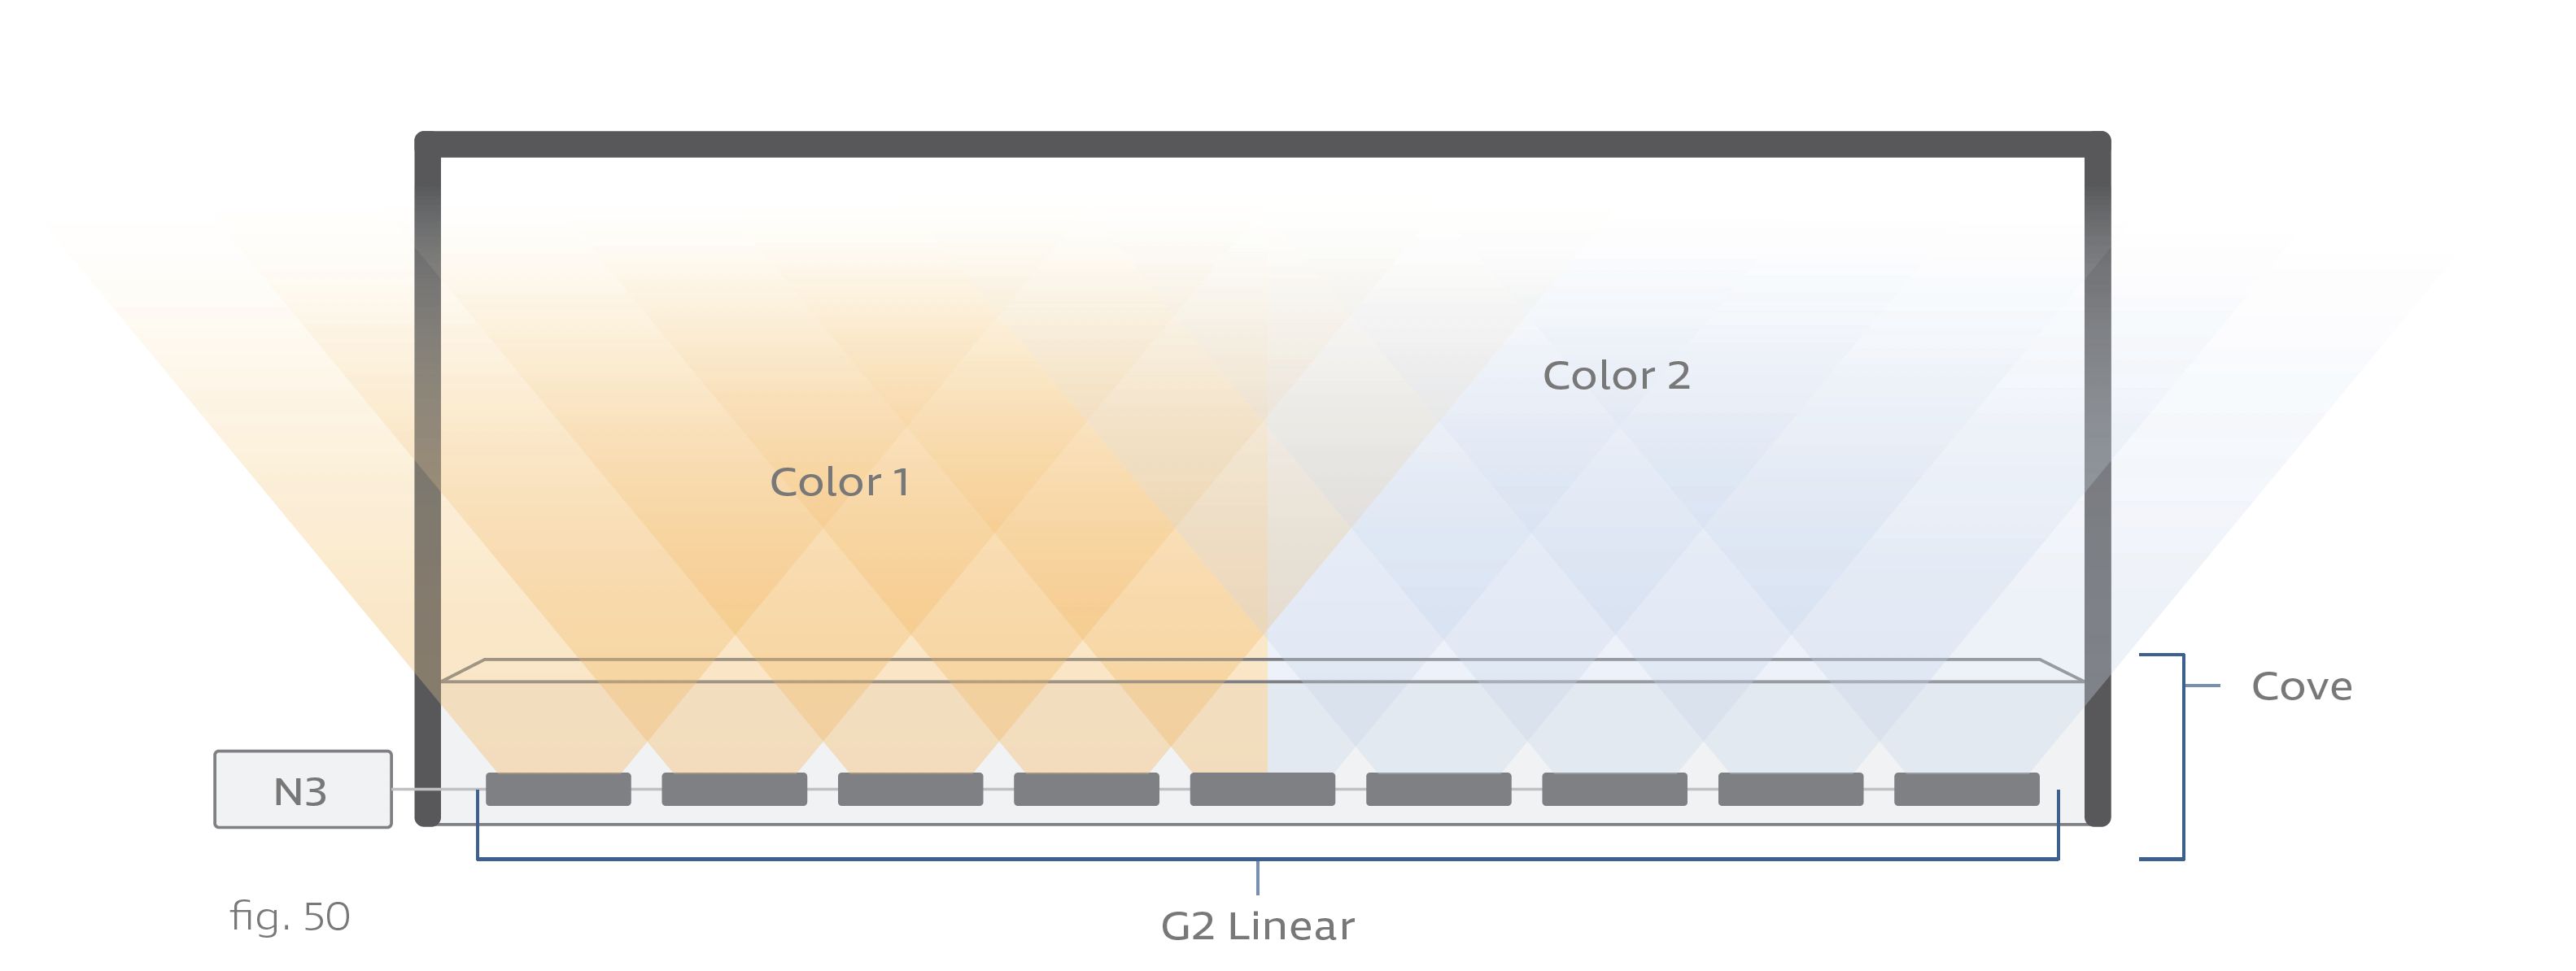
- 9 G2 Linear fixtures are washing a wall, and you want half of the wall to have one color and the other half to have another color. In this case, you would do the following math:

Note: Groups must be built in Design Studio prior to using Emitter Grouping. You cannot build groups in Tech Tool.
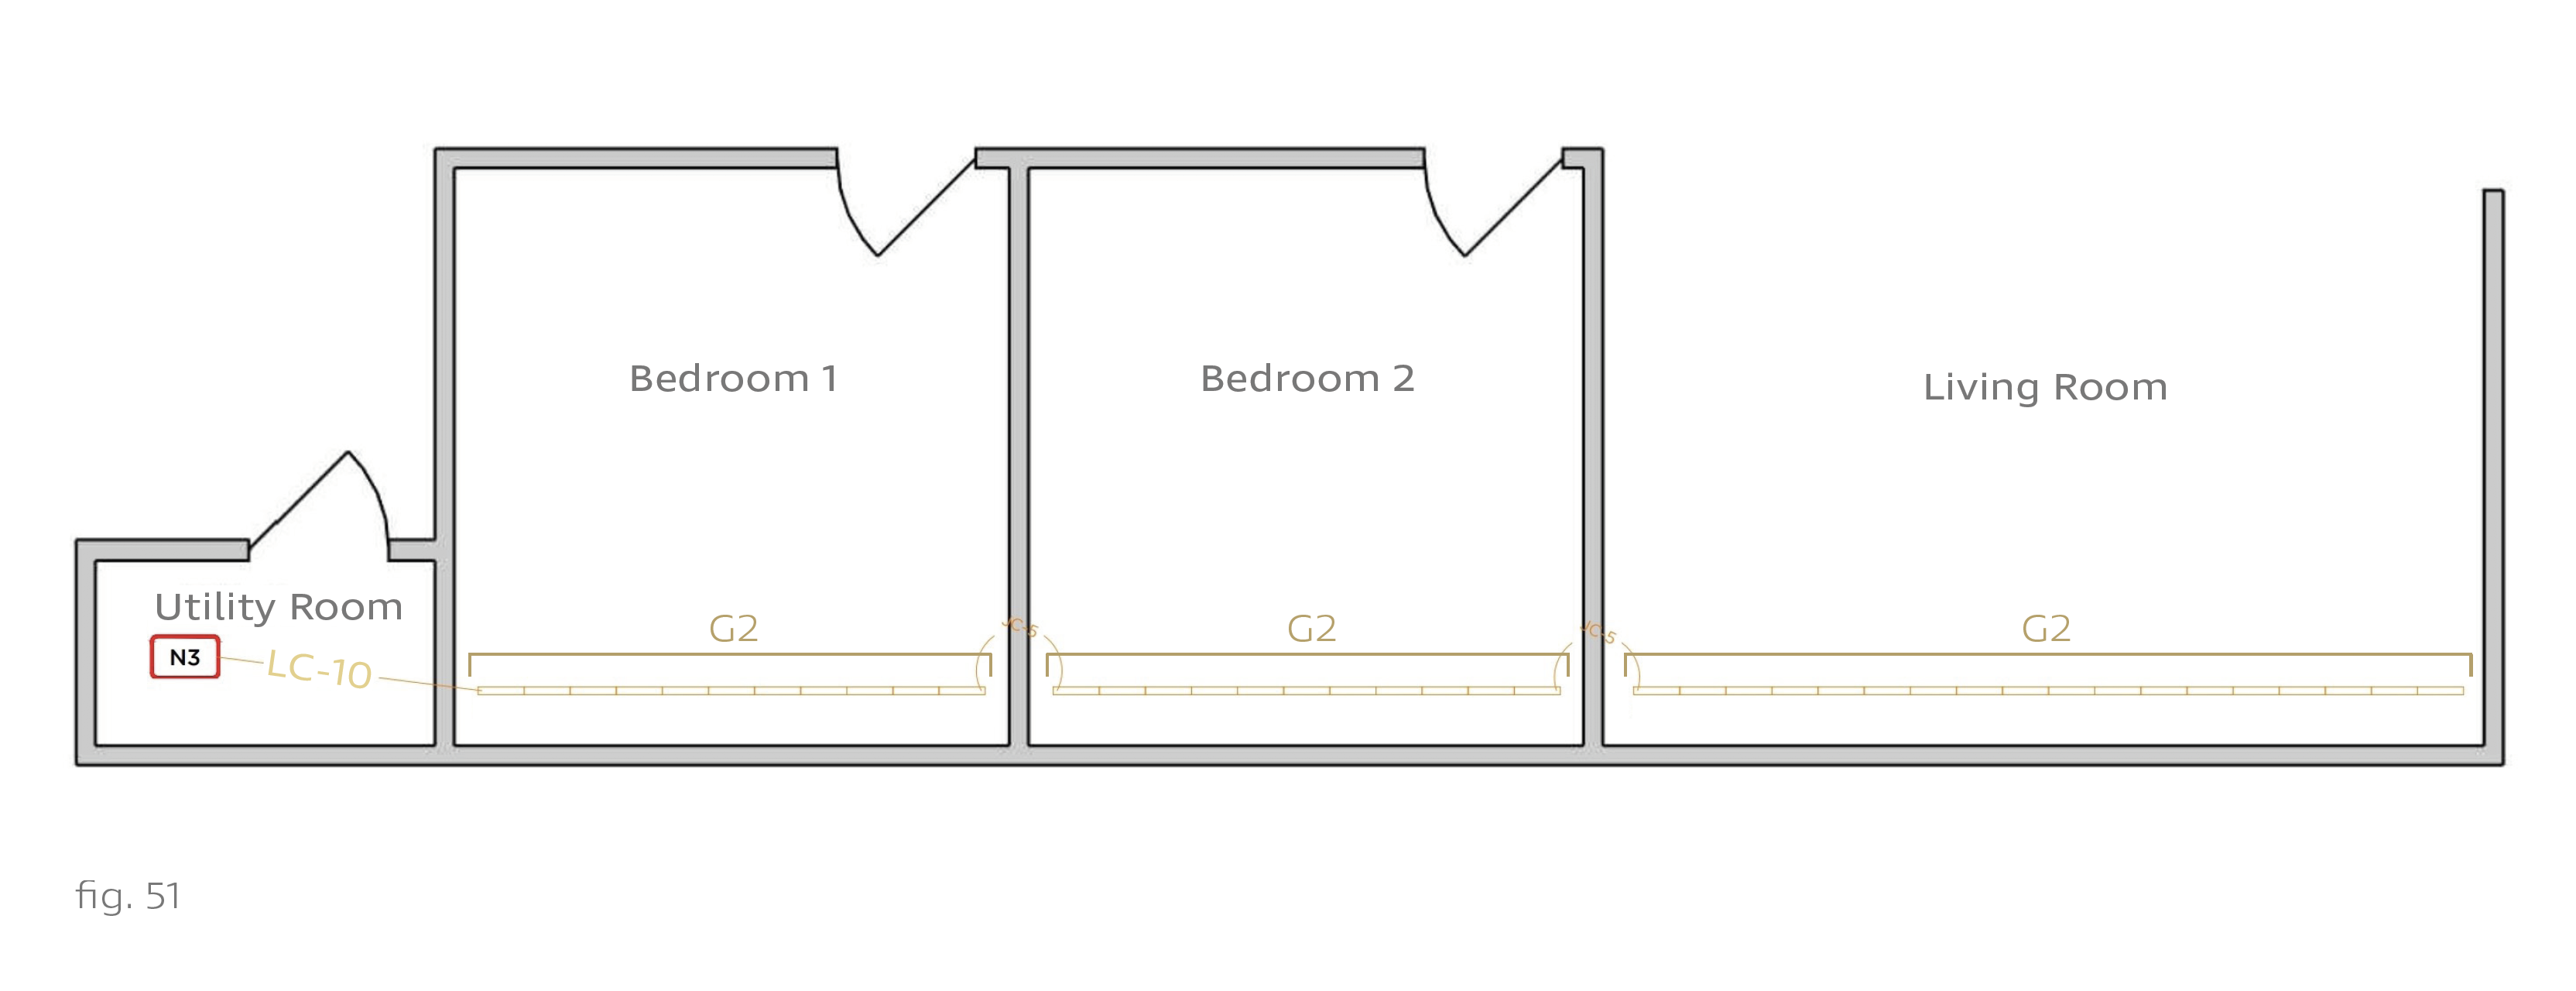
In the step process below, all example images will draw from this blueprint:
To sort fixtures and emitters into groups, follow these steps:
1. If you haven’t done so, create a group for each room or each run segment. If creating groups, be sure to add them to their proper place in the grouping hierarchy.
2. Add or cut/paste the N3 Satellite into the first group in which its fixtures appear.
Note: The N3 will not necessarily be located in the same room as the first fixture in the run. Always put the N3 into the first room that has fixtures. In our example, the N3 is located in the utility room, but we will add the N3 to "Bedroom 1".
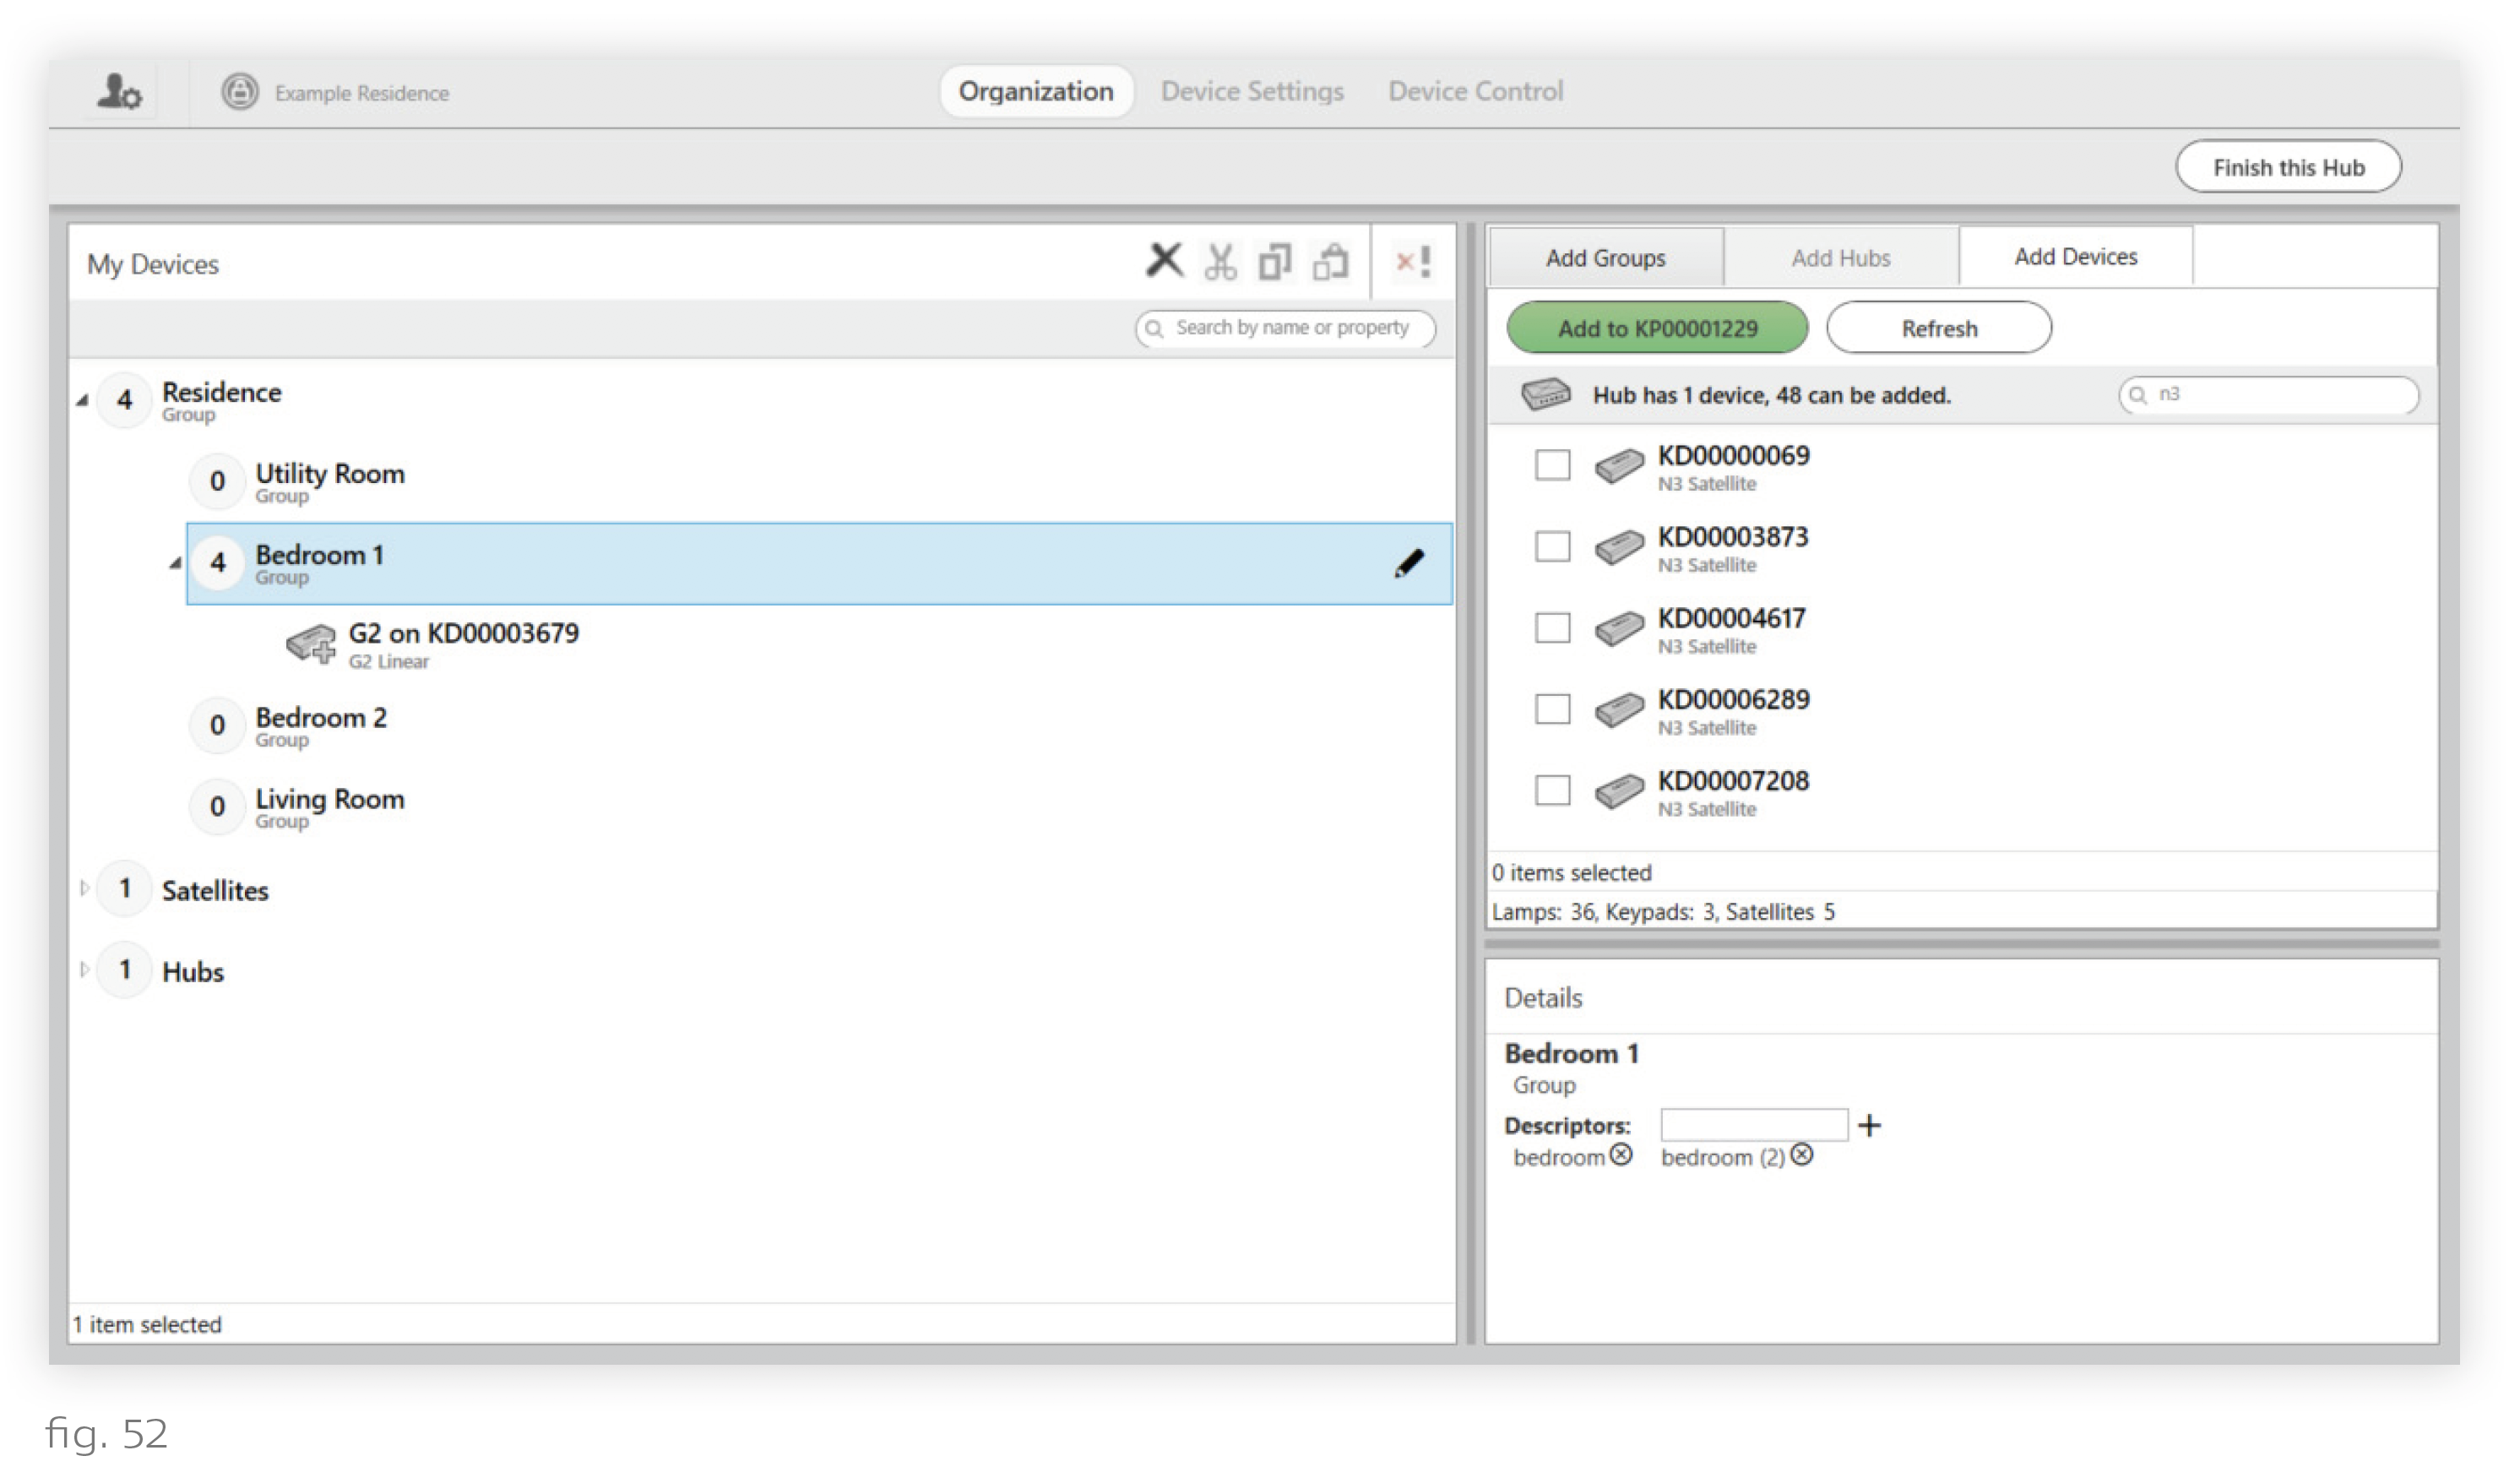
3. Make a note of the N3 Satellite’s serial number or name. You will reference this serial number or name later in Tech Tool.
4. Click Finish This Hub to save your hub configurations.
5. Click Publish and Save.
6. Close Design Studio and open the installation in Tech Tool.
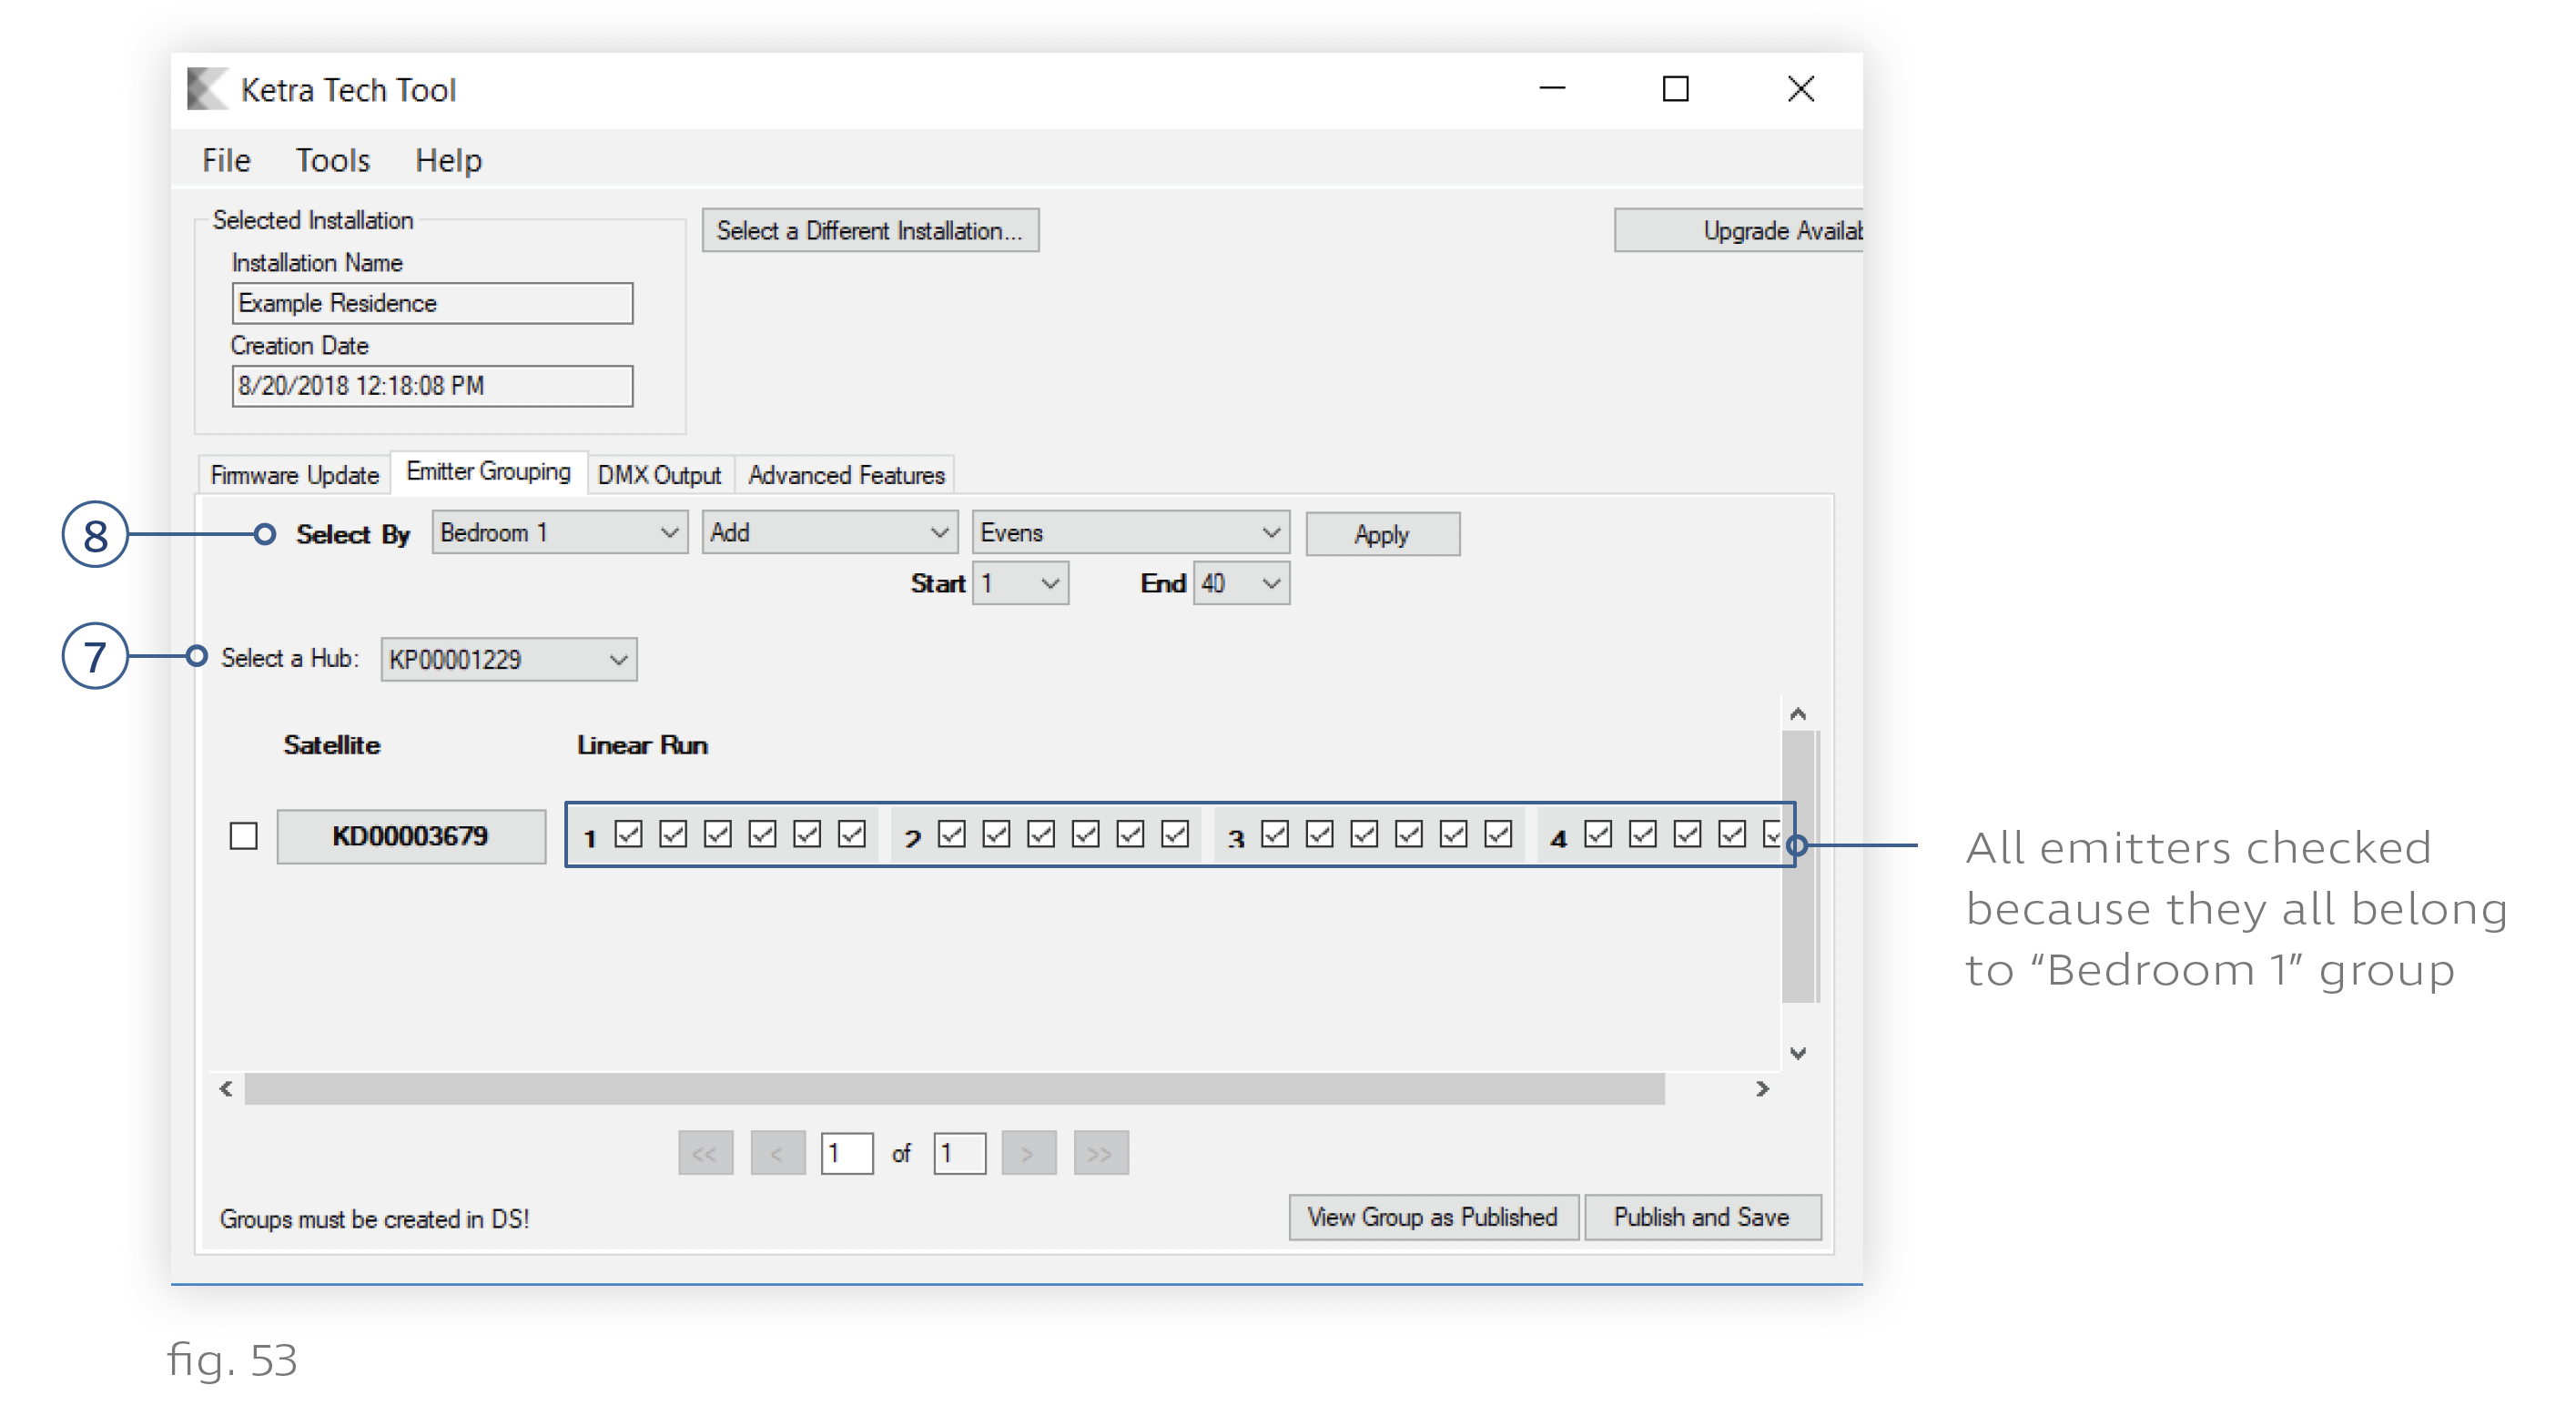
7. On Tech Tool’s Emitter Grouping tab, use the Select a Hub dropdown to select the hub/KNet that hosts the N3 Satellite.
8. In the Select By dropdown, pick the N3 Satellite’s group (i.e., the first group in which fixtures appear). The checkboxes represent emitters connected to the N3.
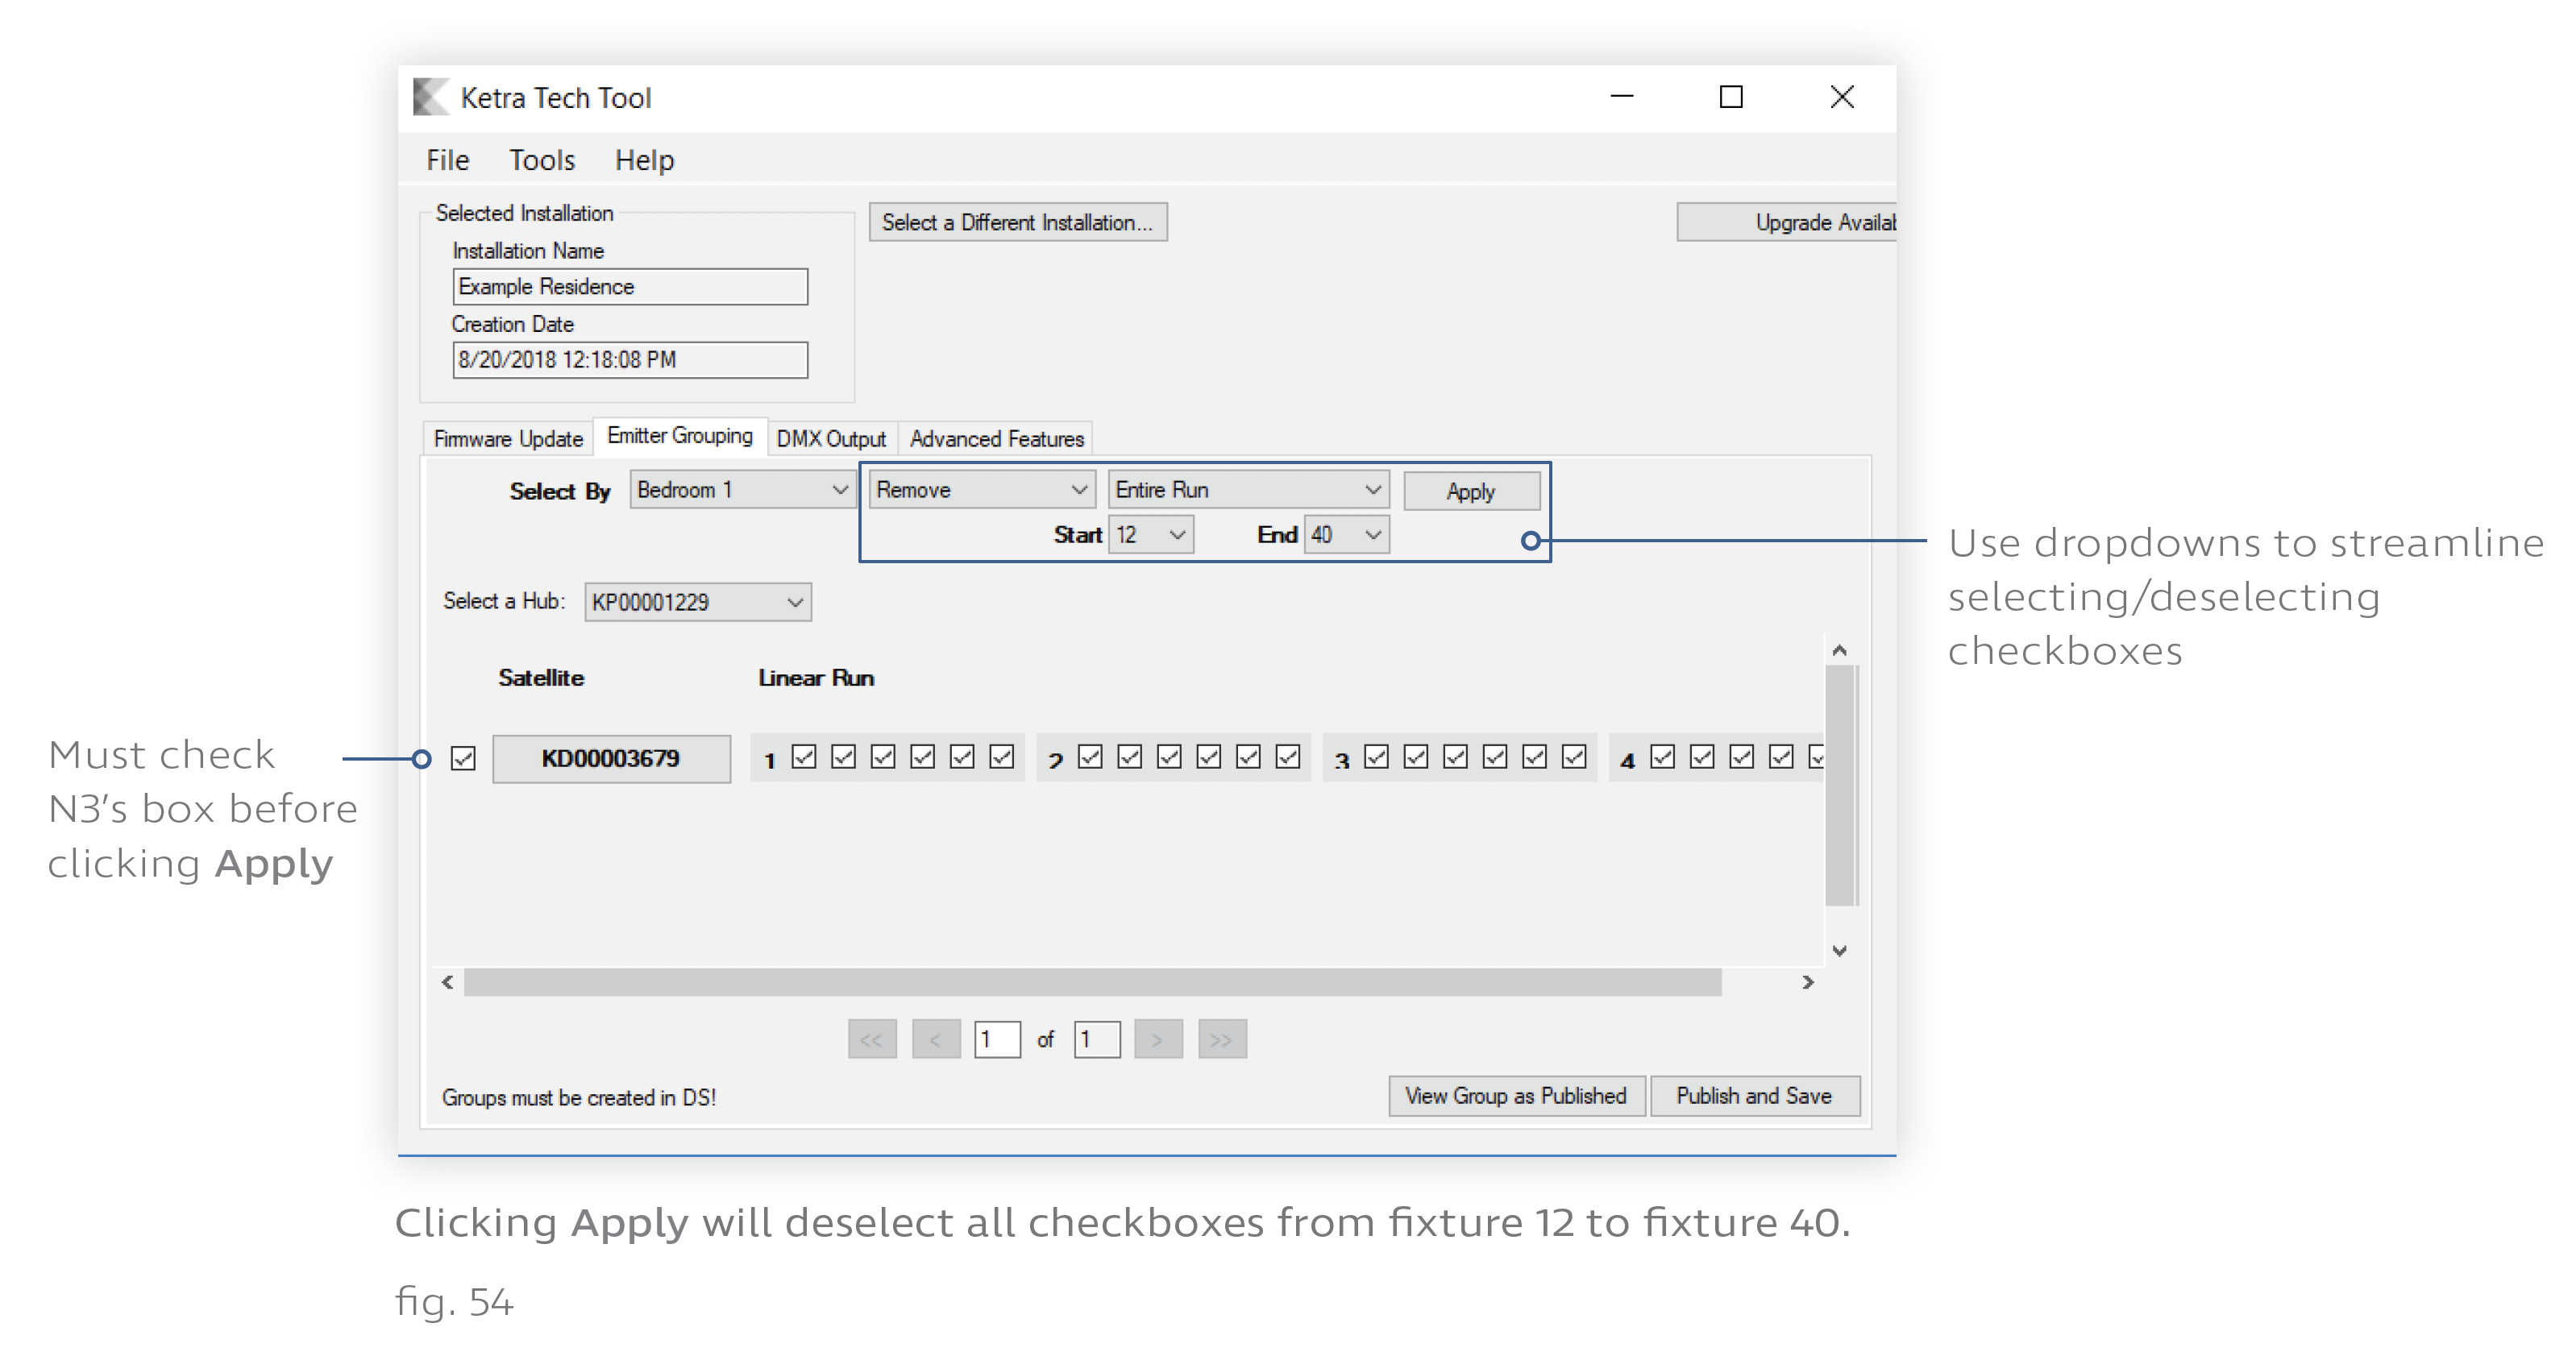
9. Remove any emitters that shouldn’t be in the group. You can either do this by unchecking each emitter’s box or by using the dropdowns as shortcuts.
If using the dropdowns:
- The dropdowns called out in fig. 54 (Start, End, and the unlabeled ones that default to Add and Evens) let you tell Tech Tool which boxes you want to uncheck. Once you click Apply, it will automatically uncheck those boxes for you. No changes will be made to the devices themselves until you click Publish and Save.
- Before clicking Apply, you must check the box to the left of the N3 Satellite’s name or serial number.
- Use the Add/Remove dropdown to determine whether you want to check or uncheck boxes.
- Use the Start and End dropdowns to set a fixture range whose boxes you want to check or uncheck. This range is inclusive (e.g., to include first 10 fixtures, set Start to 1 and End to 10).
- Use the Evens/Odds/Entire Run/etc. dropdown to determine which boxes you want to check or uncheck within that range.
- Example: Uncheck (remove) all even-numbered emitters in fixtures 5-8.
- Click Apply to check or uncheck the boxes.
10. Repeat steps 8-9, selecting the next group in the chain and adding emitters rather than removing.
Note: Be sure you are selecting the correct group. Once you place the emitters in the group and return to Design Studio, you will not be able to cut/copy/paste the subdivided run into a different group; you will have to return to Tech Tool to make changes.
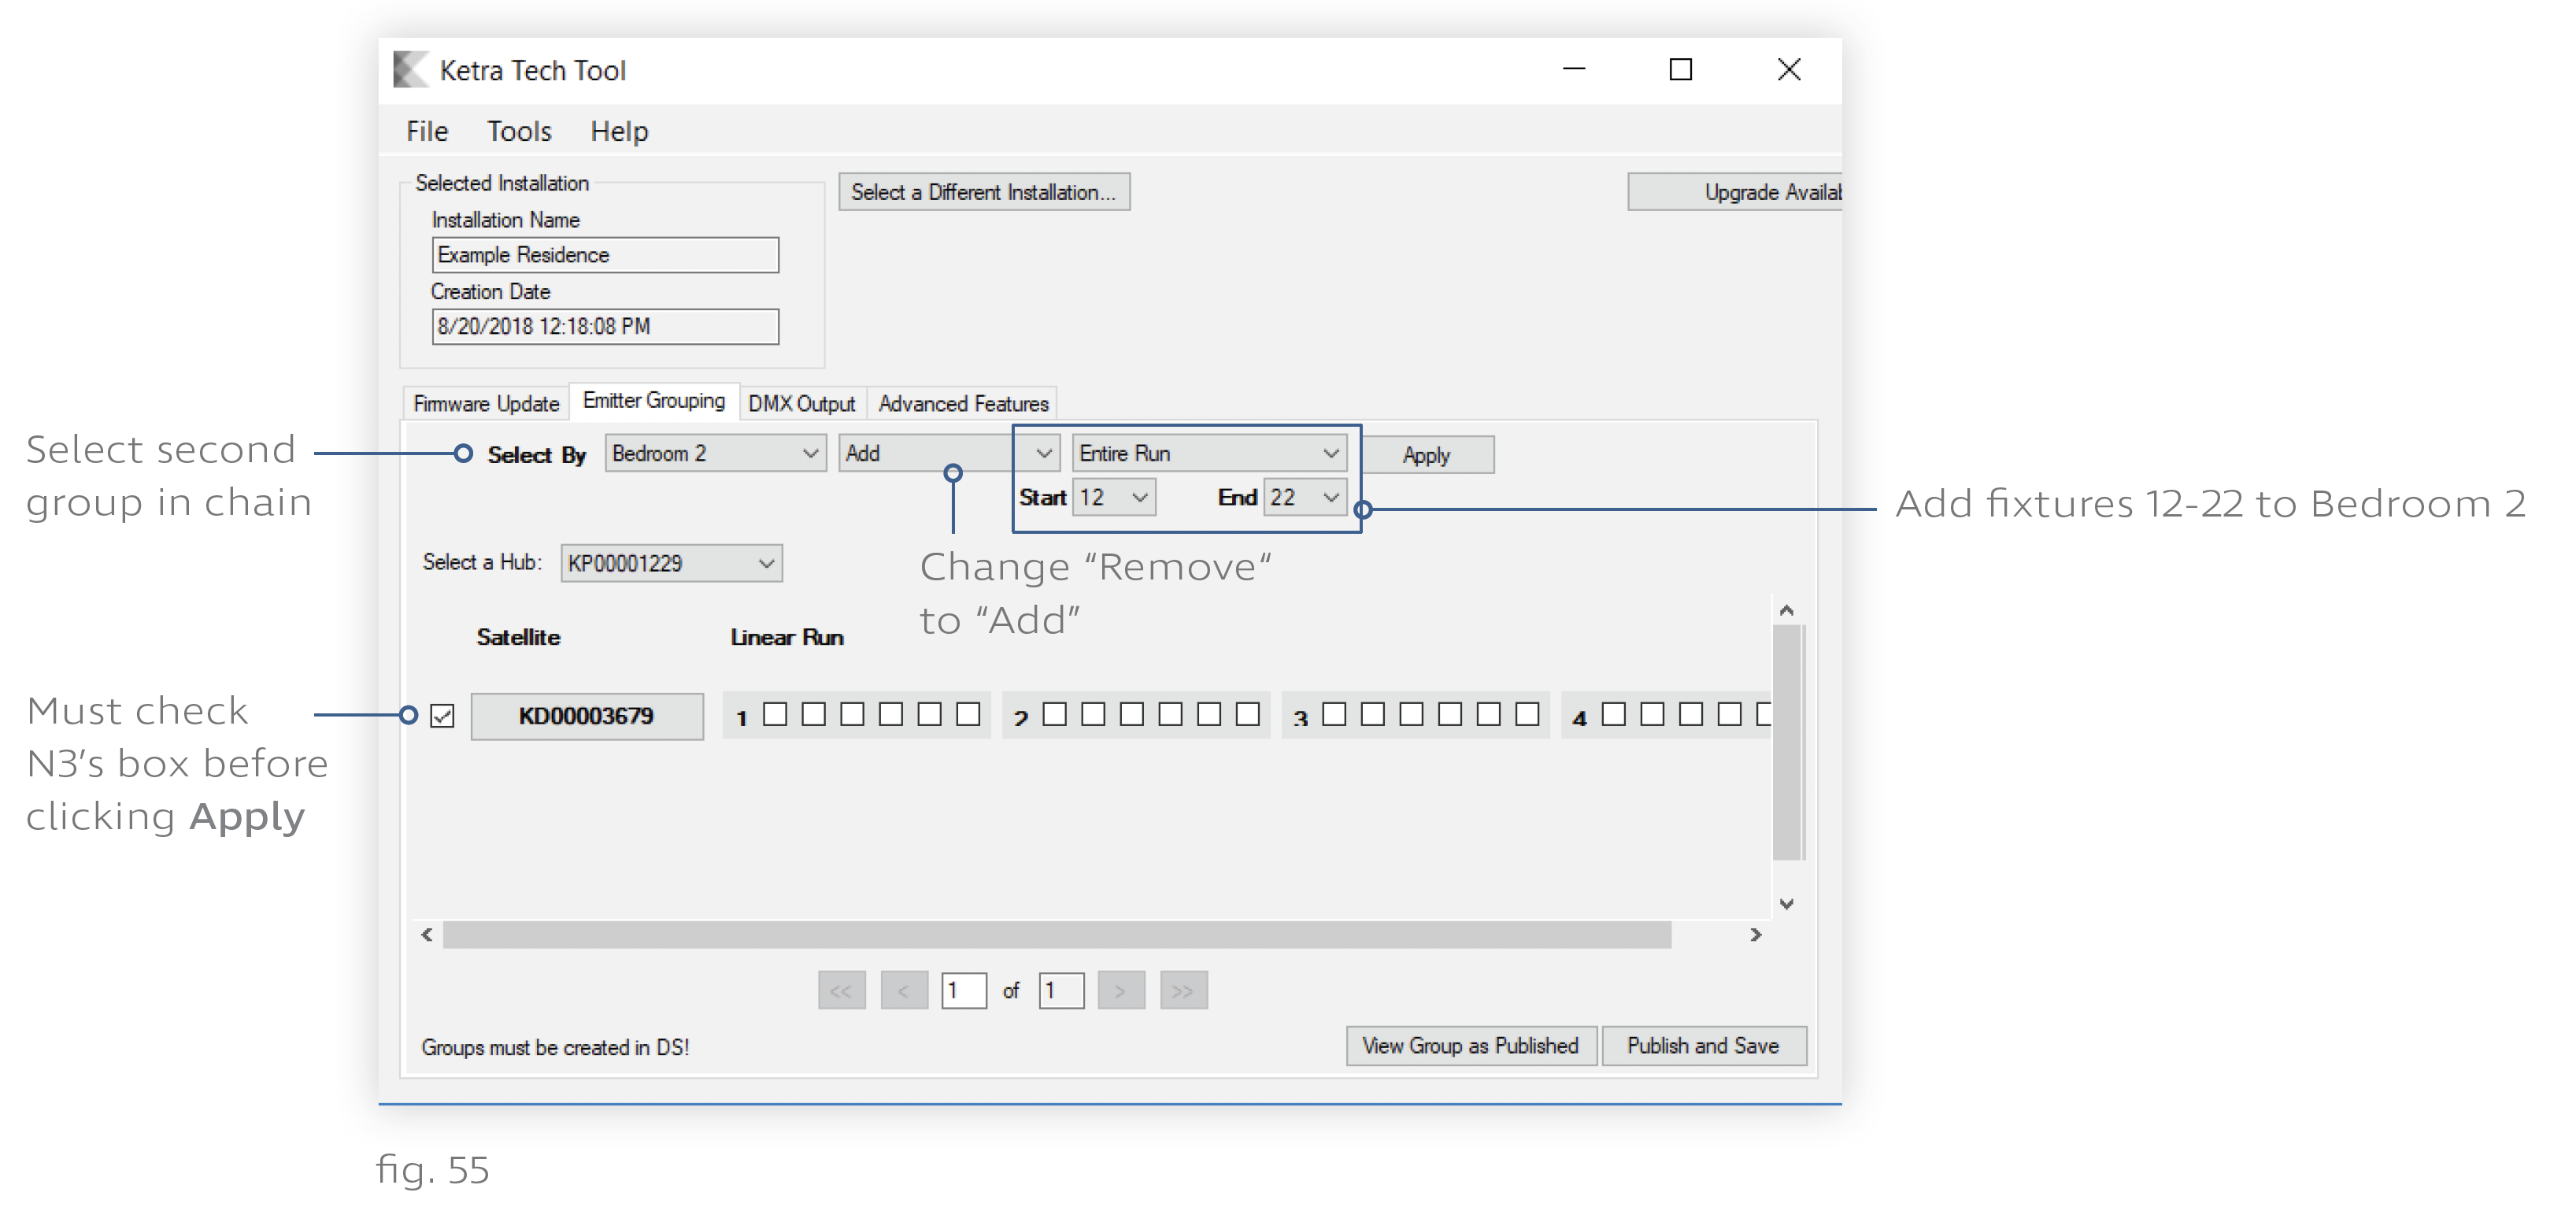
Caution: Be careful to ensure that every emitter is sorted into a group, and that no emitter is sorted into two groups.
11. After dividing the entire run into groups, click Publish and Save in Tech Tool. This adds the emitters (or fixtures) you selected to the group you selected.
Caution: Clicking View Group as Published will turn the group green but also turn all other groups in the installation red.
Your emitters should now be sorted into their new groups, as shown in fig. 56. (In Design Studio, they will all be listed using the N3 Satellite’s serial number or name.)
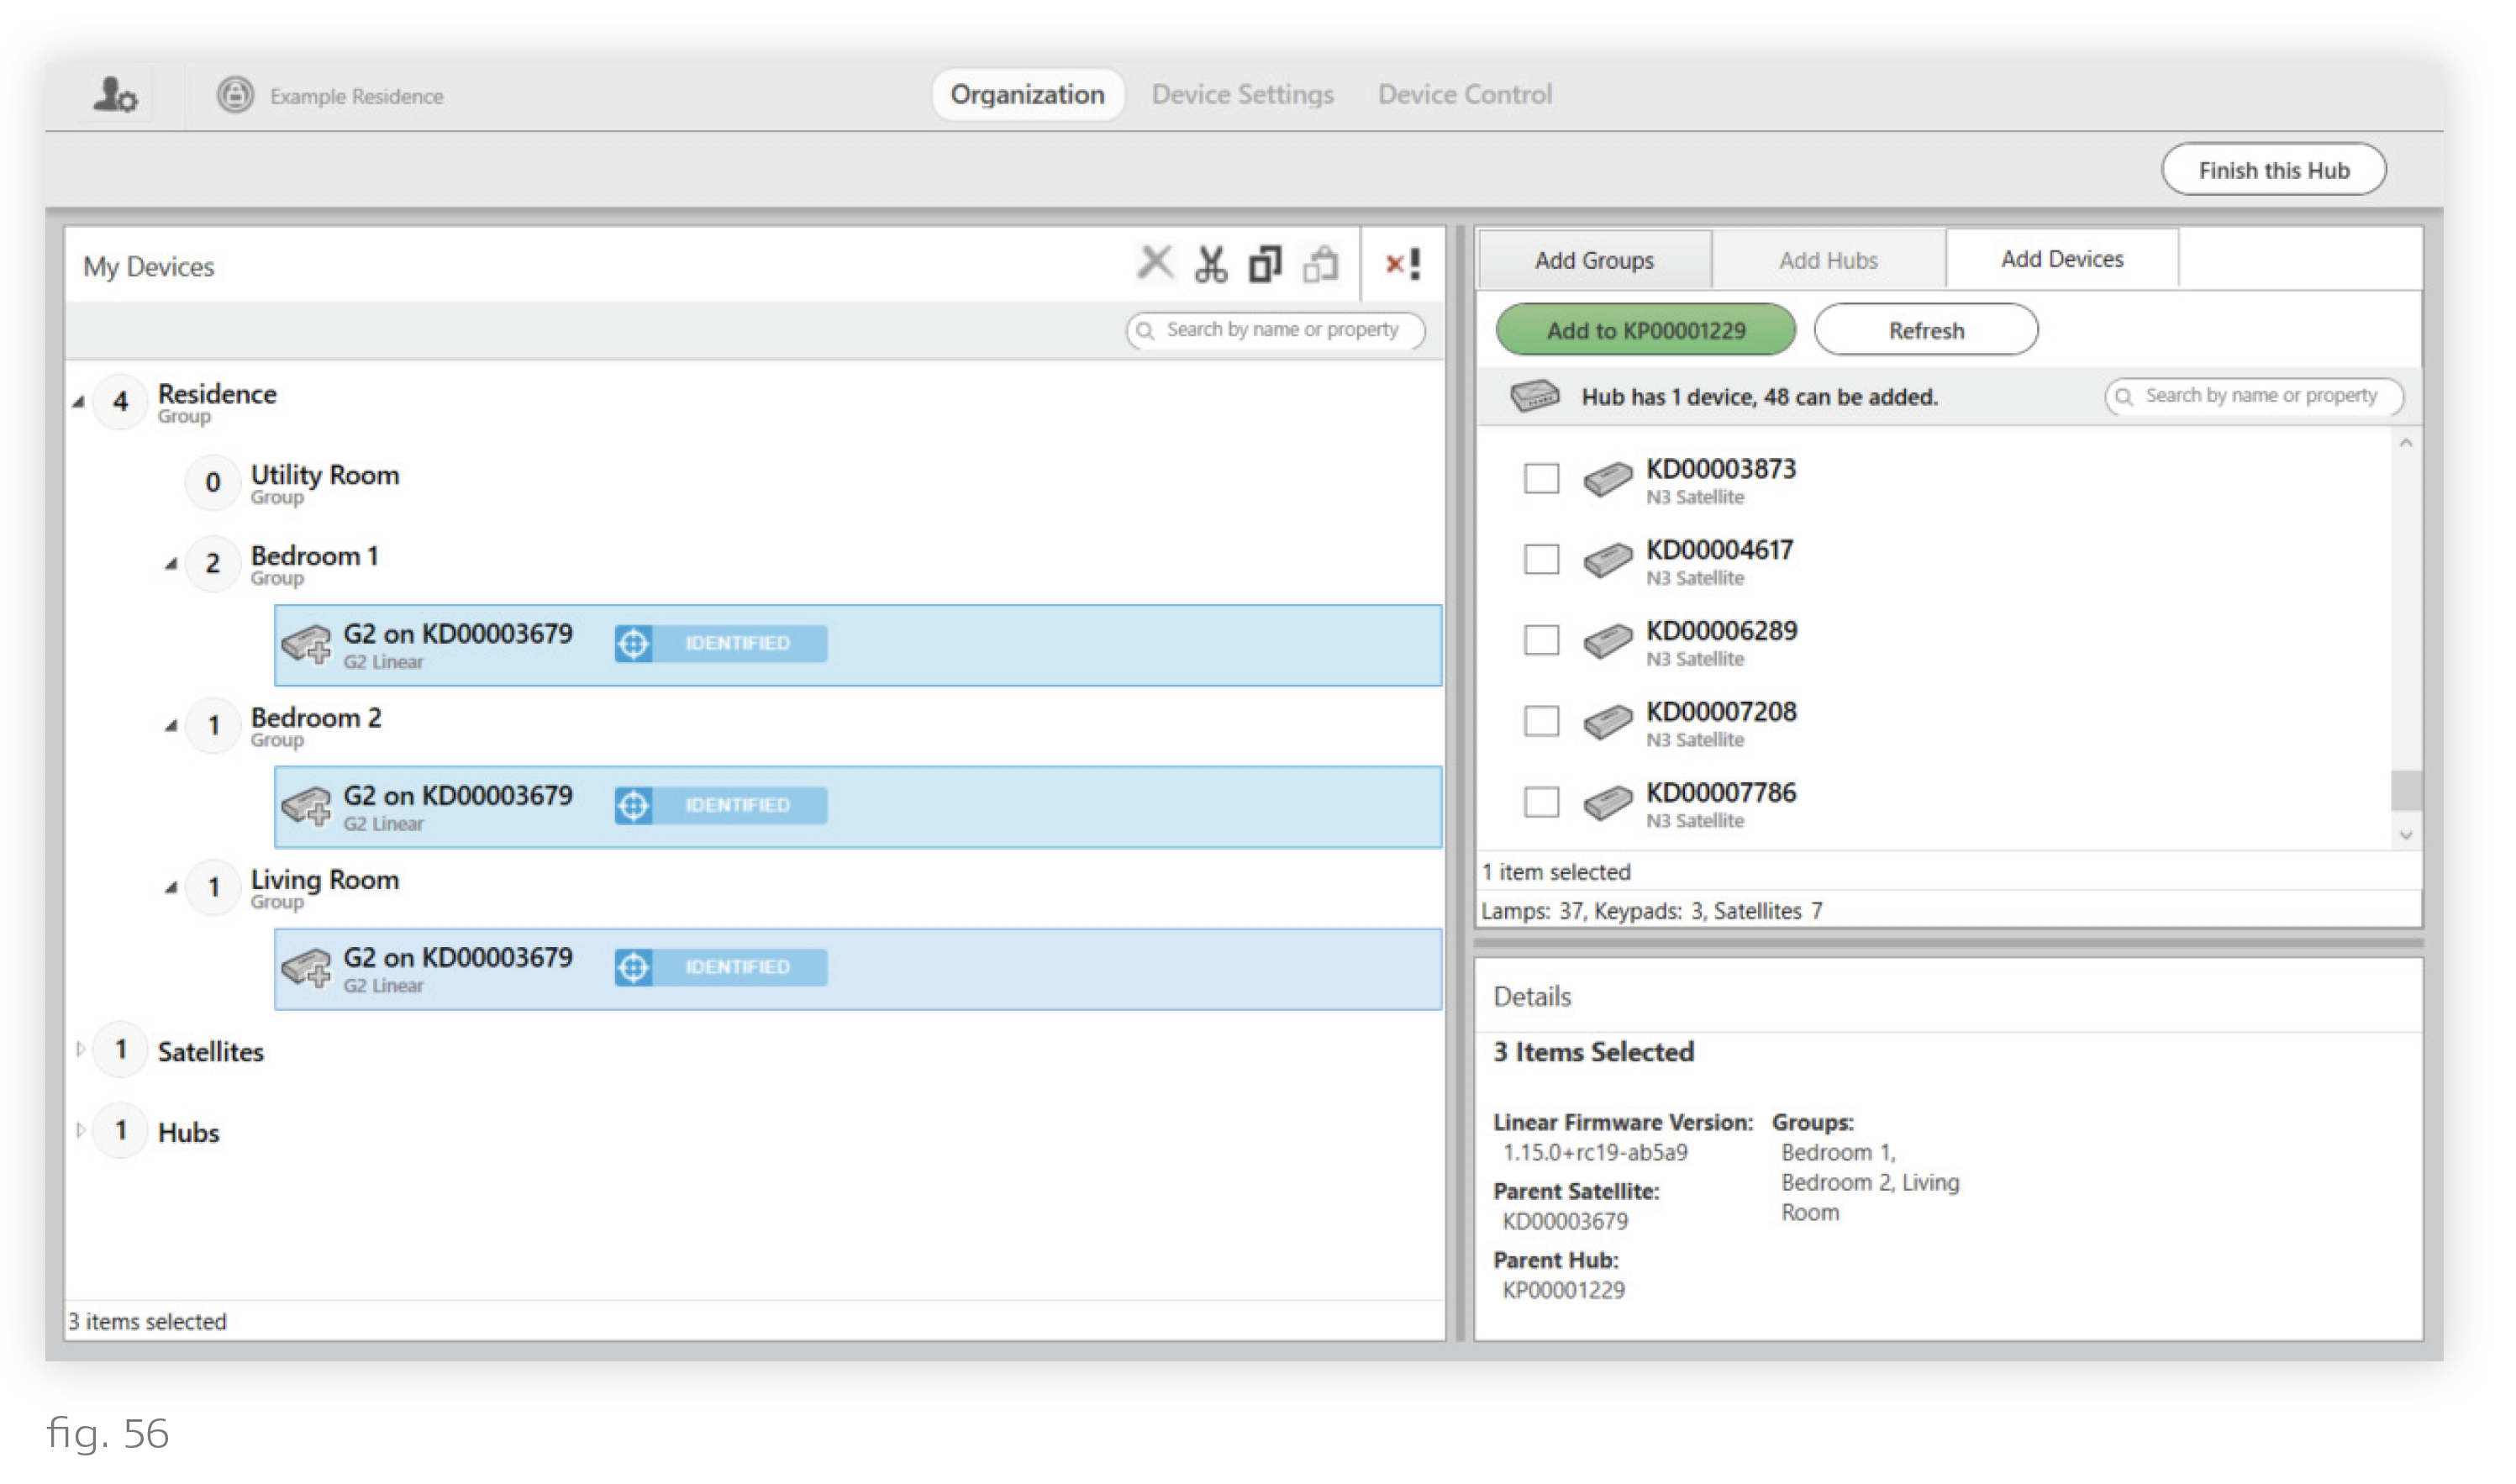
Note: You cannot cut/copy/paste the subdivided sections of the run(s). To move emitter-grouped linear fixtures between groups, you will need to return to Tech Tool and change their grouping using the same Emitter Grouping tool you just used.