
Design and programming steps can be performed off-site, prior to commissioning, and in both Lutron Designer and Ketra Design Studio. Groups, scenes, and shows can be created in Ketra Design Studio before identifying lights and adding them to groups. An area tree can be created in Lutron Designer that matches the organization layout in Ketra Design Studio. The Ketra Design Studio groups will be mapped to areas in Lutron Designer during the import or update process. After the import or mapping is completed, Ketra scenes and shows will show as assignable items in Lutron Designer and they can be triggered by any HomeWorks QS input action.
Note: Design Studio (DS) must be initially logged into while connected to the internet. However, after that point DS does not require internet access to run. DS will automatically sync once it is opened when there is internet access.
Ketra Design Studio
For more information on configuring the Ketra installation, please refer to the Ketra Design Studio 3.0 user manual.
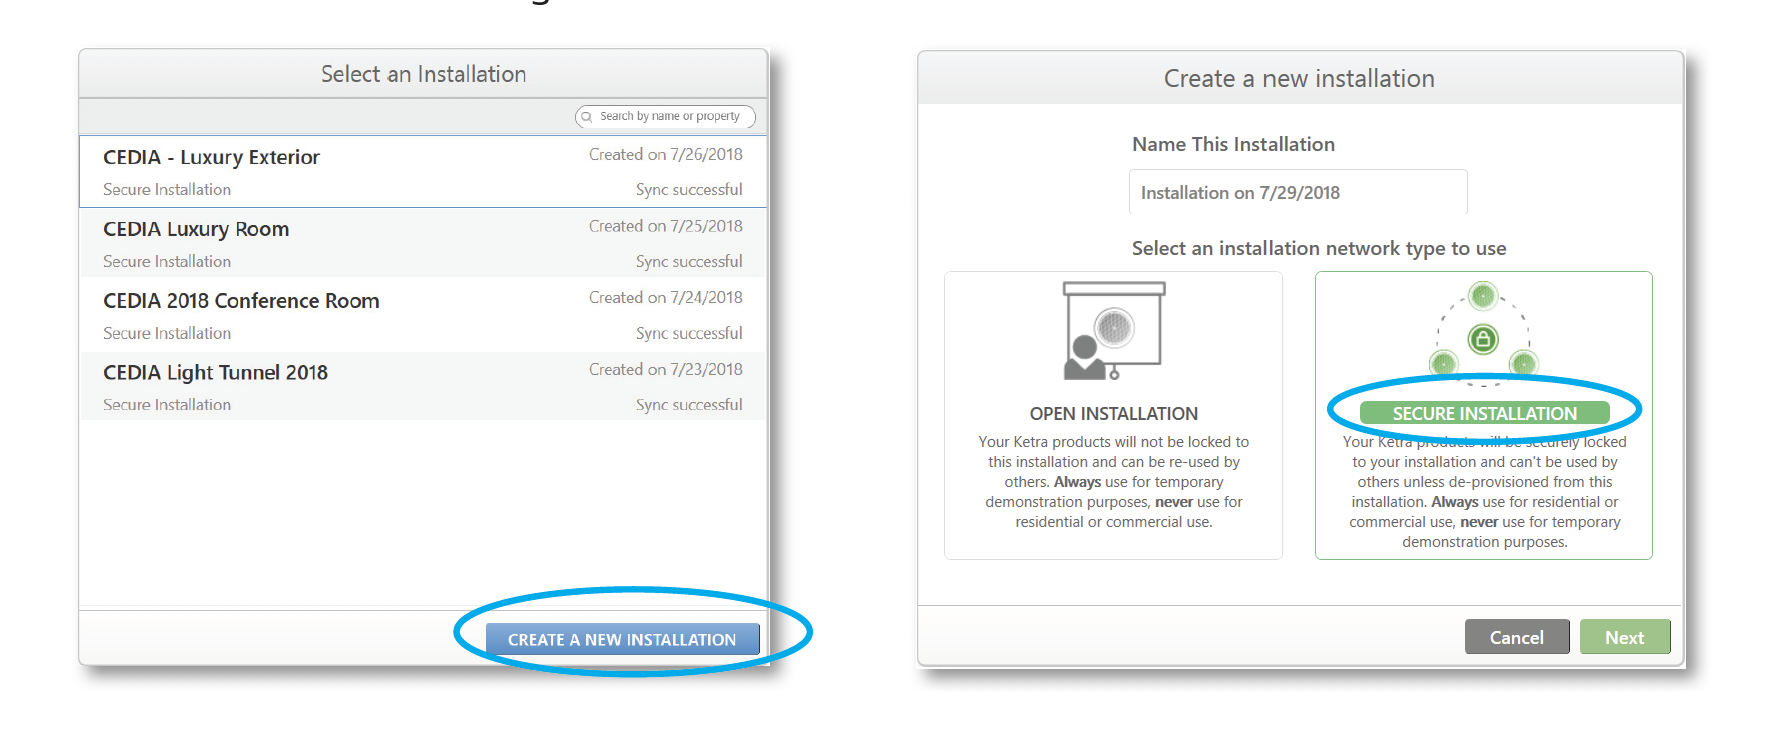
1. Click CREATE A NEW INSTALLATION and then SECURE INSTALLATION to create a new secure installation in Ketra Design Studio.
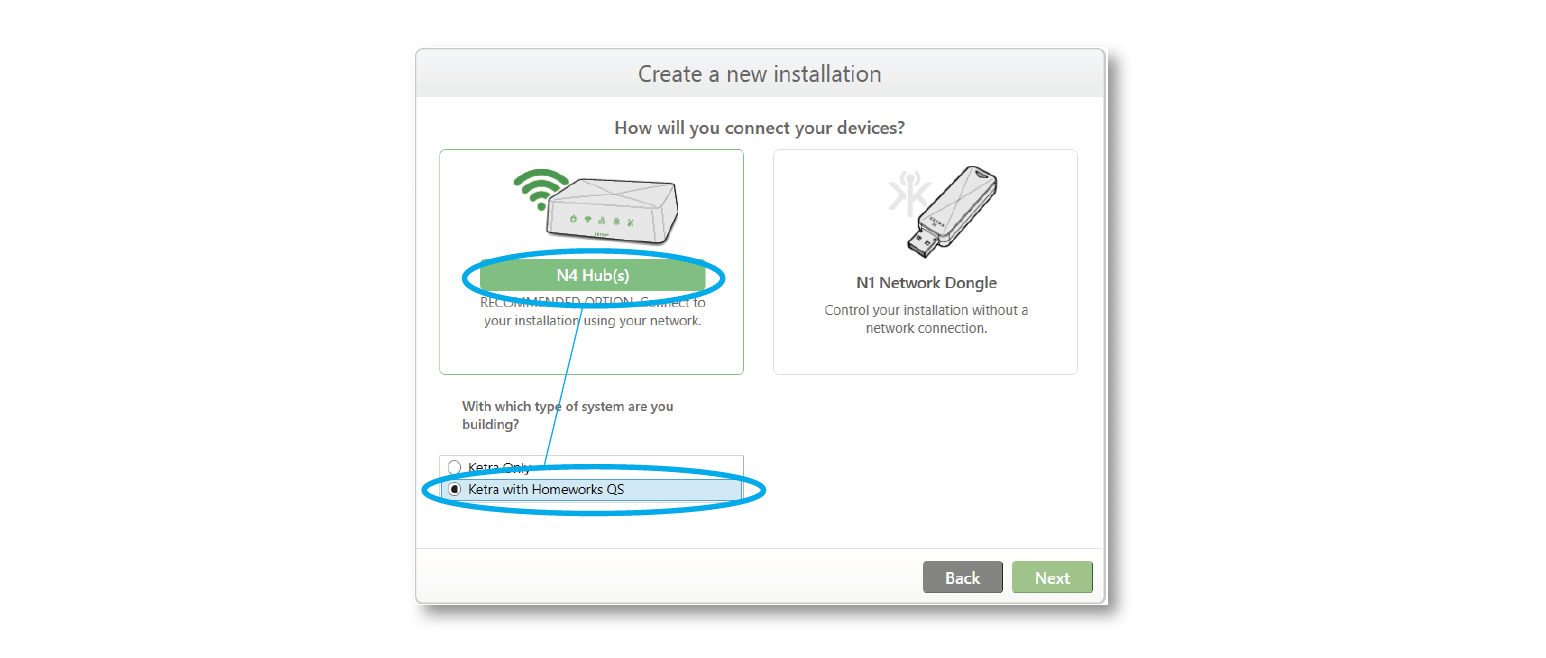
2. Click N4 Hub(s) and select Ketra with HomeWorks QS. Only installations with an N4 hub can integrate with HomeWorks QS systems.
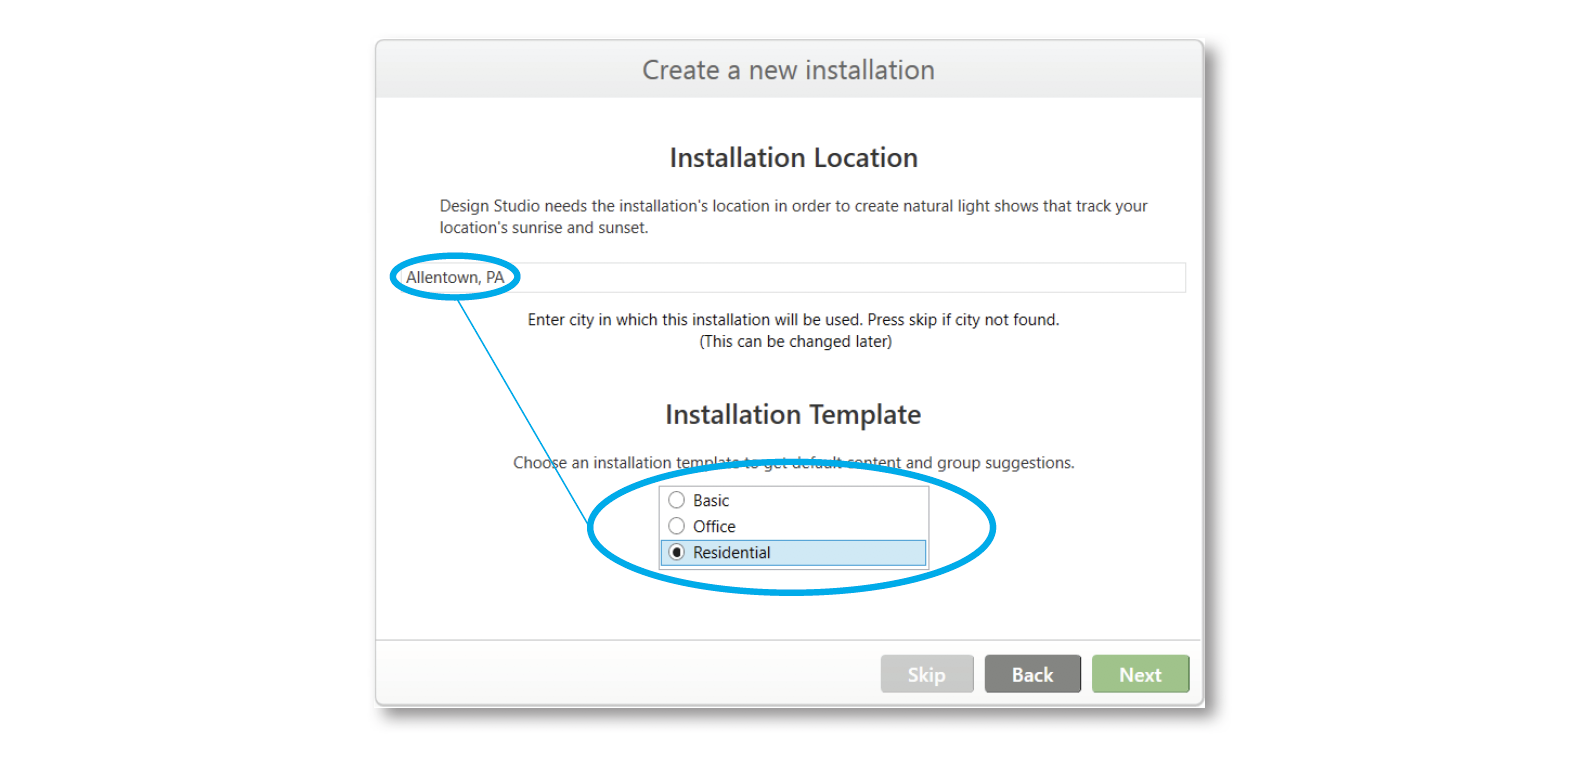
3. Enter the Installation Location and click on the appropriate Installation Template.
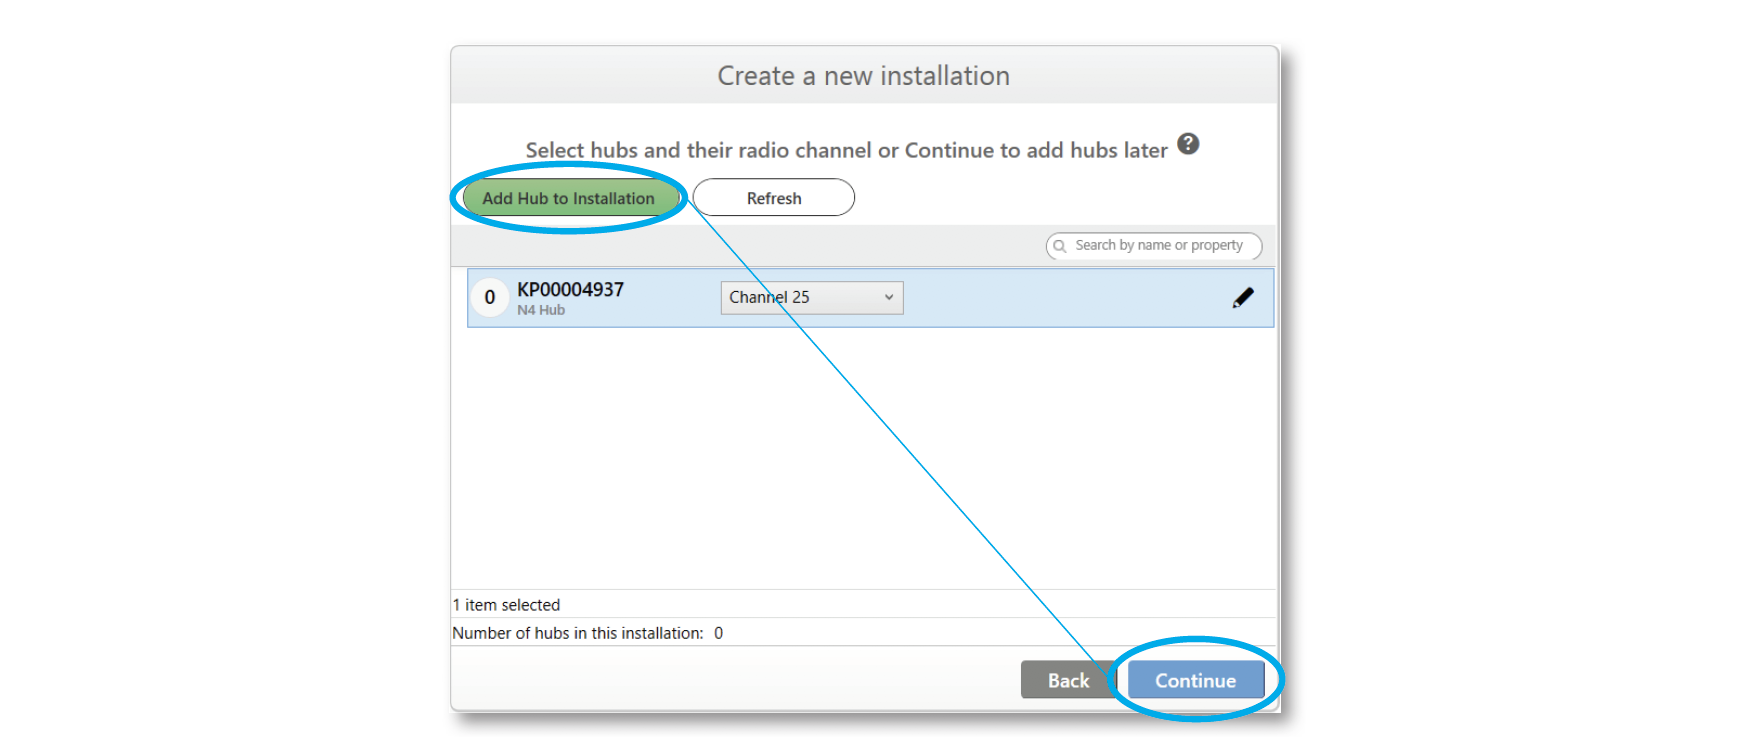
4. If the N4 hub is available, select it, click Add Hub to Installation, and click Continue. If an N4 hub is not currently available, click Continue, and add it later. When multiple N4s are physically close together, they can cause mutual interference if they are on the same channel. When using multiple N4s, each N4 should be set to its own channel. This will improve performance when devices on multiple N4s are entering the same scene, as well as improve firmware transfer speeds to devices.
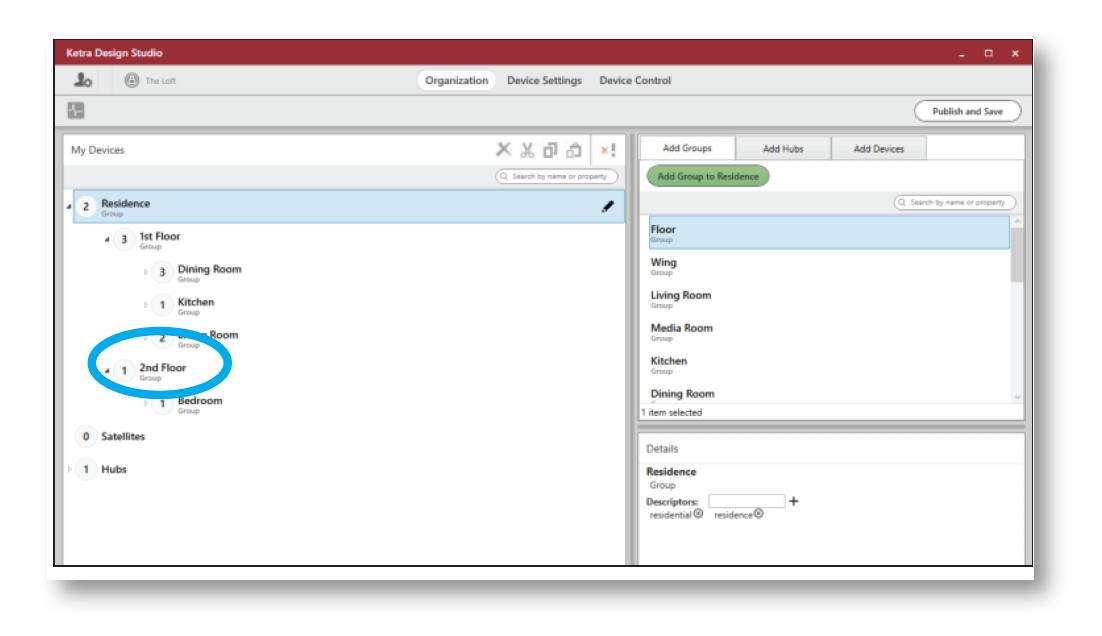
5. Create group hierarchy. Consider the area layout and lighting for the installation. These groups will be mapped to areas in Lutron Designer. See step 6 for more information on the mapping process.
i. On the Organization tab, add groups by highlighting the higher level (parent) groups in the My Devices list, selecting a group template at right, and pressing the green Add Group button.
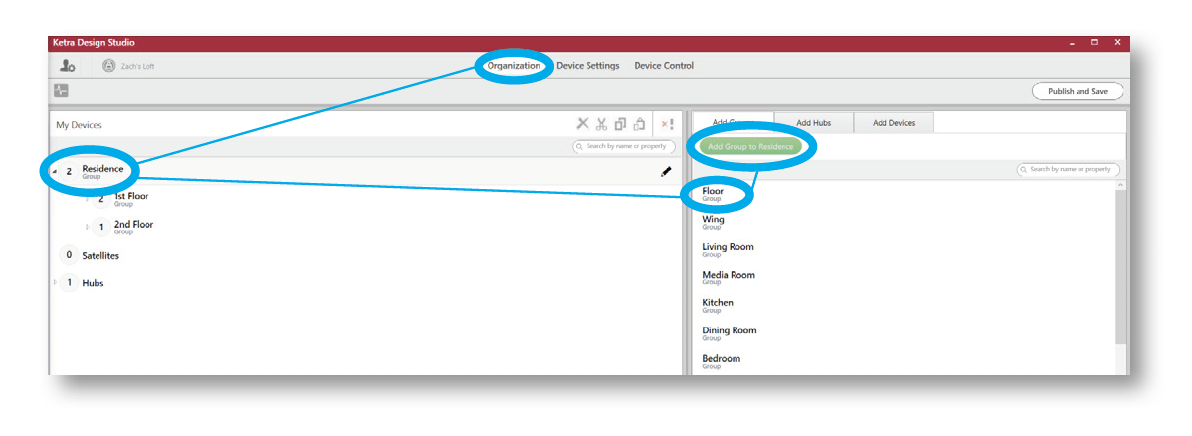
ii. Add the parent groups (e.g., wings, floors, other sections of the home) and then lower level (child) groups (e.g., rooms).
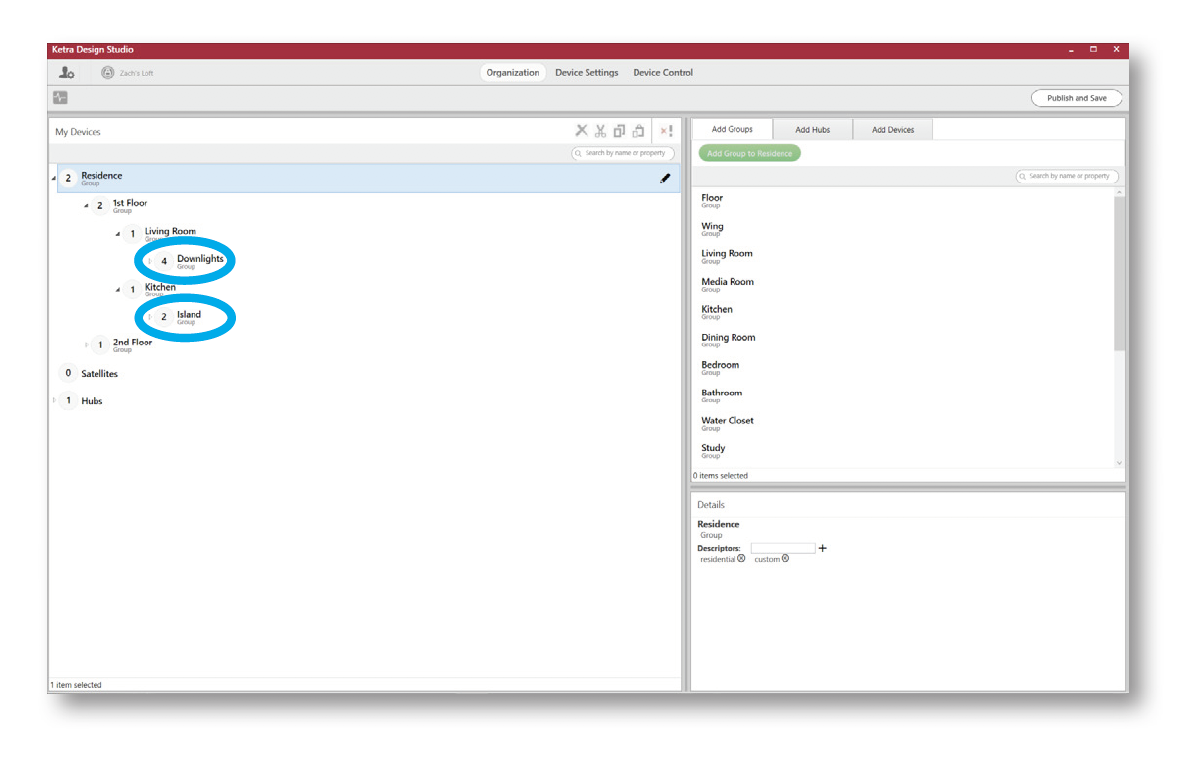
6. Create groups for each intended zone of lighting (e.g., downlight, overhead, accent light). Actual lamps and fixtures will be added to these groups later.
7. Optional: Divide runs of G2 linear luminaires into separate groups. By default, all G2 linear luminaires in a run have to be grouped together. A run of G2 linear luminaires can be divided into multiple groups using the Ketra Tech Tool. For more details, see the Ketra Design Studio 3.0 user manual.
8. Creating Control Groups. When a scene will affect lights in multiple Ketra groups, a Control Group should be created in Design Studio. For example, if a dining scene is to control lights within the “Dining Room” and “Kitchen” groups, a separate Control Group named “Dining Room + Kitchen” should be created. Navigate to Device Control > Control Groups in Design Studio
i. Click Create New Control Group.
ii. Name the Control Group
iii. Name the Control Group
iv. Select the groups to include

9. Creating Scenes. The process below outlines scene creation using the tree view. For information on building scenes using the template view, please refer to the Ketra Design Studio 3.0 user manual.
i. From the Device Control tab, select the Scenes panel. There are several predefined scenes based on the installation template used and the types of groups added. These scenes can be customized and new ones can be added.
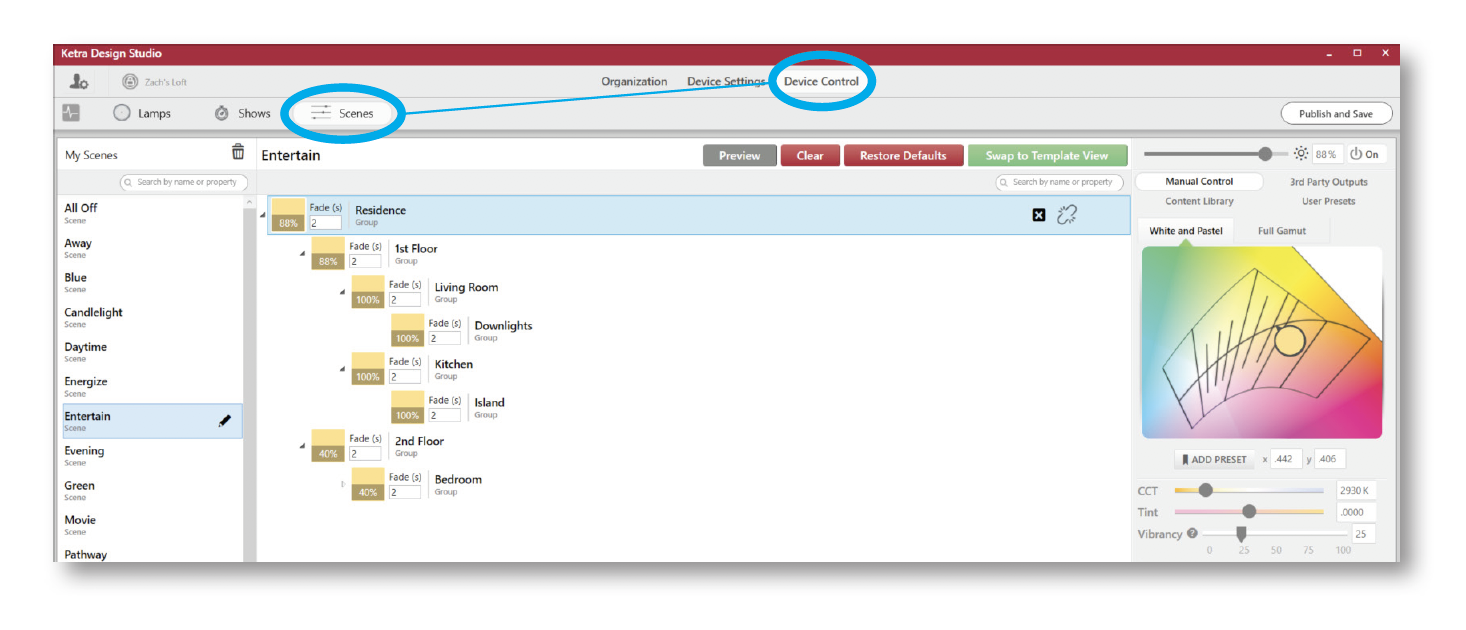
ii. Select brightness, fade time, white light color temperature and vibrancy, and saturated color settings for each group. Click “x” to make the group unaffected.

iii. Changing the settings for a parent group will update the values of the child groups. However, if settings are then changed for one of the child groups, those settings will have priority over the settings automatically updated by the parent group.
10. Creating Shows
i. From the Device Control tab, click on the Shows panel. There will be a pre-built Natural show that consists of many astronomical steps (scenes) that have color temperature and fade settings for each group. The Natural show can be customized and up to 10 new shows can be created.
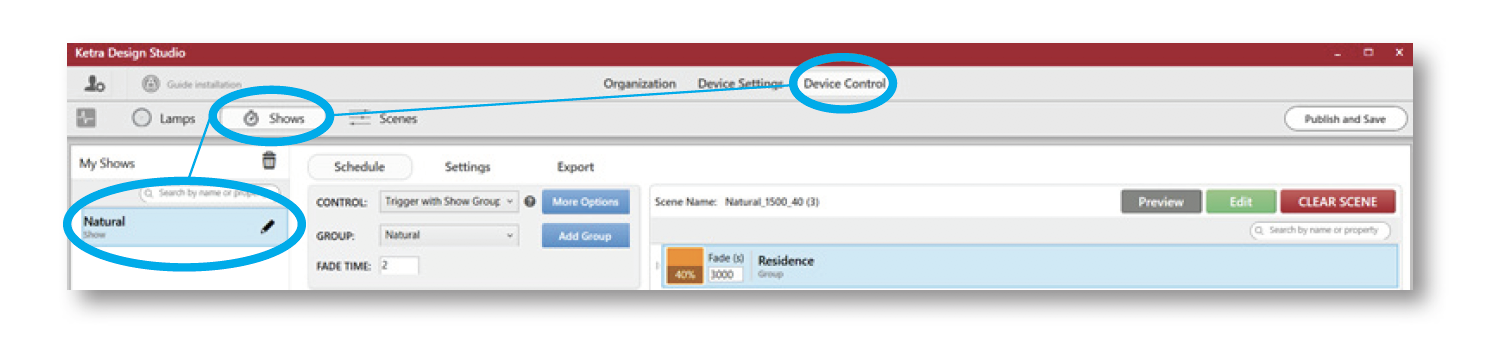
ii. Click Schedule and in the CONTROL: field, select Trigger with Show Group.
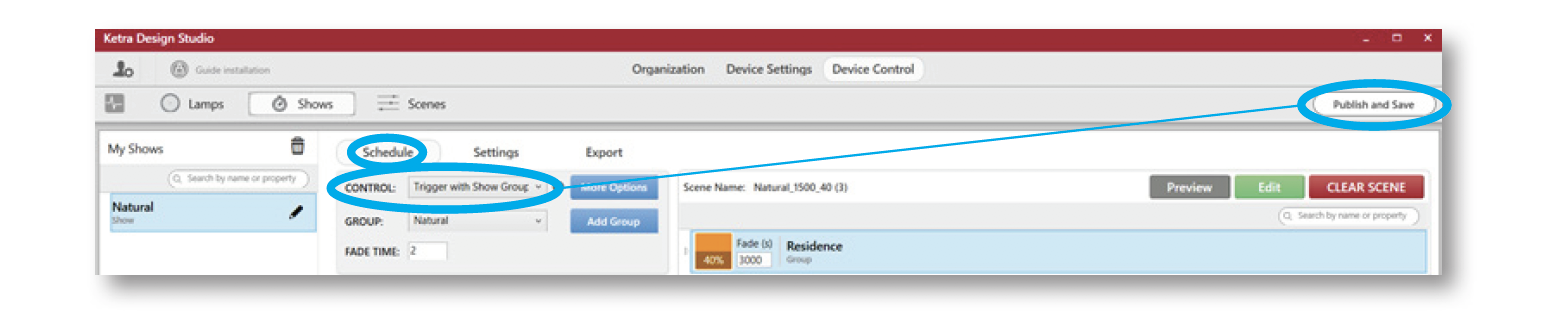
iii. If you want the show to start automatically, set a timeclock event in Lutron Designer to trigger the show group rather than selecting Run Always in Ketra Design Studio.
11. Click Publish and Save.