
Note: 0-10V control of third-party fixtures is only supported in Ketra Only installations.
Integrating third-party lighting via 0-10V output allows you to set intensity for the loads in any scenes they appear in.
To enable an N3 Satellite to control third-party fixtures via 0-10V output, follow the steps below.
1. In Design Studio, go to Device Control > Integration.
2. Select the appropriate N3 Satellite from the My Control Devices list on the left. At this step, satellites will not identify themselves by flashing indicator lights when selected.
3. Go to the Analog I/O tab.
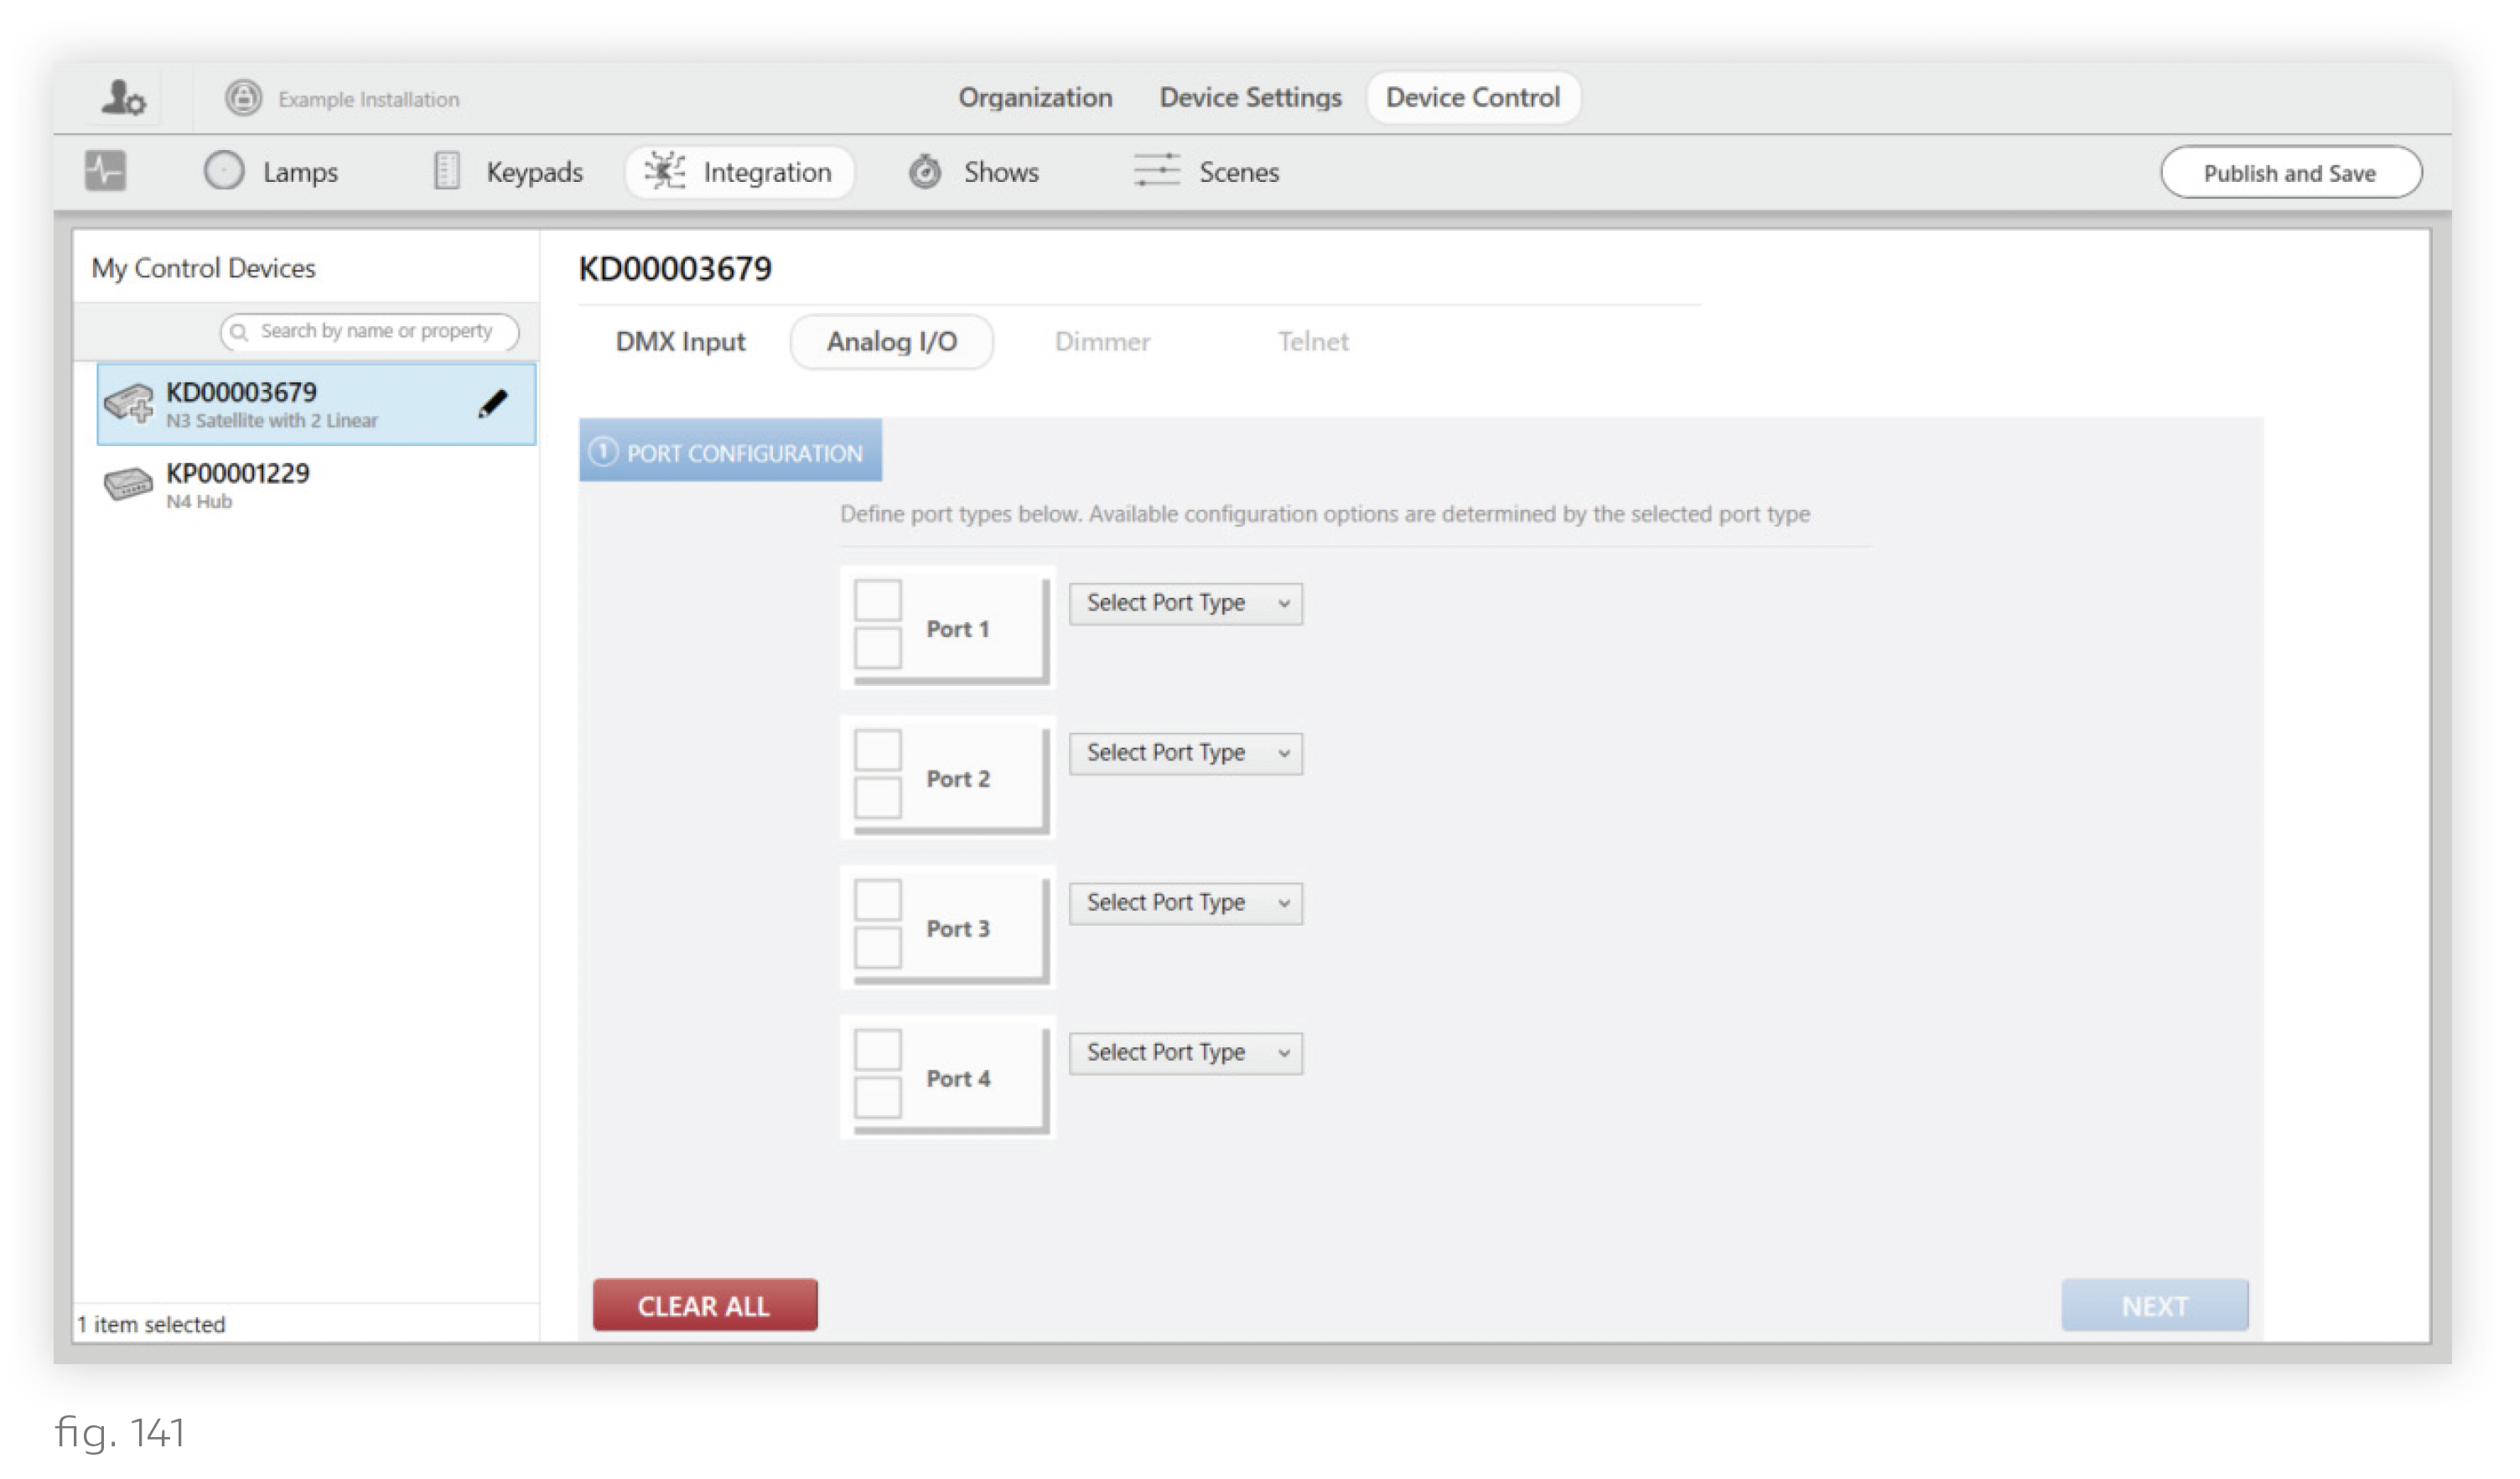
4. Consult the Ketra submittal to see which port the fixture is wired to. There are 4 Analog I/O ports on the N3 Satellite. In the Ketra submittal, “COM1” corresponds to Port 1, “COM2” to Port 2, etc.
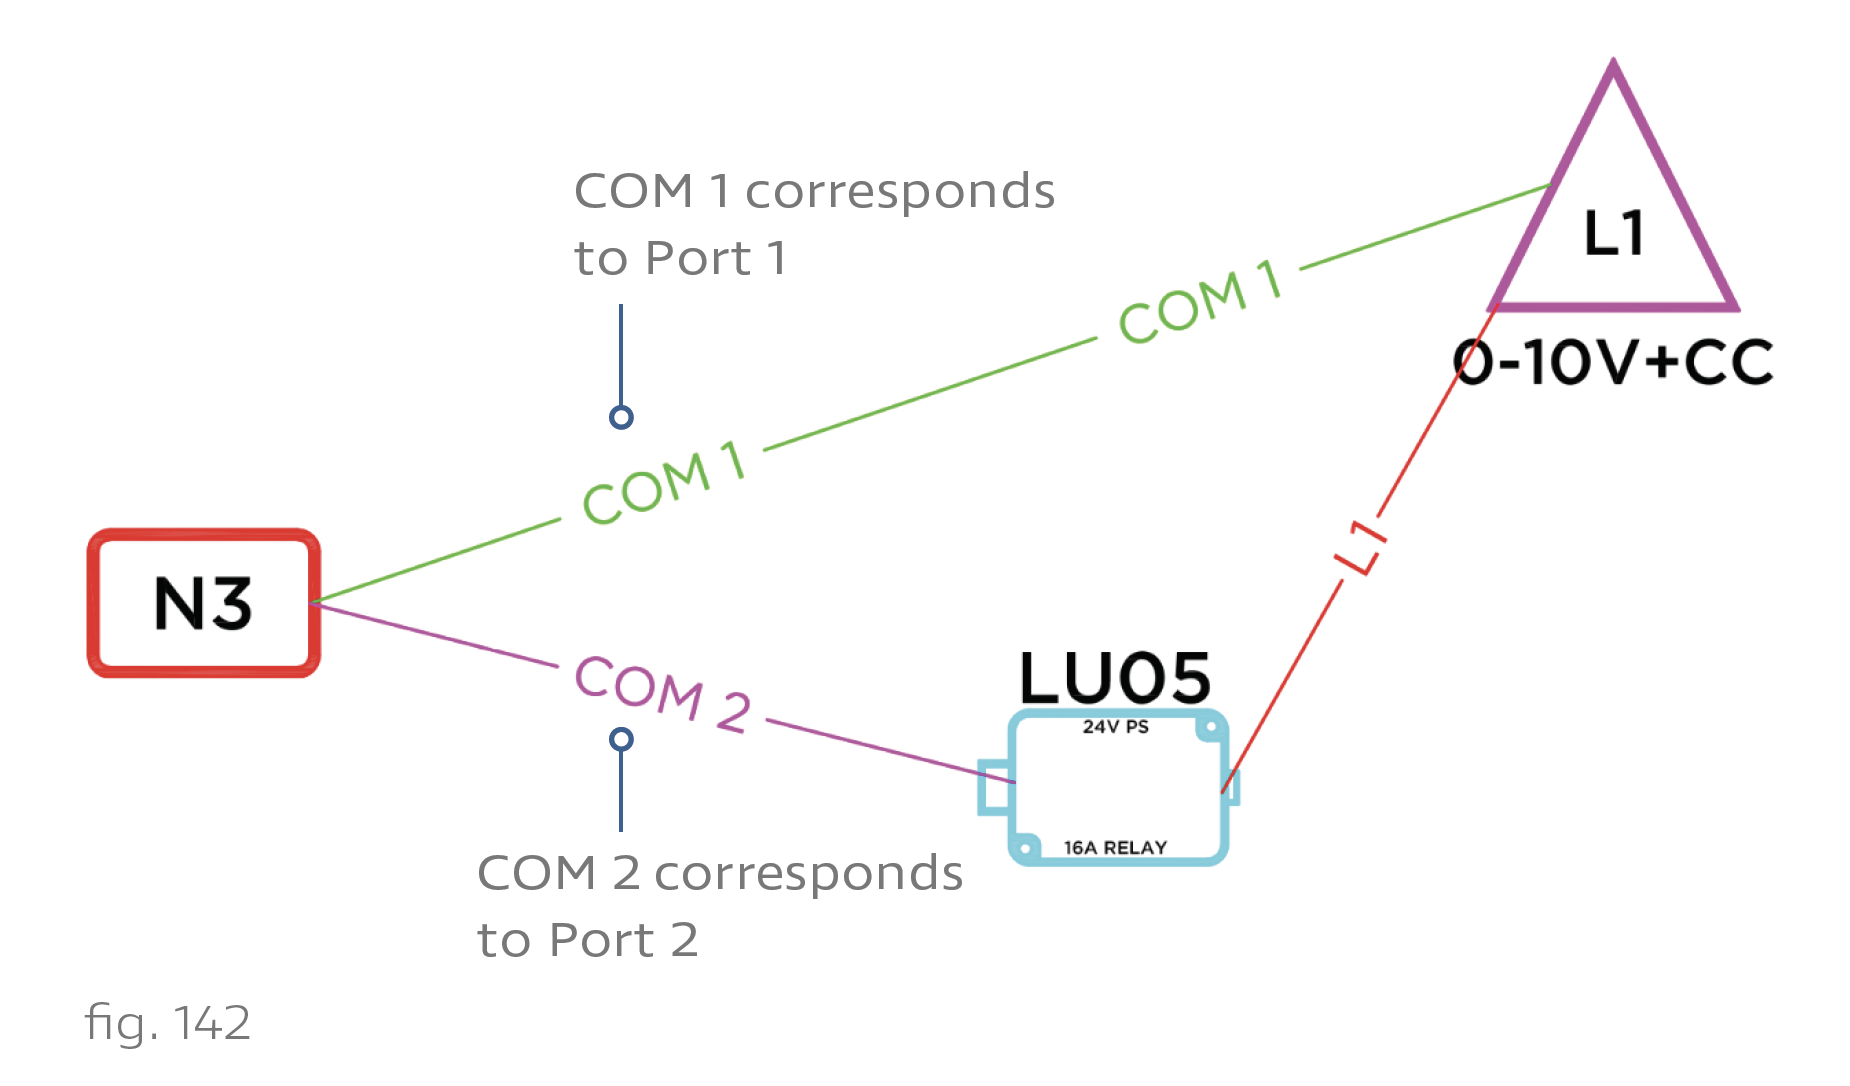
If the third-party fixture requires 2 ports (as in fig. 142), only configure the first port. The second will be included automatically once you pick a profile in step 8.
5. For the appropriate port, set the Port Type dropdown to "0-10V".
6. Change the second dropdown to "Output".
7. Set whether the output is Current Sink or Current Source. Consult the spec sheet for the device that you are interfacing with.
8. Use the dropdown on the right to set the profile of the output.
- If the next port is connected to a Ketra power pack (KL14), select "Intensity + Ketra Power Pack".
- If the next port is connected to any power pack other than the KL14, select "Intensity + CC".
- If the next port is not connected to a power pack, select "Intensity".
Note: For the Lutron LU05 power pack (shown in fig. 142), use "Intensity + CC".
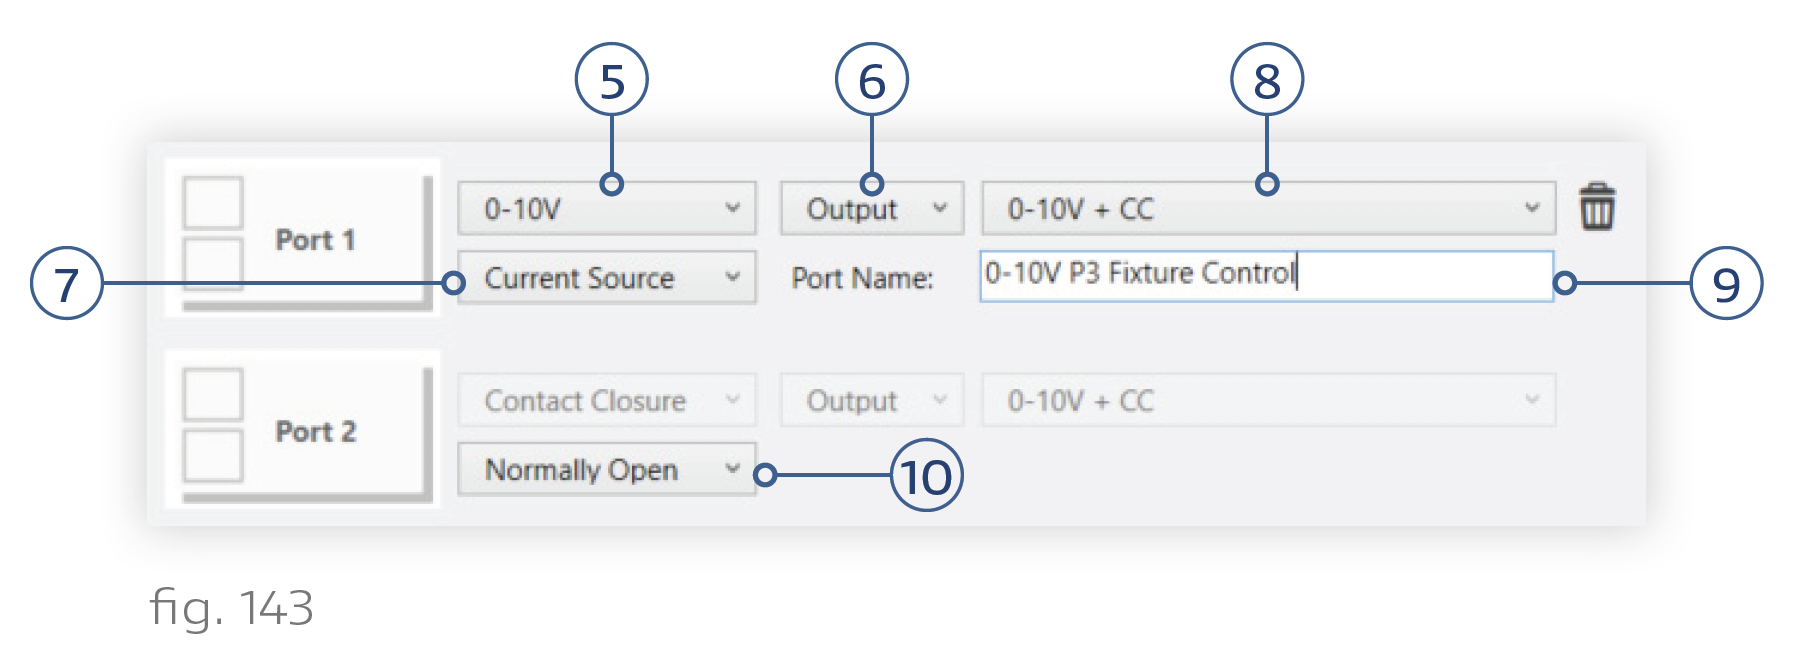
9. Give the output a distinctive name so you know which fixtures it controls. Unlike with Ketra lights, you will not be able to select the output in Design Studio and have it identify in the space. Therefore it is very important to give it a descriptive name.
10. If you selected a profile with a power pack, set whether the second port is normally open or normally closed.
11. Click Next.
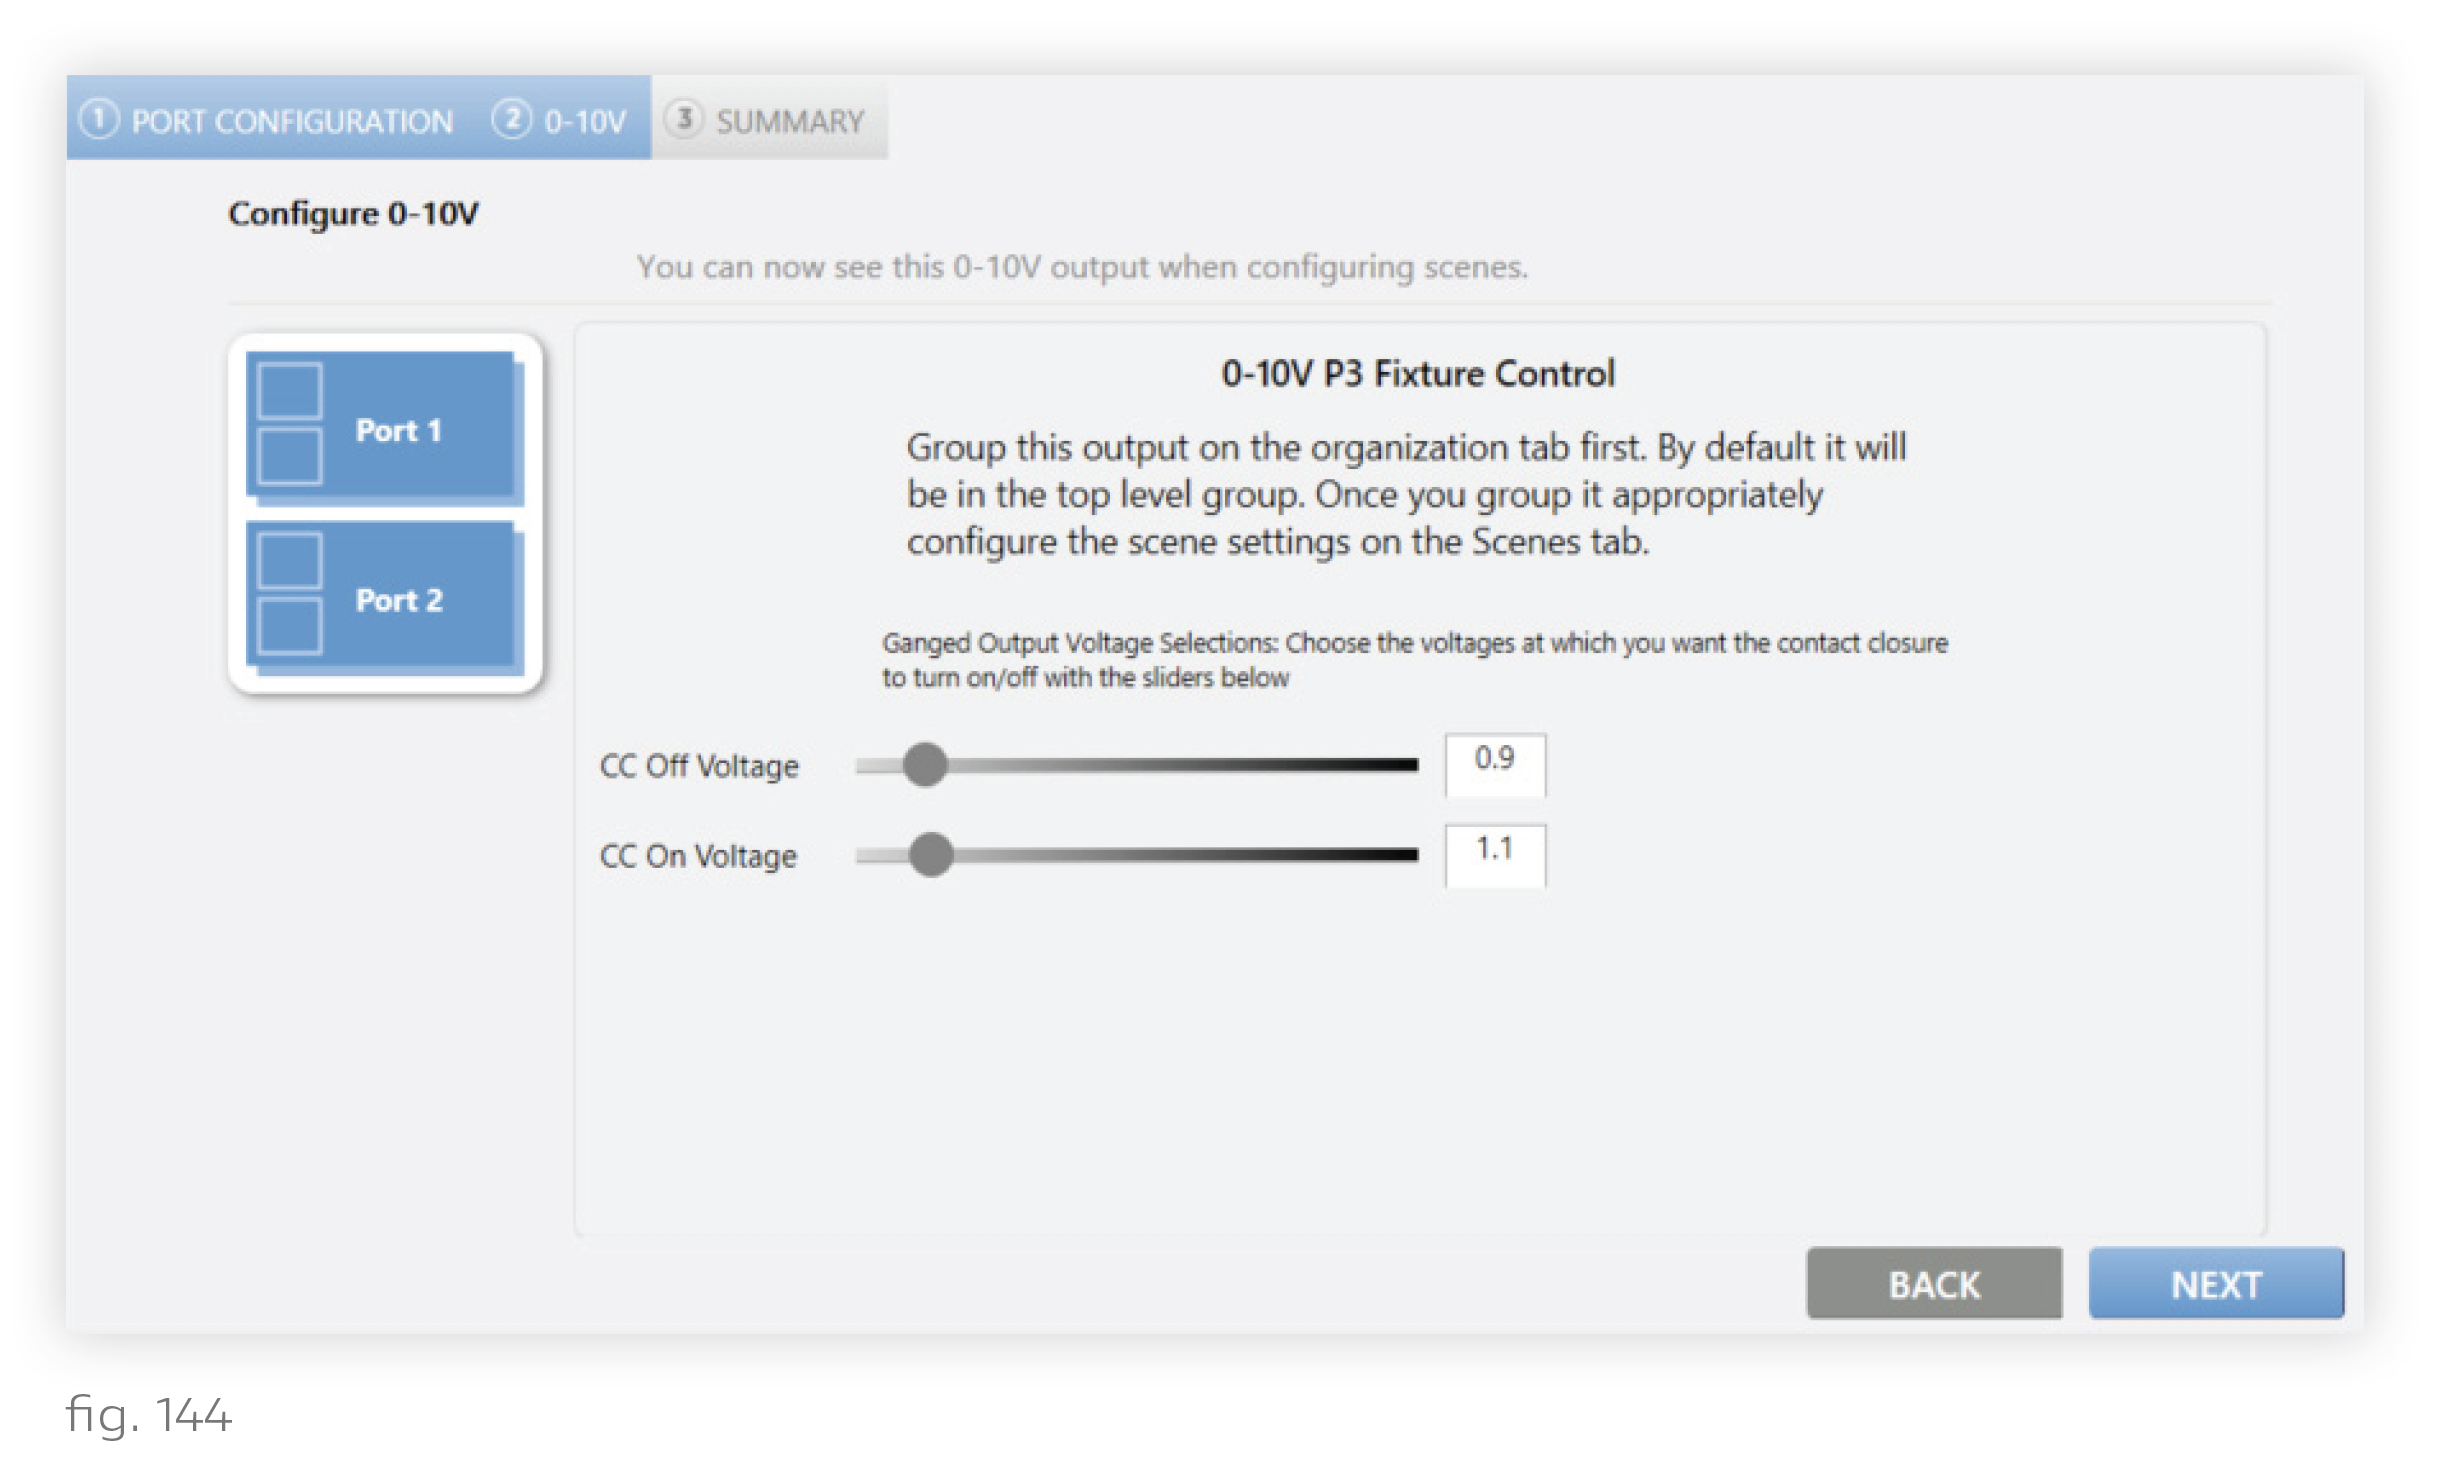
12. Optional: If you selected a profile that uses a power pack, adjust the voltage thresholds at which the contact closure should turn on and off. For example, if a third-party light starts flickering at 3V, its CC Off Voltage should be set to 3.
After performing those configurations, you are ready to add the output to a group on the Organization tab, then integrate it into scenes on the Scenes tab. See Using Third-Party Lighting in Scenes.