
To assign a scene to one of your keypad buttons, follow these steps:
1. Select a keypad in the My Keypads panel at left, then select the button to program. If the button has default content, click Clear Scene or Clear Show.
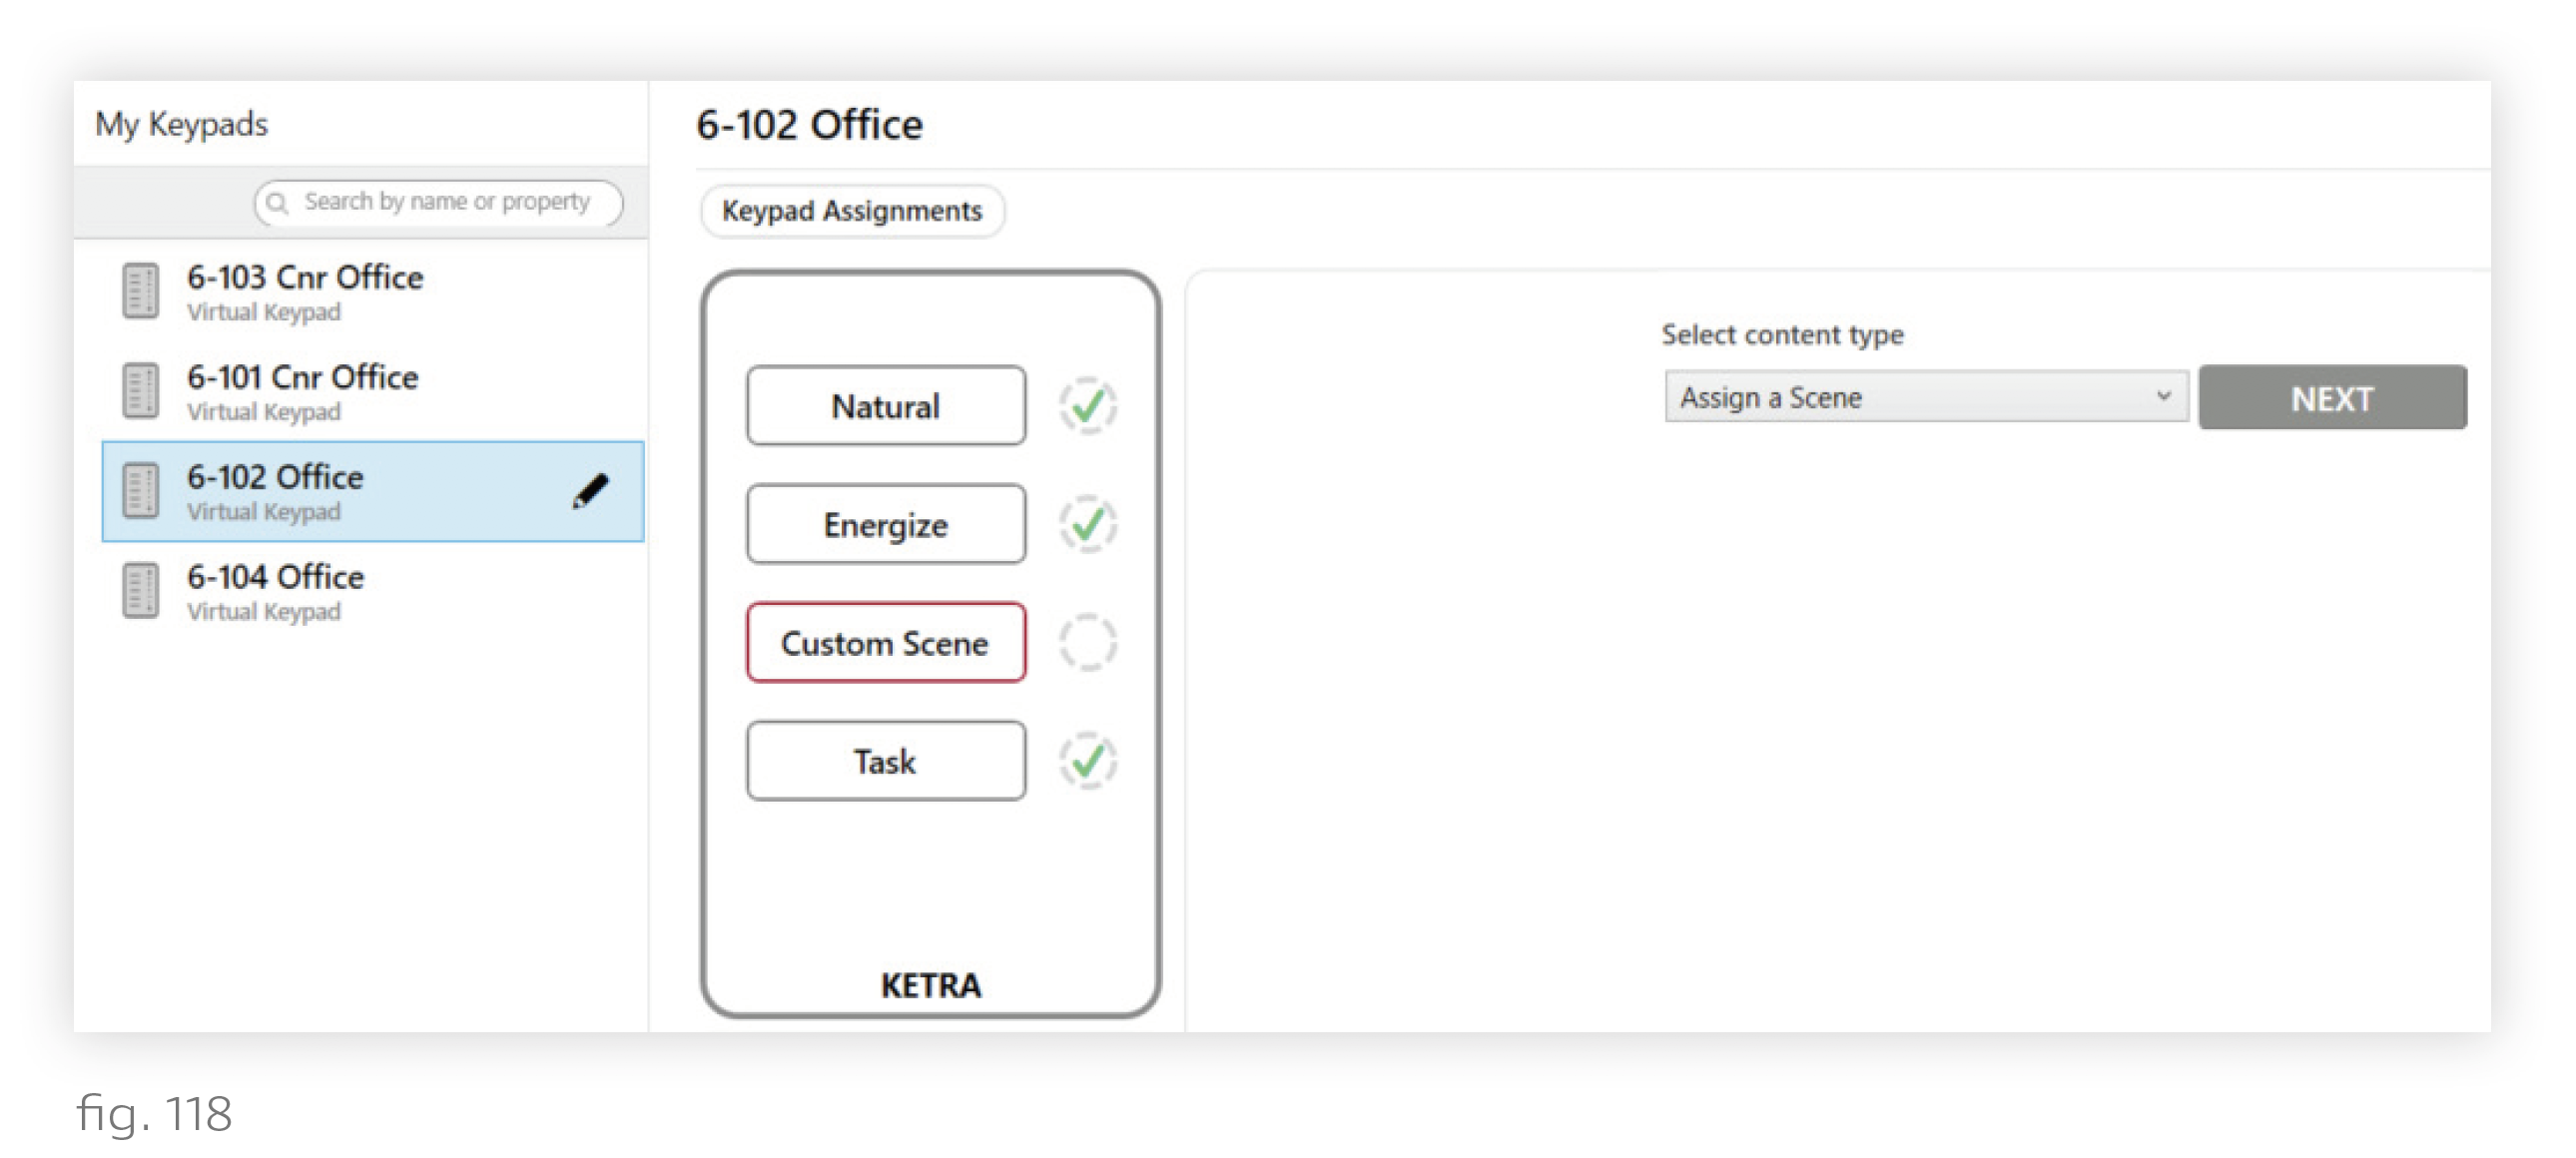
2. Select "Assign a Scene" in the Content Type dropdown, then click Next.
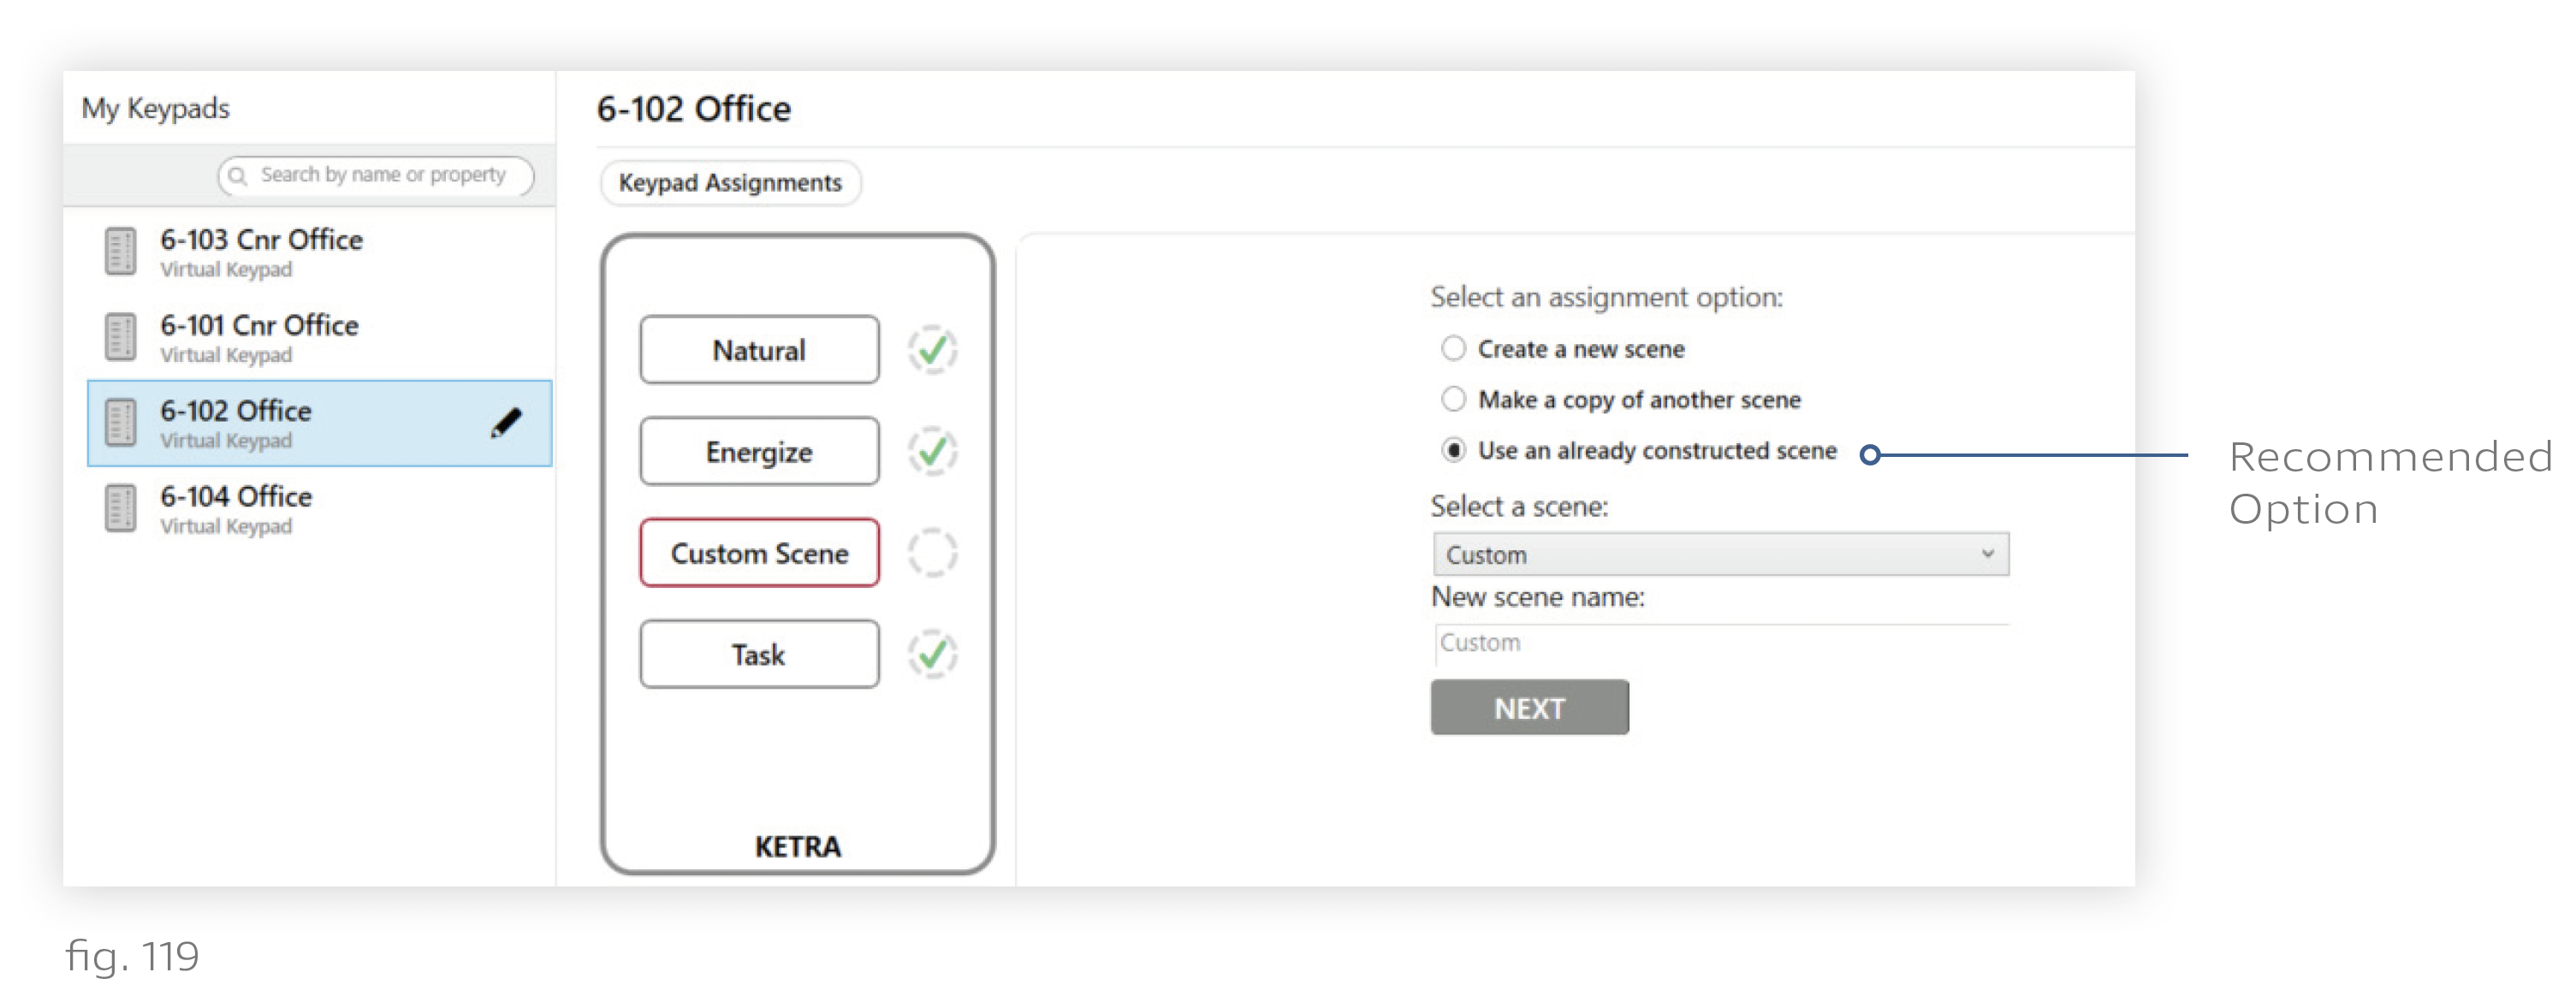
3. Select Use an already constructed scene for the assignment option (recommended). We recommend building scenes on the Scenes tab, then assigning them on the Keypads tab. You will be able to control the groups that will be affected when the scene is triggered.
Note: If you intend to make any modifications to the existing scene, select Make a copy of another scene. This will ensure that your modifications do not take effect throughout the installation wherever the original scene is applied.
4. Select or name the scene and click Next.
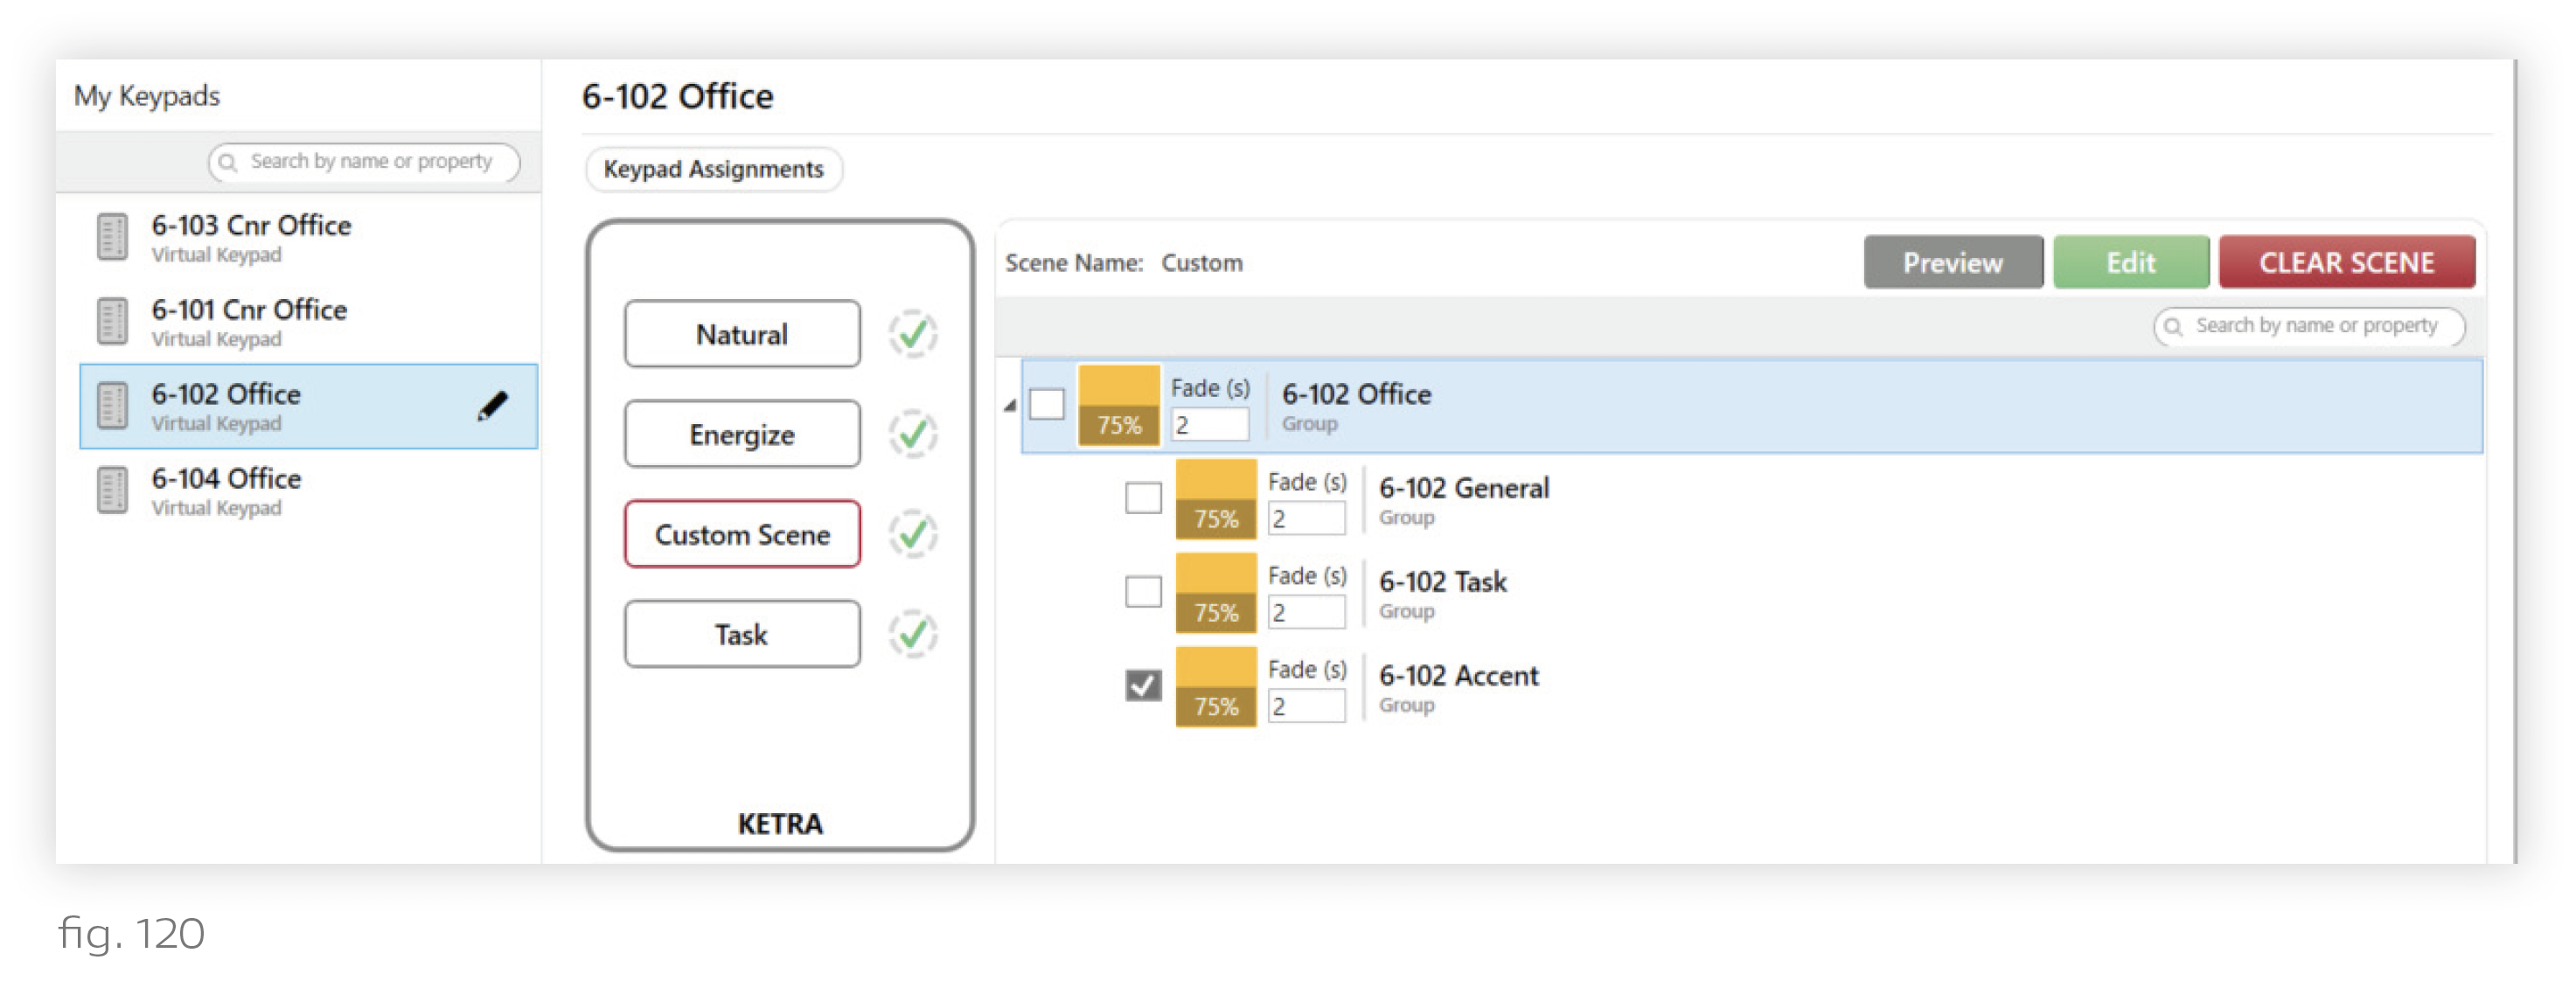
5. Optional: Use the checkboxes to set which groups can be controlled by the button. If a group does not have a checkmark, the keypad will not send it any commands when the scene is activated, dimmed, or deactivated. Effectively, the group is excluded from the scene.
Note: To enable discrete zone control on a keypad, use these checkboxes. For example, to ensure that a scene only affects the "Accent" group, check only the box for Accent.
6. Publish your settings. This saves your configurations to your keypad. Click Publish and Save in the top-right corner of the screen. For more information on publishing, see Publishing.