
Note: Not available in Ketra with HomeWorks QS installations.
A virtual keypad is one that does not exist physically but that you can control through the Ketra mobile app or API. Like a hardware keypad, a virtual keypad can play scenes and shows and be linked to other keypads to control the same groups. Unlike a hardware keypad, it can have up to 19 buttons.
To add a virtual keypad to the installation, follow these steps:
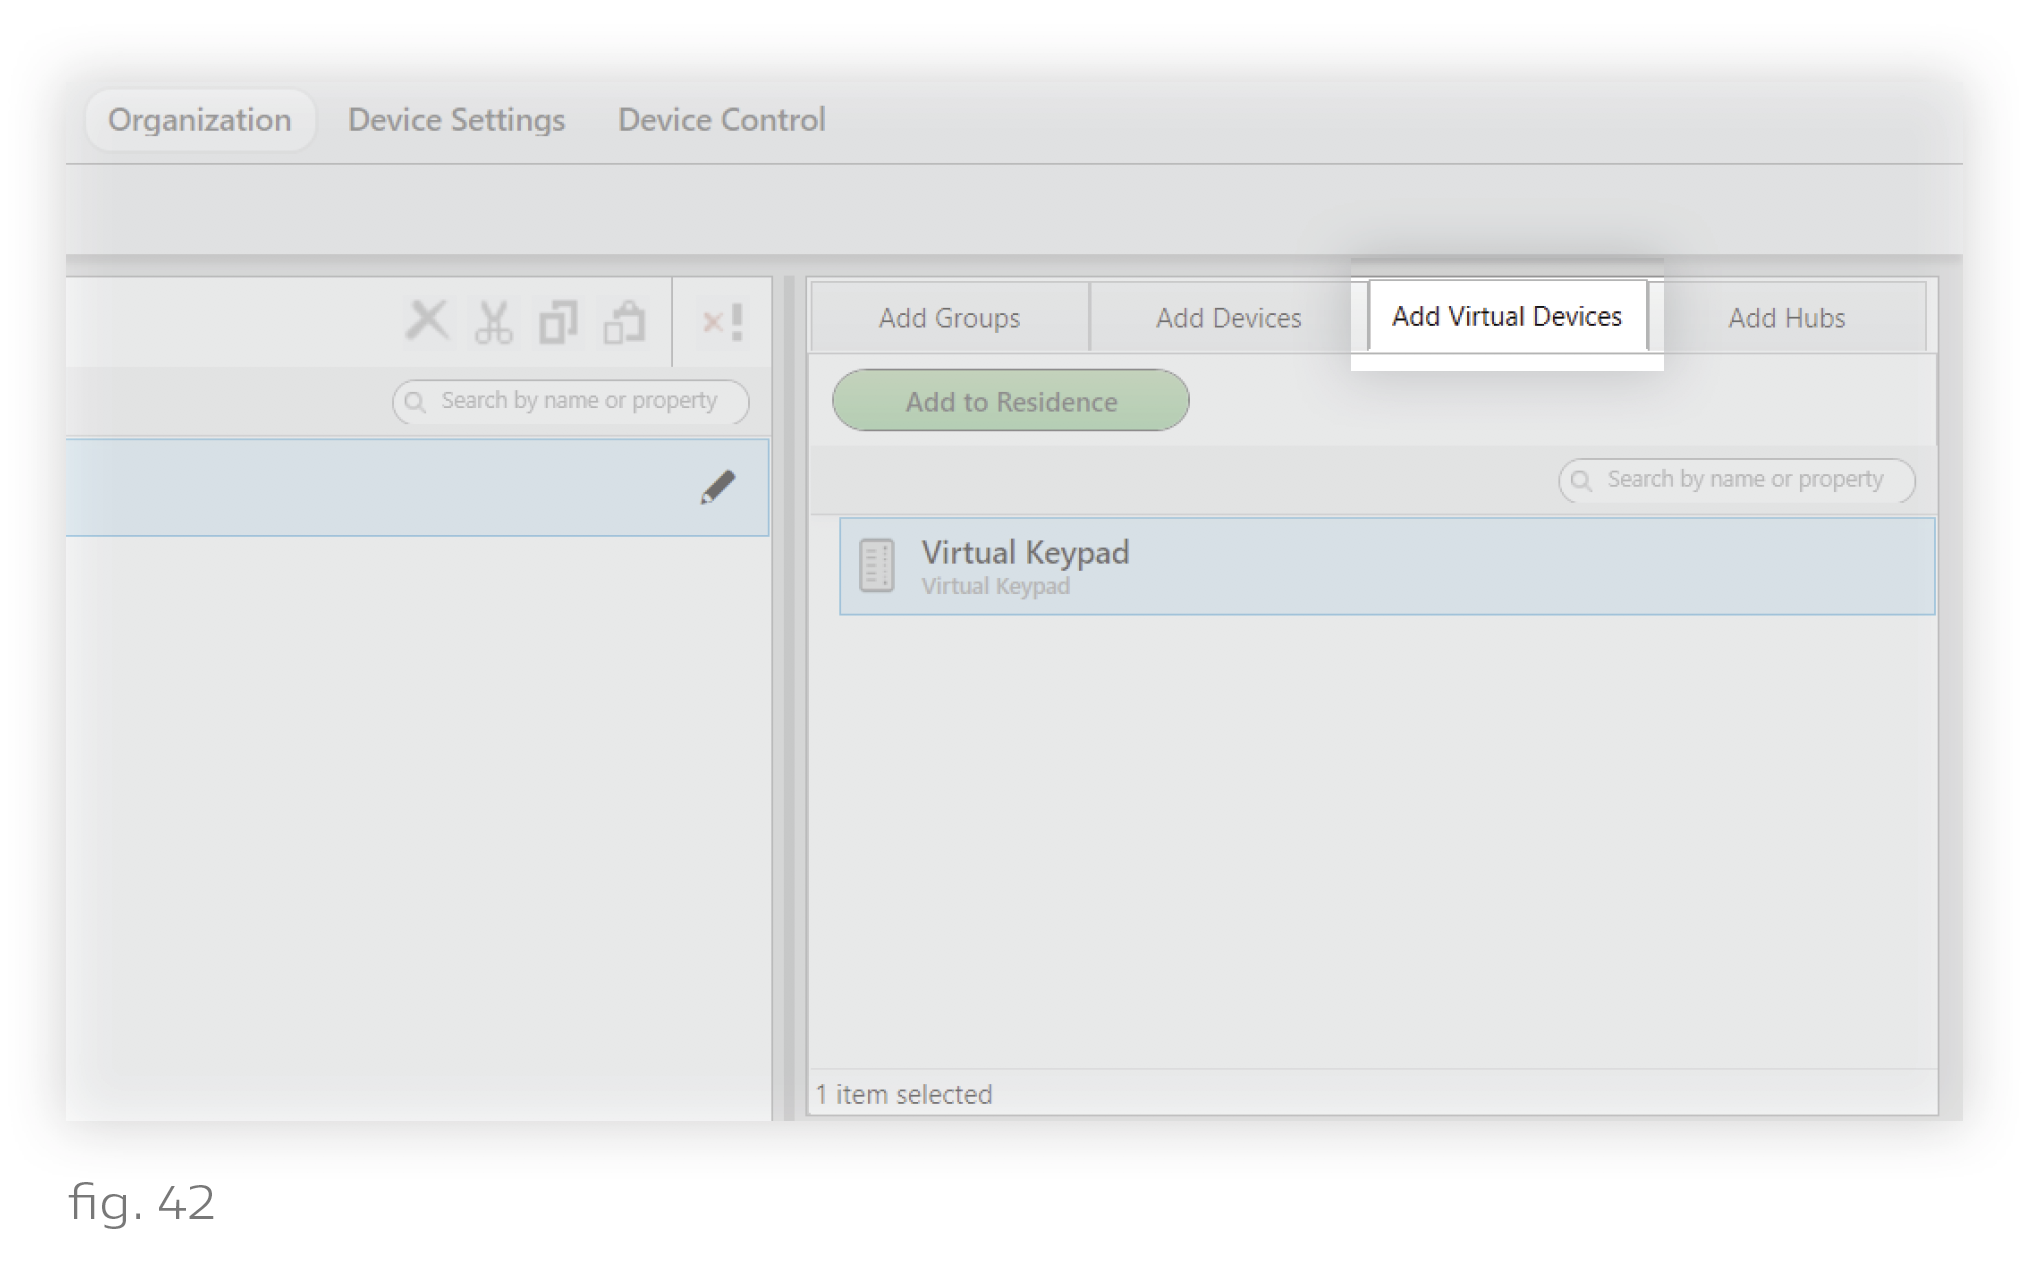
1. Go to the Add Virtual Devices tab in the top-right pane of the Organization tab. (See fig. 42.)
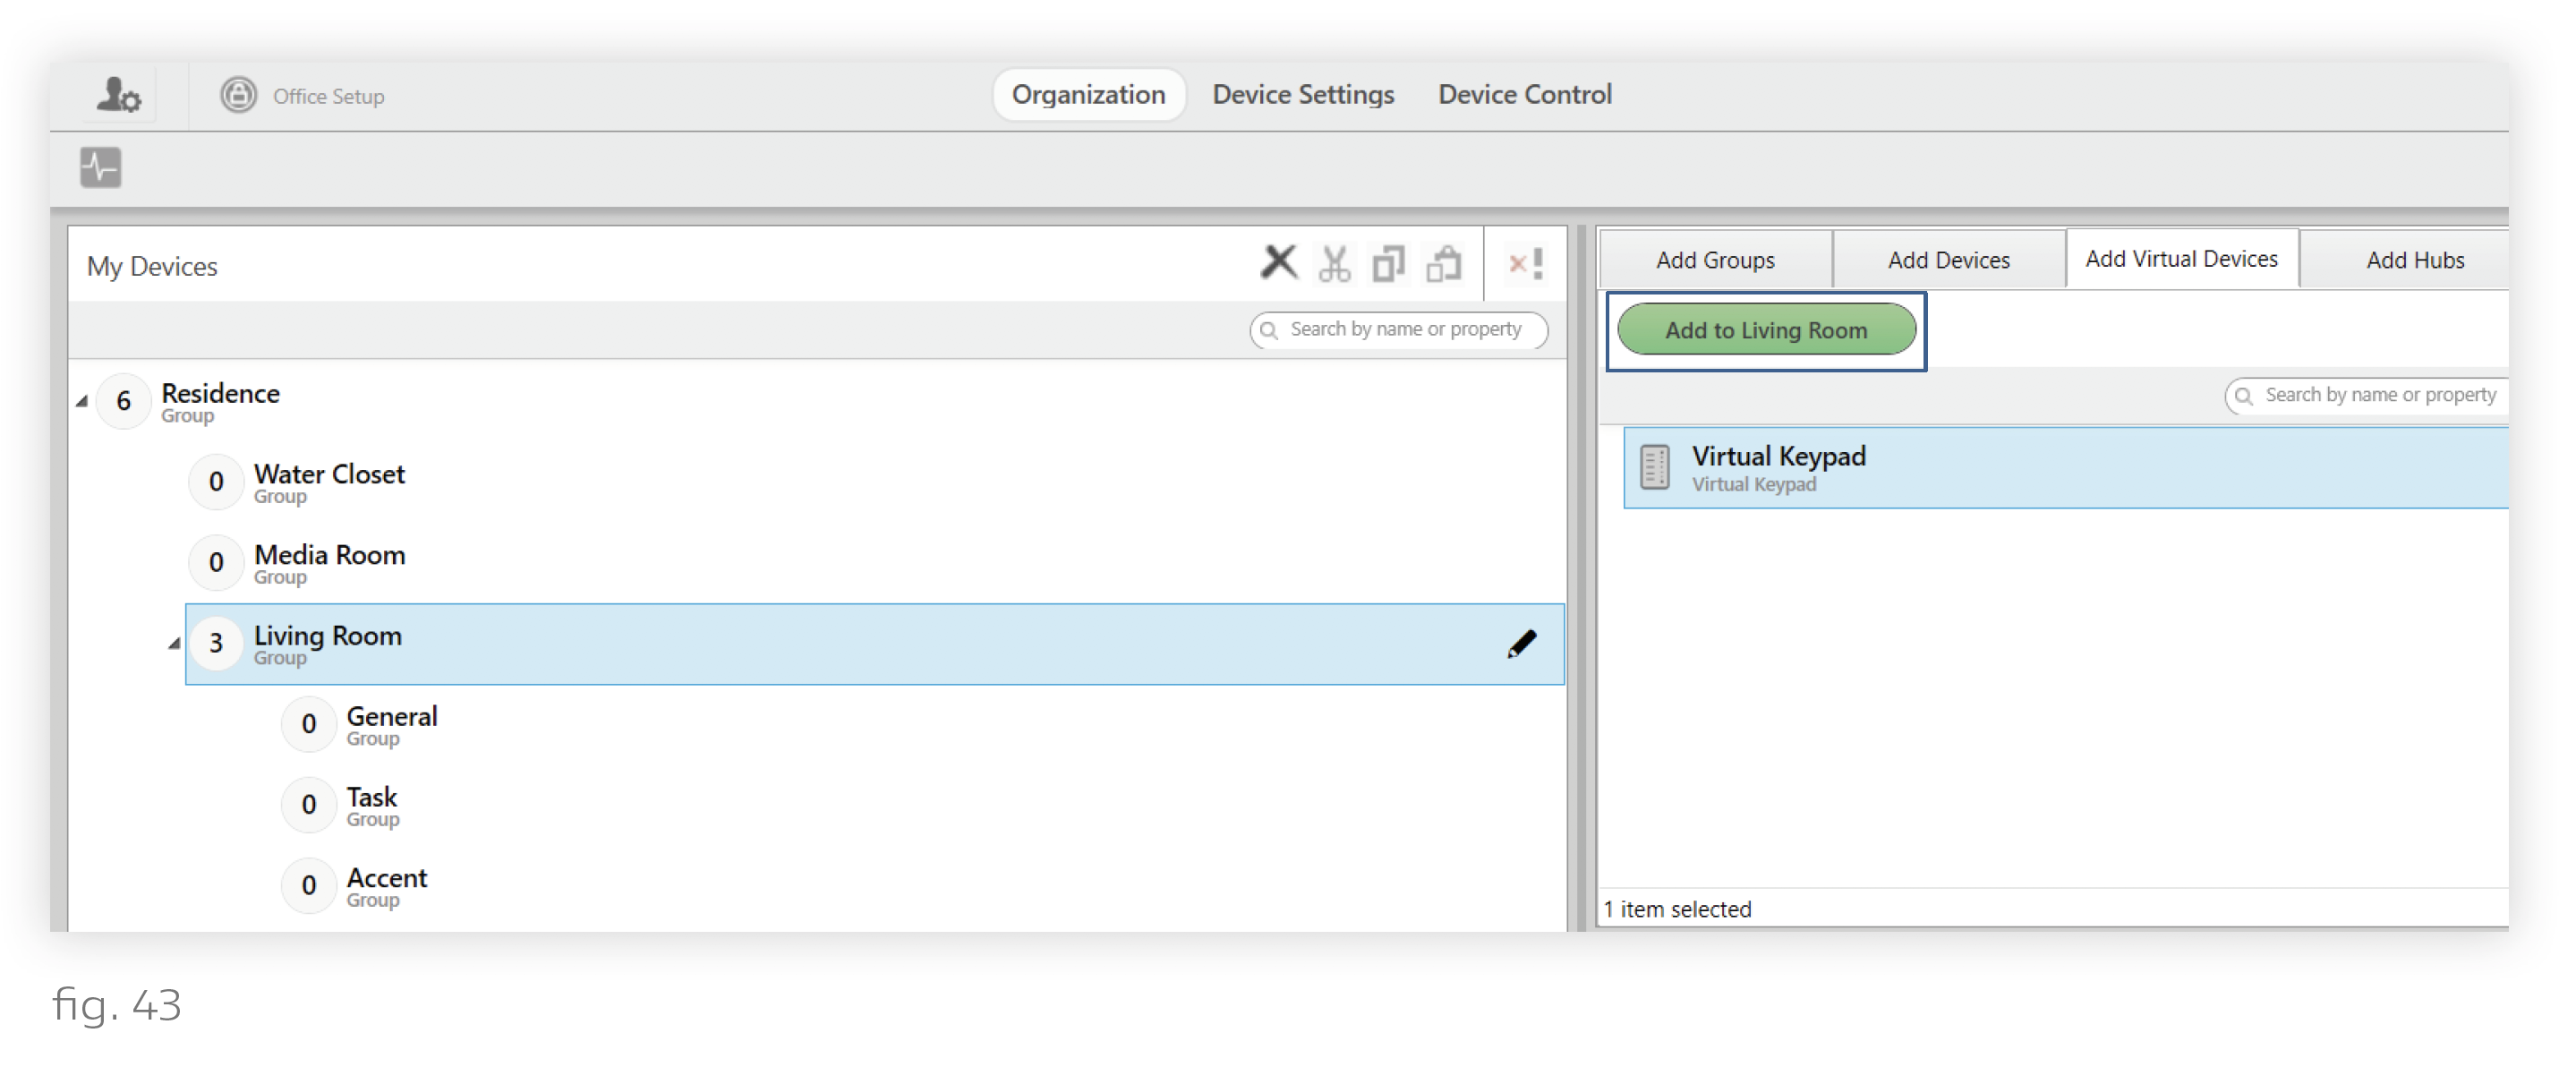
2. Highlight the destination group in My Devices and click the green Add button. (See fig. 43.)
3. In the dialogue box, set a template for the keypad. The template will determine the button names as well as the default scenes and shows that the buttons receive. You will be able to change the button names and content later, in Device Control > Keypads.
4. Set the number of buttons. Any buttons beyond the template’s default quantity will be not be assigned any content. You will be able to change the button quantities later on.
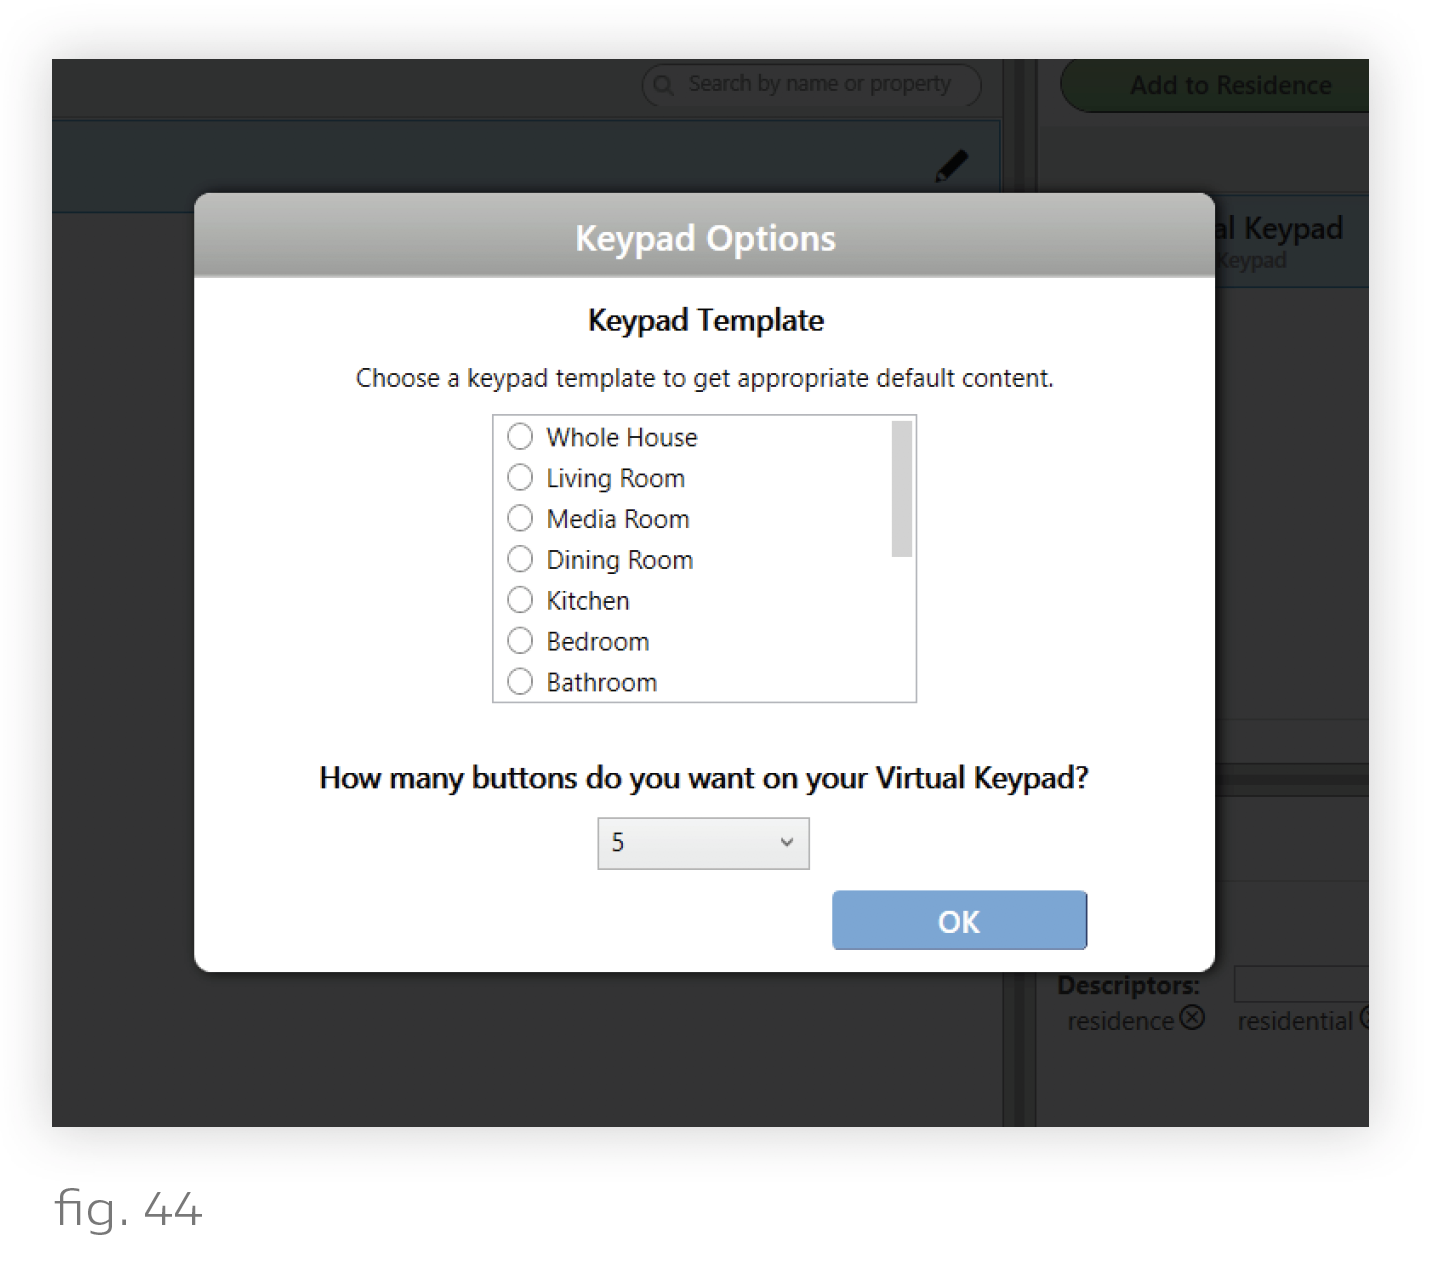
5. Click OK.
6. Rename the virtual keypad. Select the keypad in the My Devices panel, then click the pencil icon.
Virtual keypads are programmed in the same way as hardware keypads: using the Keypads tab of Device Control. For more details, see Programming Ketra Keypads.
You can remove virtual keypads from the installation by deprovisioning them.