To add new groups, use the top-right panel of the Organization tab. (See fig. 27.)
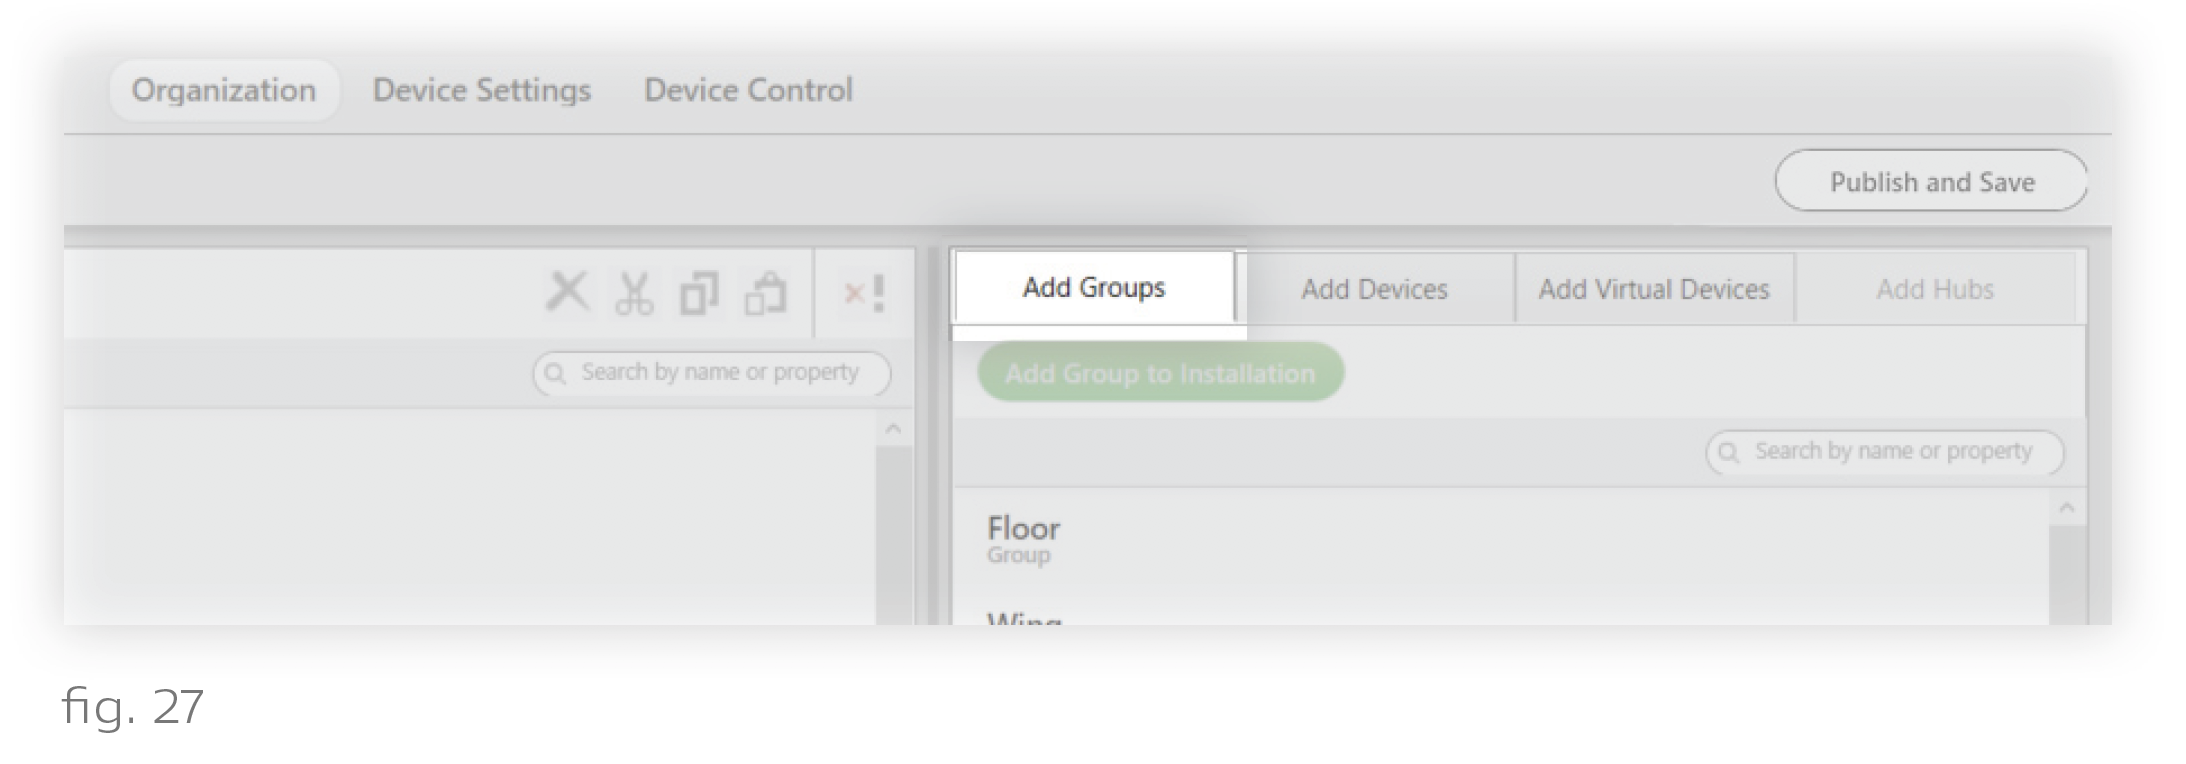
Group names are recommended based on the installation template. For example, the Residential template includes group recommendations like “Living Room,” “Kitchen,” or “Bedroom.” In turn, most rooms contain "General", "Task", and "Accent" groups. You can also add a custom group by scrolling to the bottom of the list.
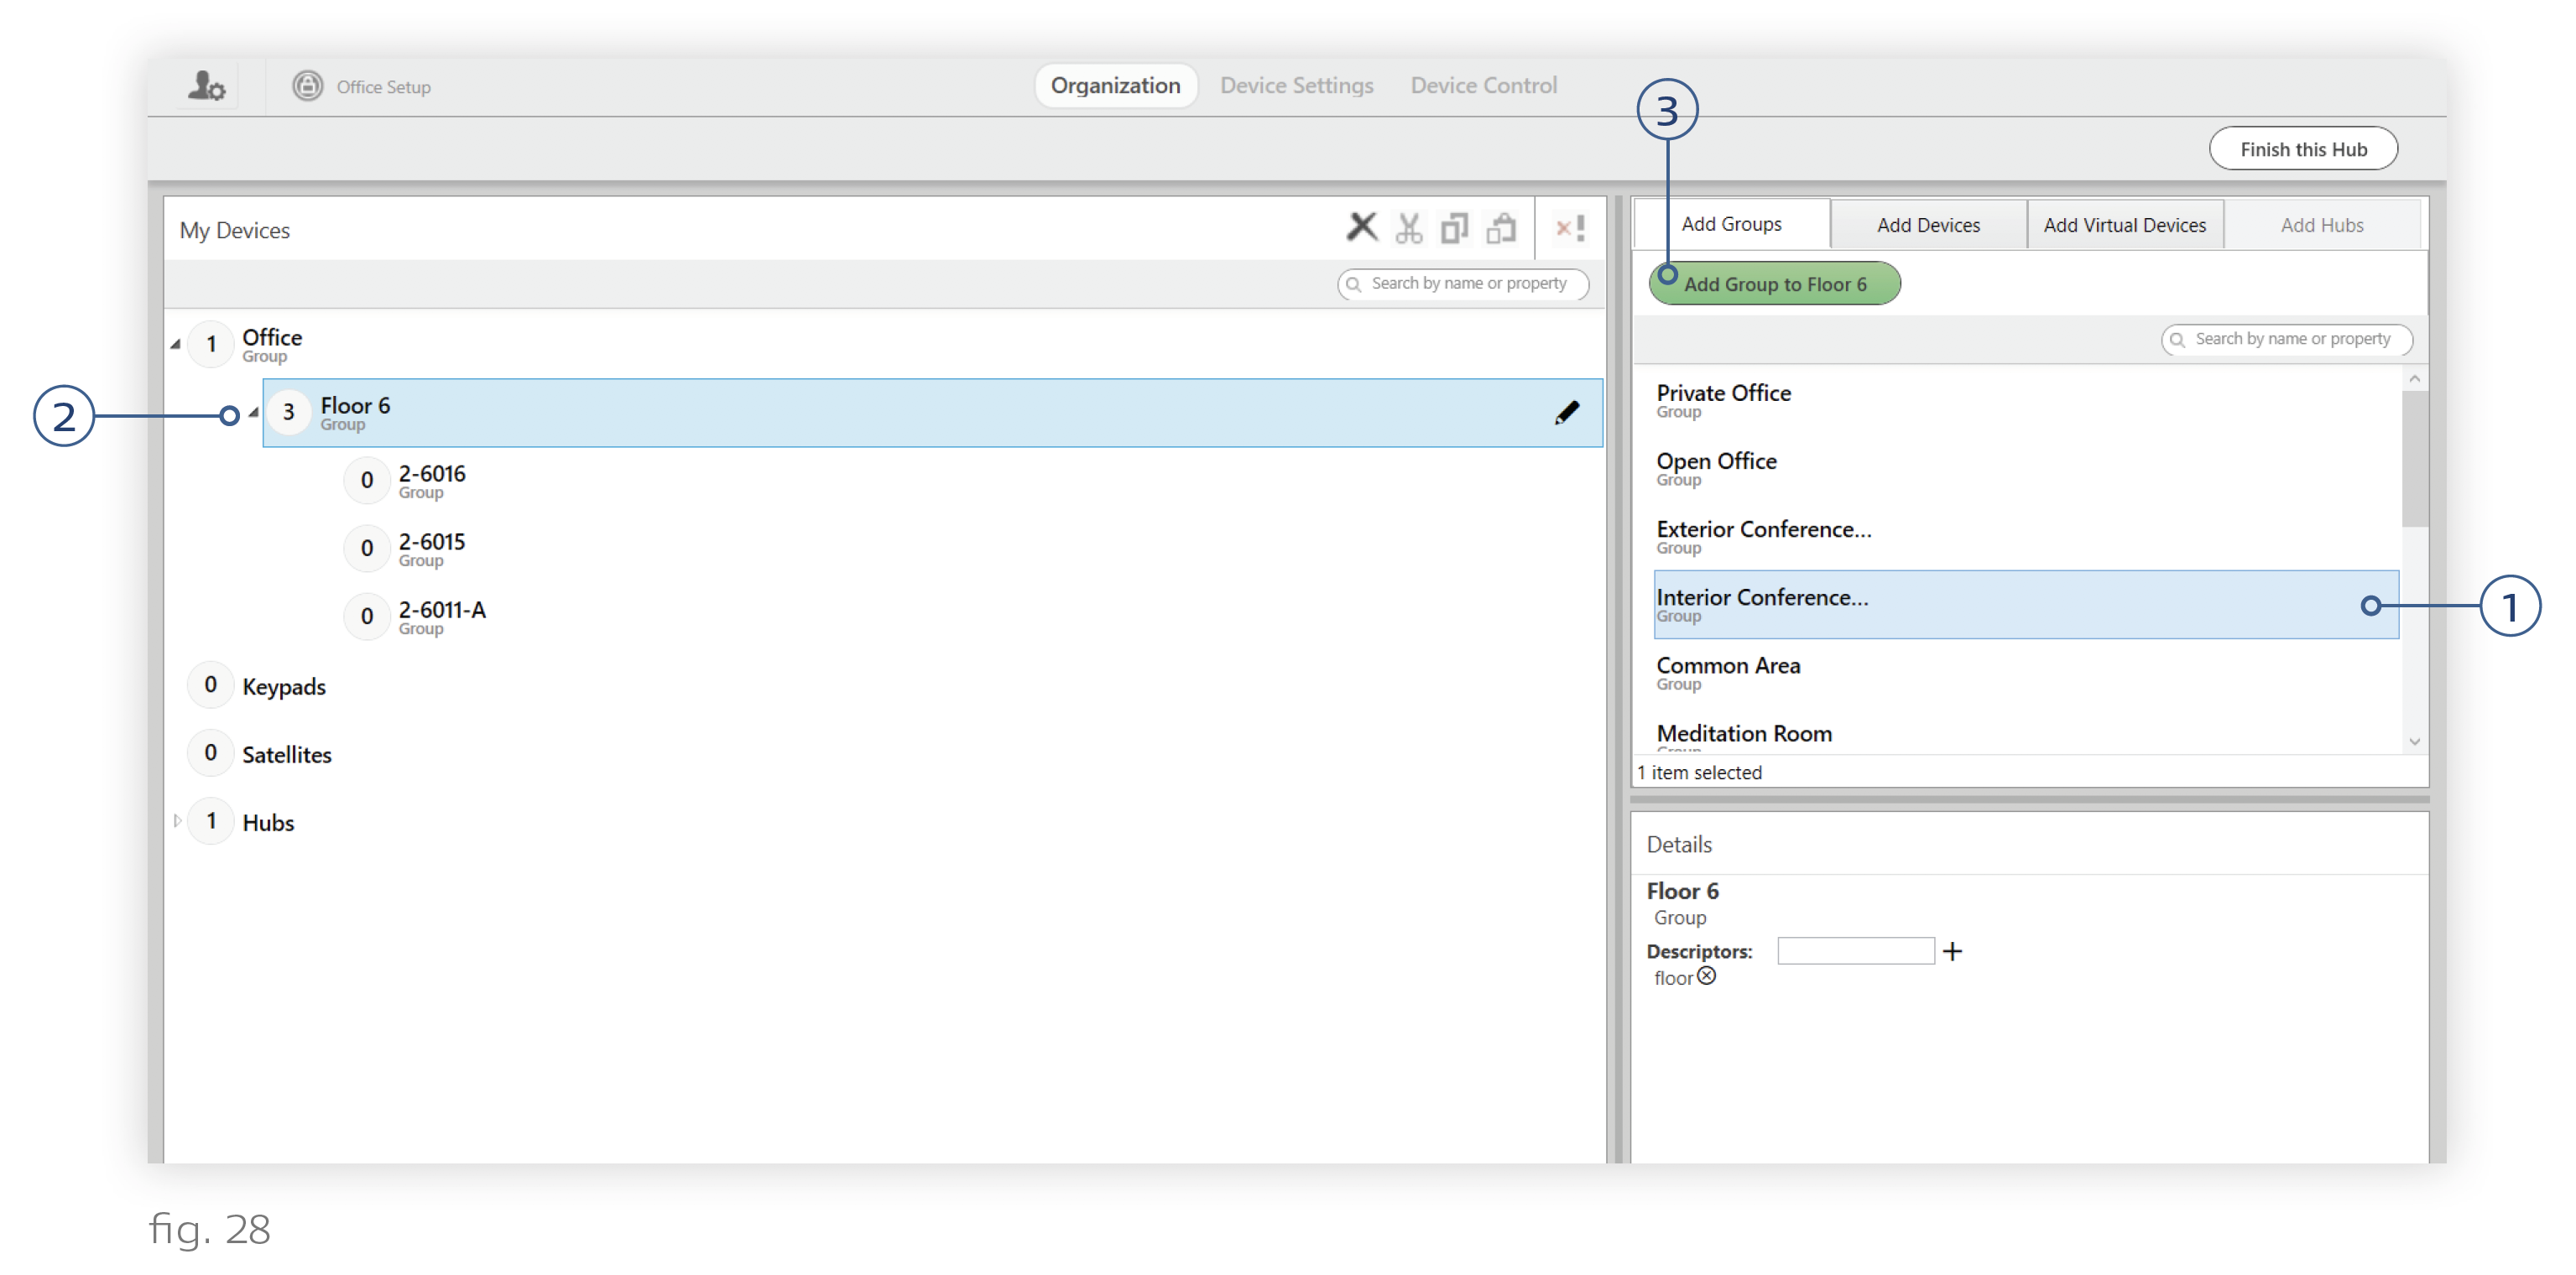
To add the group to its place in the hierarchy, follow these steps:
1. In the top-right pane of the Organization tab, select a group type to add. You can also scroll to the bottom of the list and select "Custom Group".
To select multiple groups at once, use Ctrl+Click or Shift+Click.
The group type you pick determines the descriptors (tags) that the group comes with. For example, the “Accent” group comes with the descriptor “accent.” These descriptors determine what content the groups receive by default in each of the pre-curated Ketra scenes. However, both the descriptors and the Ketra scenes can be modified.
2. Highlight the parent group in the My Devices panel. This could be the highest-level group in the installation or a group lower in the hierarchy.
3. Click the green Add Group to <Parent> button.
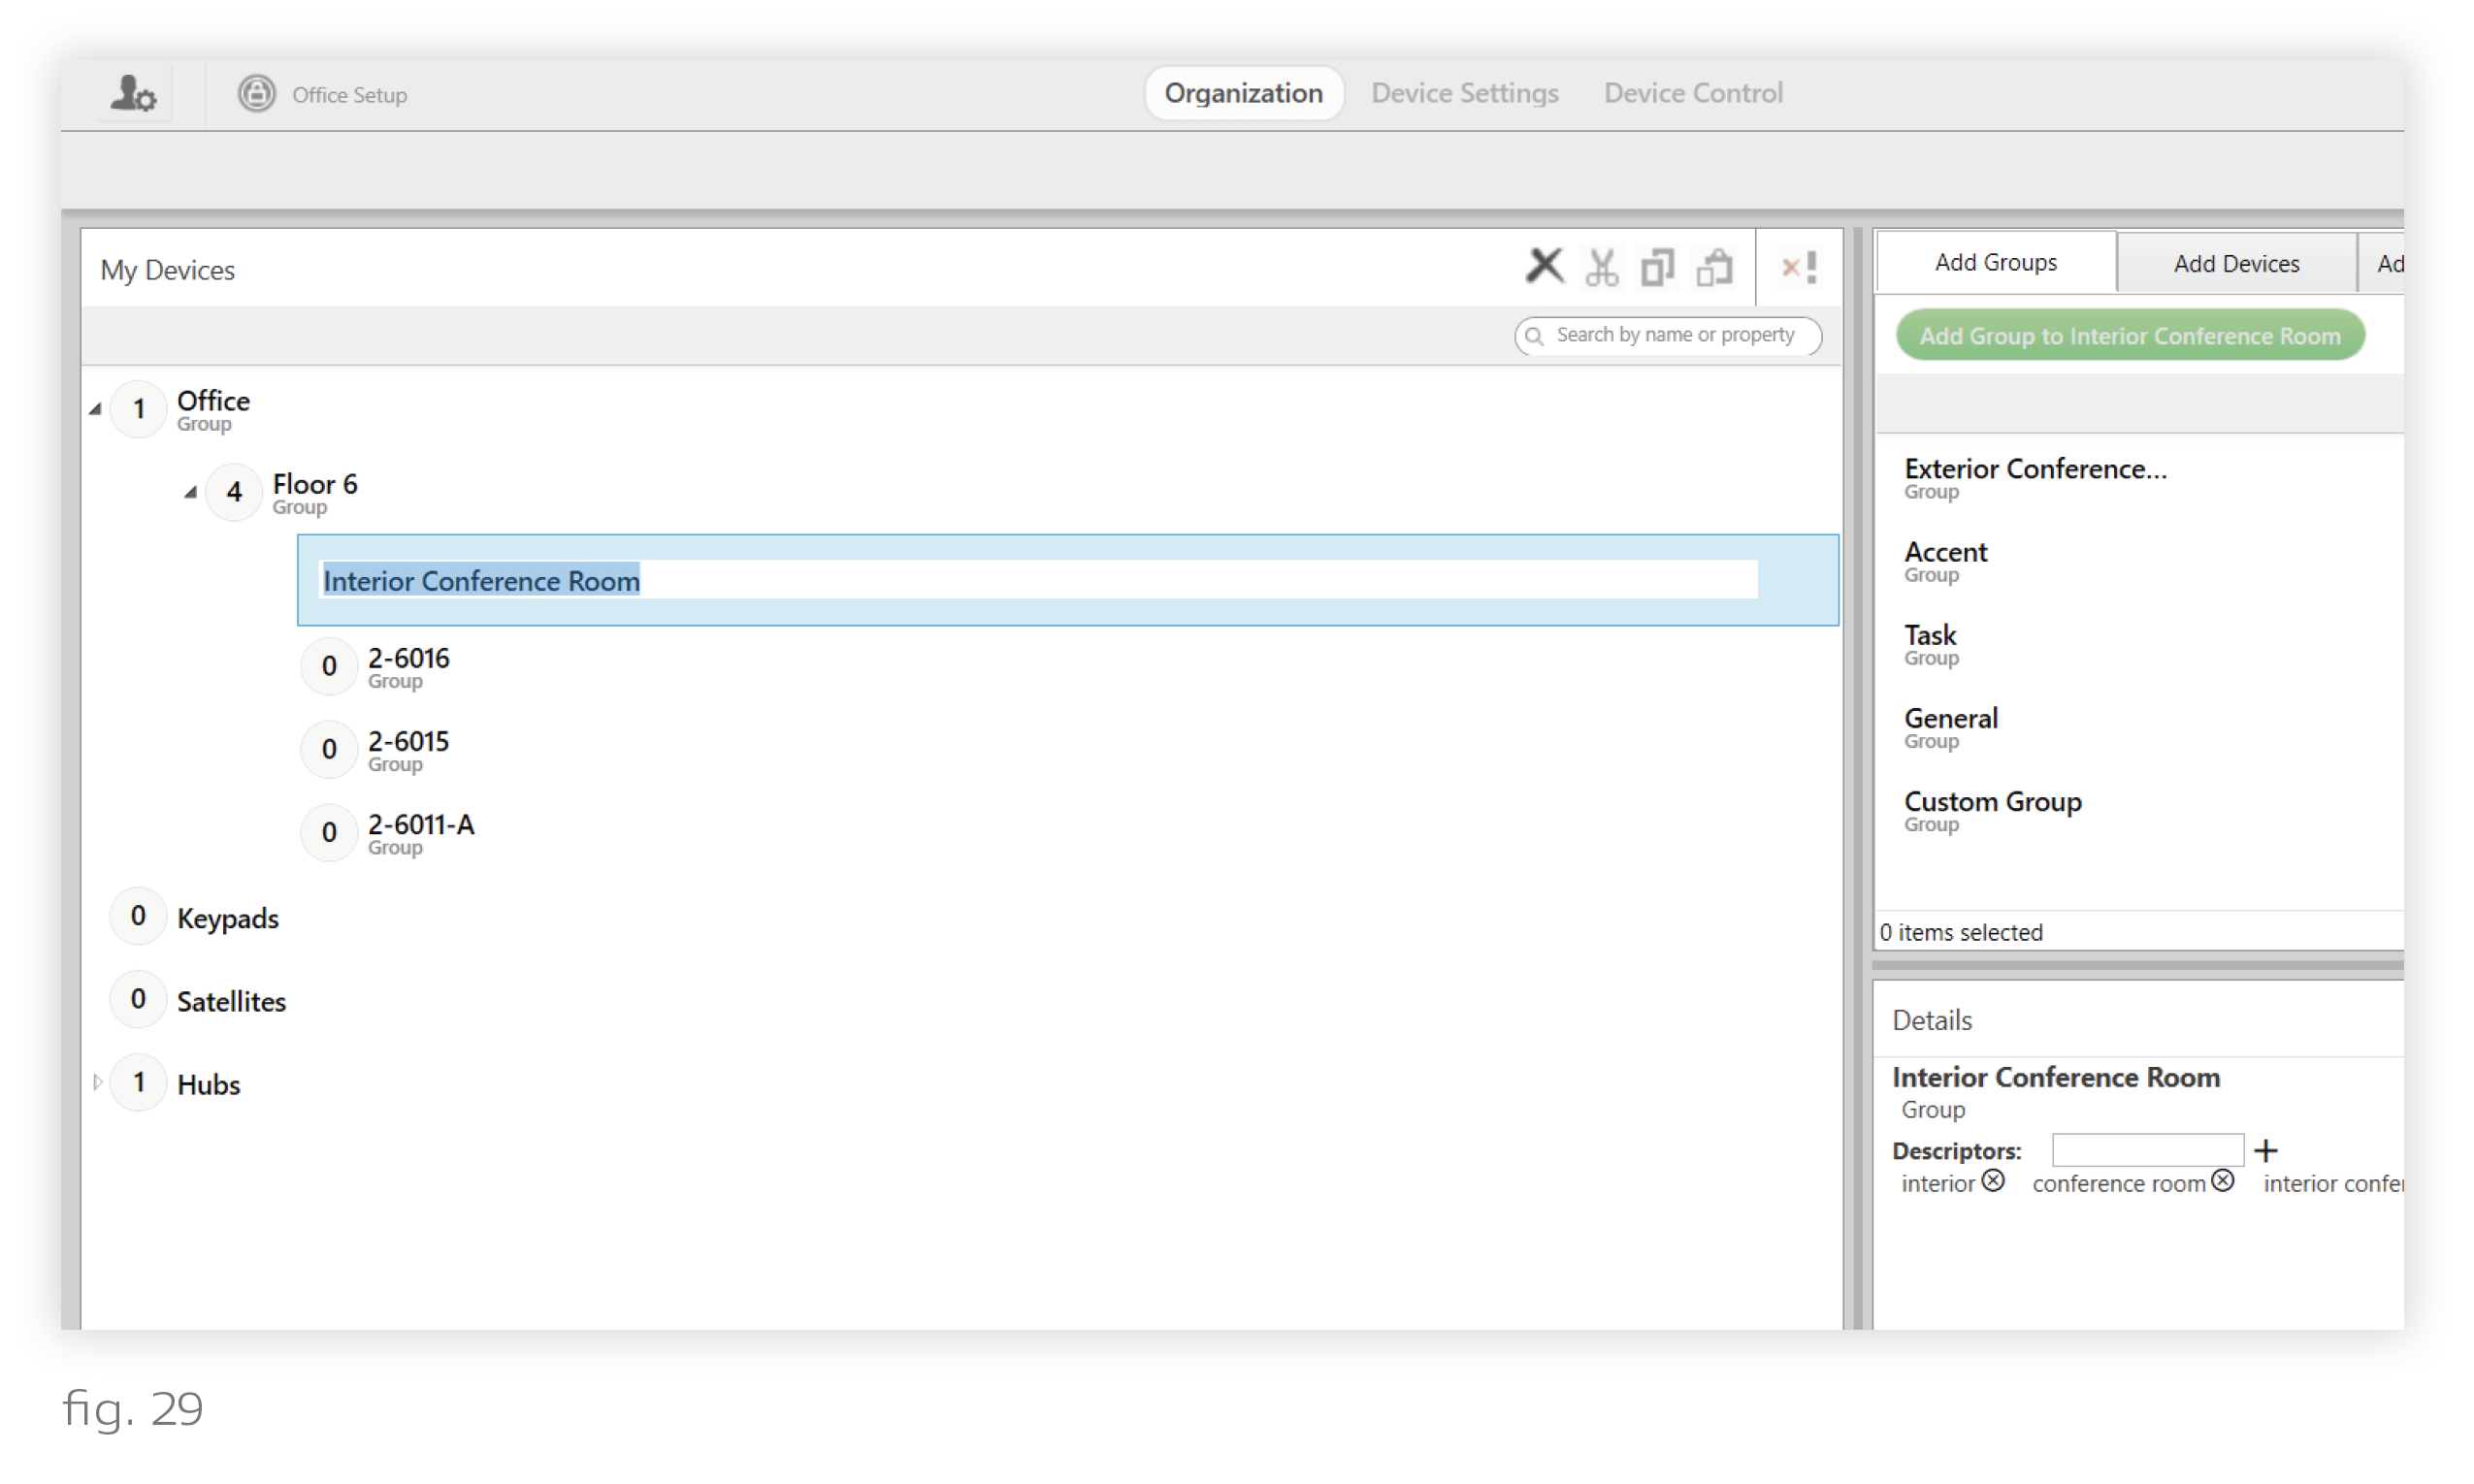
4. Rename the group by clicking the pencil icon next to its name.
Naming Convention - Each group should have a unique and specific name. For zone groups, we recommend including the name of the room—e.g., “Kitchen General” rather than “General (2).” In office spaces, we recommend naming room groups after the label in the KNet diagram, plus a descriptive blurb as needed—e.g., “2-6019 NW Office.”